
How to Propagate Rosemary From Cuttings
You can propagate rosemary by taking a healthy stem tip, removing the leaves from its lower section, and placing that bare stem in a clean, porous rooting medium. Keep the medium evenly moist and the leaves humid but out of direct sun until roots form.
The easiest material is fresh, nonflowering growth that has begun to firm but is not old, thick wood.
Rosemary can also root from more mature growth, although the season, stem condition, and home environment change how long it takes.
A jar of water can show you whether a stem is making roots, but a moist propagation mix is the stronger default for a woody herb. Roots that begin in mix do not have to adjust from water to an air-filled potting medium later.
The process runs from choosing the parent shoot through potting and outdoor acclimation.
A failed cutting can also show you what to change, so the next batch improves instead of repeating the same problem.
Which Rosemary Stems Make the Best Cuttings?
Start with a named rosemary plant you actually want to copy. A cutting is a clone, so its growth habit, leaf character, and culinary qualities come from the parent rather than being reshuffled as they can be in seedlings.
The parent should be actively growing and free of obvious insects, leaf spots, wilt, and root trouble. A drought-stressed or waterlogged plant should recover before you remove propagation material.
Softwood rosemary cuttings come from current growth that is still flexible but has started to gain substance.
UC Master Gardener guidance places this useful window in spring or early summer, while partially mature semi-hardwood growth can also be used from midsummer into early fall.
Timing by stem condition is more reliable than a nationwide calendar date. In a mild climate the plant may make usable growth earlier, while a cold spring can delay it.
Choose a tip with mature leaves below its newest leaves and no flower buds. Flowers use water and stored energy at the moment the detached stem needs both for survival and root initiation.
Avoid the oldest bare wood for a first attempt. It can root under suitable propagation conditions, but flexible current-season material is easier to prepare and fits a simple home setup better.
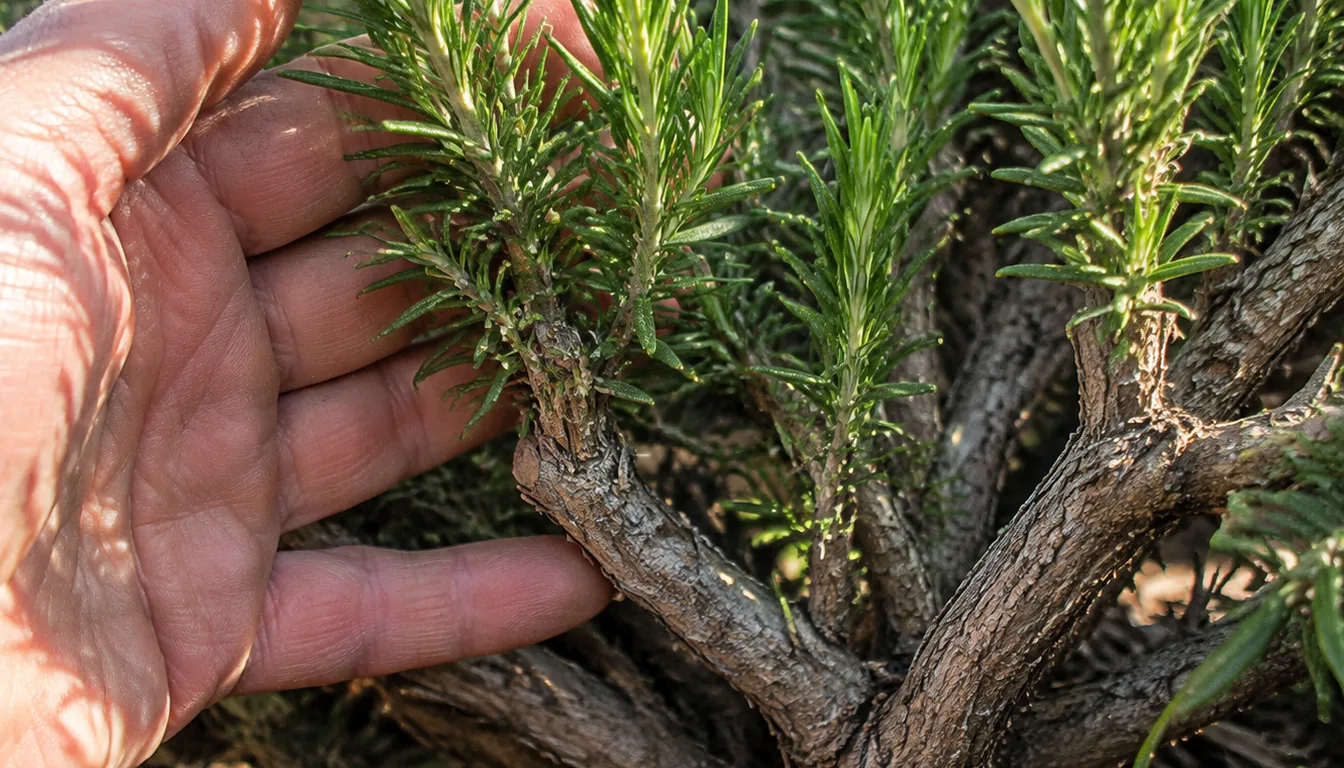
- The parent is growing normally and is not wilted, waterlogged, or visibly diseased
- The shoot is green to lightly firm rather than thick, cracked, or bare
- The stem has several leaf nodes and a healthy growing tip
- There are no flowers, flower buds, insect clusters, or damaged leaf sections
- You can remove the shoot without stripping one side of a small parent plant
Take several cuttings rather than expecting one stem to carry the whole attempt.
Variation among shoots is normal, and a small batch lets you learn from a failure without cutting heavily into the parent.
What Do You Need Before Taking the Cuttings?
Prepare the container and medium before cutting any stems. A detached rosemary tip starts losing water immediately, so it should not wait on a counter while you find a pot or mix dry ingredients.
Use a clean tray, cell pack, or small pot with open drainage holes.
Several cuttings can share one container while they root, provided their leaves do not crowd together and each stem can be removed later without tearing its neighbors.
A rooting medium has a different job from rich garden soil. It must hold enough moisture to prevent wilt while leaving air around the stem base and new roots.
Commercial propagation mix works, or you can use a clean blend of peat or coir with perlite and vermiculite. Heavy garden soil compacts easily in a small container and can carry organisms that damage unrooted stems.
| Item | What it does | What to avoid |
|---|---|---|
| Clean sharp snips or a knife | Makes an uncrushed cut and limits disease transfer | Dull blades and tools carrying soil or sap from a sick plant |
| Small container with drainage | Holds the medium while excess water escapes | Cachepots, jars, or trays that leave the base standing in water |
| Porous low-fertility medium | Balances moisture with oxygen around the stem | Dense garden soil and fertilizer-rich mixes |
| Pencil or plant label | Opens a hole without scraping the prepared stem | Forcing a soft stem through packed mix |
| Clear cover, used loosely | Slows leaf water loss while the cutting has no roots | A sealed cover in direct sun or constant dripping on foliage |
| Rooting hormone, optional | Can encourage faster or more uniform rooting | Guessing a dose or returning used powder to its container |
Moisten the medium thoroughly, let the excess drain, and fill the container without pressing it hard. Use a pencil to make planting holes so any optional rooting powder stays on the stem instead of being rubbed off at the surface.
Rooting hormone is useful but not compulsory for rosemary. If you use it, follow the product label, place a small working amount in a separate cup, and discard what remains in that cup so the original container stays clean.
How Do You Prepare and Stick Rosemary Cuttings?
Work during the cooler part of the day when the parent plant is hydrated.
If you cannot stick each cutting immediately, place the cut ends in a clean bag with a barely damp paper towel and keep the bag shaded.
For a simple home batch, take shoots about 4 to 6 inches long. That length usually supplies several nodes, enough foliage to support the cutting, and a lower section that can be stripped without leaving only a tiny tuft.
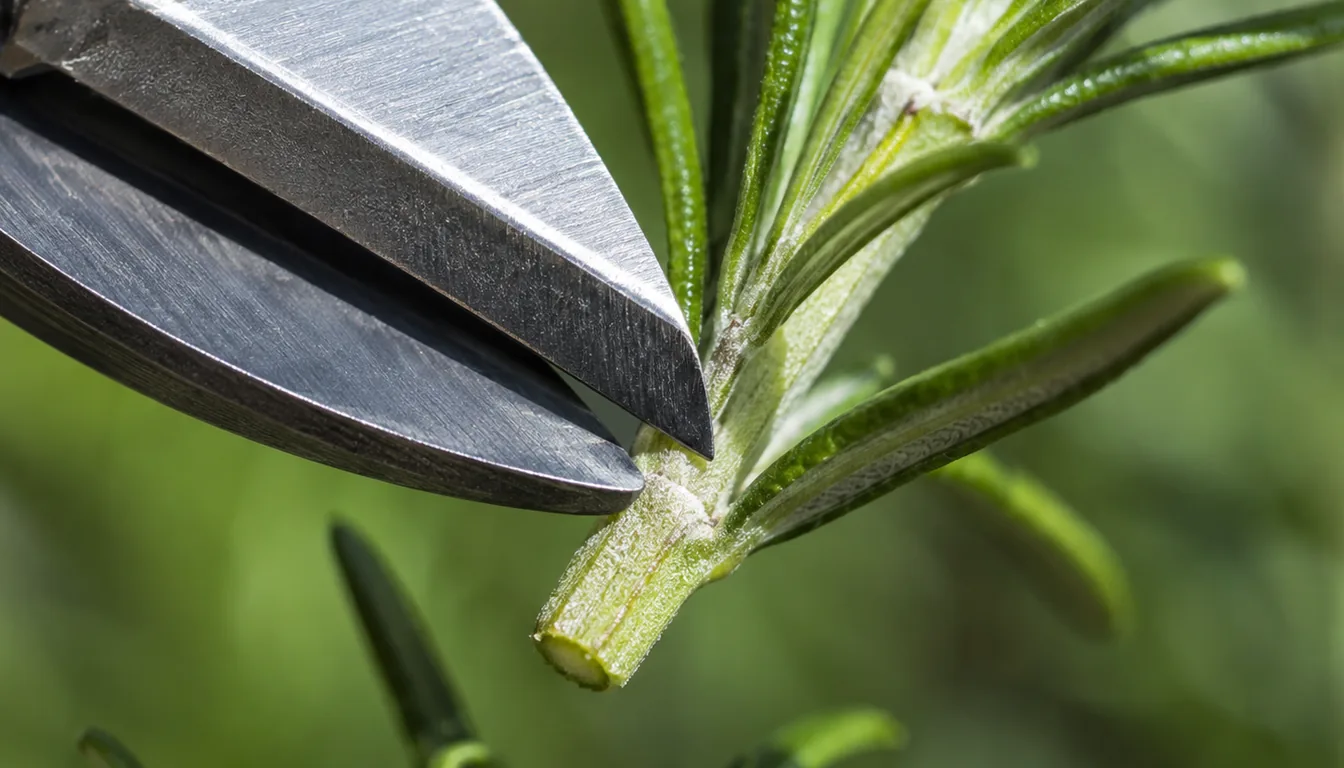
- Make a clean basal cutCut just below a leaf node with sanitized snips or a sharp knife, keeping the growing tip intact.
- Remove flowers and lower leavesPinch off any buds, then strip the leaves from roughly the lower 2 inches without tearing the stem.
- Reduce an oversized topIf a tip is unusually long or soft, shorten it rather than leaving a large leaf load above a small future root system.
- Apply hormone if chosenLightly moisten the bare base if the label directs it, coat only the intended section, and tap away excess powder.
- Insert without scrapingLower the prepared stem into a preformed hole until at least one stripped node is below the surface and all remaining leaves stay above it.
- Firm and waterPress the medium gently against the stem, water enough to settle it, and let the container drain completely.
- Label the batchRecord the cultivar or parent, date, cutting type, and method so you can compare the result honestly.
Do not bury rosemary leaves. Foliage trapped against wet medium breaks down, and decaying tissue next to the stem creates the conditions that cause many home batches to fail.
Space the cuttings so leaves receive light and air without rubbing into a dense mat. The stems do not need a large pot, but crowding makes it harder to remove one rotting cutting without disturbing the rest.
Wounding the bark is unnecessary for softwood tips. A more mature semi-hardwood cutting may benefit from a small, careful wound and rooting hormone, but an aggressive scrape can remove too much living tissue.
How Much Light, Humidity, and Water Do Cuttings Need?
A cutting has leaves but no working root system, so it loses water faster than it can replace it. Humidity slows that loss while the porous medium supplies moisture and oxygen at the stem base.
Cover a small batch with a clear dome or a loose plastic bag that does not rest on the foliage. Keep the container in bright, indirect light, because direct sun can heat a covered pot enough to injure the leaves and stem.
The medium should stay moist, never waterlogged. Check it with a finger or the weight of the container and add water only when it is beginning to lose moisture, then let every excess drop escape.
A tray of standing water is not insurance against drying. It fills the air spaces that developing roots need and keeps the wounded stem base continuously wet.
Softwood cuttings may root in roughly 2 to 5 weeks, while firmer semi-hardwood material can take around 4 to 6 weeks under suitable conditions. These are checking windows from Extension guidance, not deadlines for every cultivar or room.
Do not test by yanking the stem. Look first for a firm upright tip and fresh growth, then lift one cutting carefully with a label or small spoon when the expected window arrives.
New top growth is encouraging, but stored energy can open a bud before roots are adequate.
A ready cutting has several pale, firm roots that hold some medium when lifted, rather than one short root or a loose stem that slides out.
Can You Root Rosemary in Water Instead?
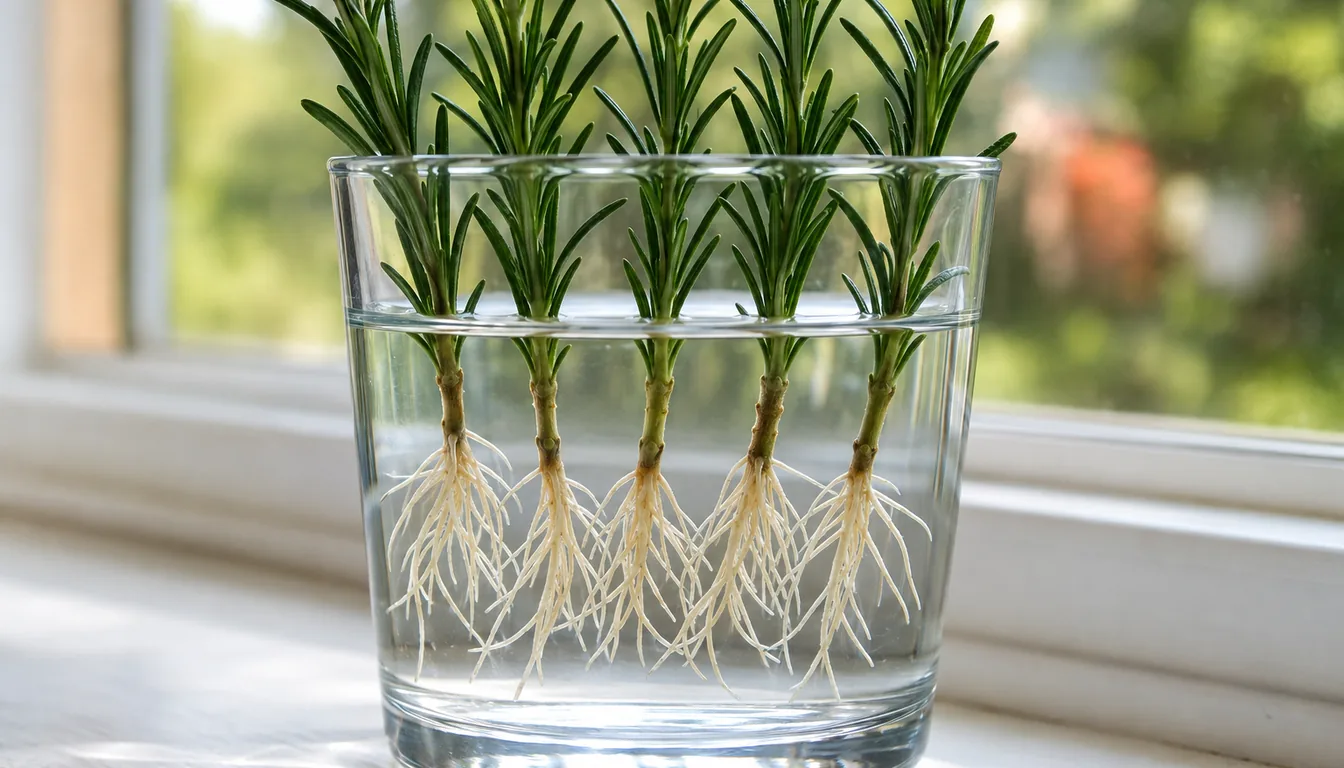
Rosemary can produce roots in water, and the clear container makes progress easy to see.
The method is useful for a small experiment, especially when you want to compare stems from the same parent.
Place only the stripped stem section in clean water and keep every leaf above the waterline. Move the jar out of direct sun and replace the water when it becomes cloudy or develops debris.
The main tradeoff comes after roots appear. Water-grown roots develop without the air spaces found in propagation mix, so handle them gently and move the cutting before a long, tangled root system forms.
| Decision | Porous rooting medium | Water |
|---|---|---|
| Best use | The main batch and the most direct route to a potted plant | A small visible comparison or backup experiment |
| What you can observe | Top growth, stem condition, and roots during a careful lift | Root initiation and discoloration through the container |
| Main risk | Medium kept too wet or a humidity cover kept too closed | Stem decay, cloudy water, and fragile roots during transfer |
| Next step | Move a well-rooted plug into potting mix with little root disturbance | Lower the roots into premoistened mix without bending or crushing them |
Do not use identical watering rules after both methods reach a pot. A water-rooted cutting needs close moisture checks during its first transition, while a mix-rooted plug already contains air-adapted roots and some familiar medium.
If the water method repeatedly produces a dark stem base before roots appear, stop replacing stems into the same setup. Return to clean tools, healthy new growth, and a fresh porous medium so you change the conditions that caused the loss.
When Is a Rosemary Cutting Ready to Pot Up?
Pot up when several firm roots have developed and the cutting can hold a small plug of medium together. Leaving a densely rooted batch in one tray makes the roots interlock and turns a gentle transplant into a tearing job.
Choose a small pot with an open drainage hole and fill it with premoistened potting mix. A large volume of unused wet mix stays damp longer, so match the first pot to the modest root system rather than to the eventual shrub.
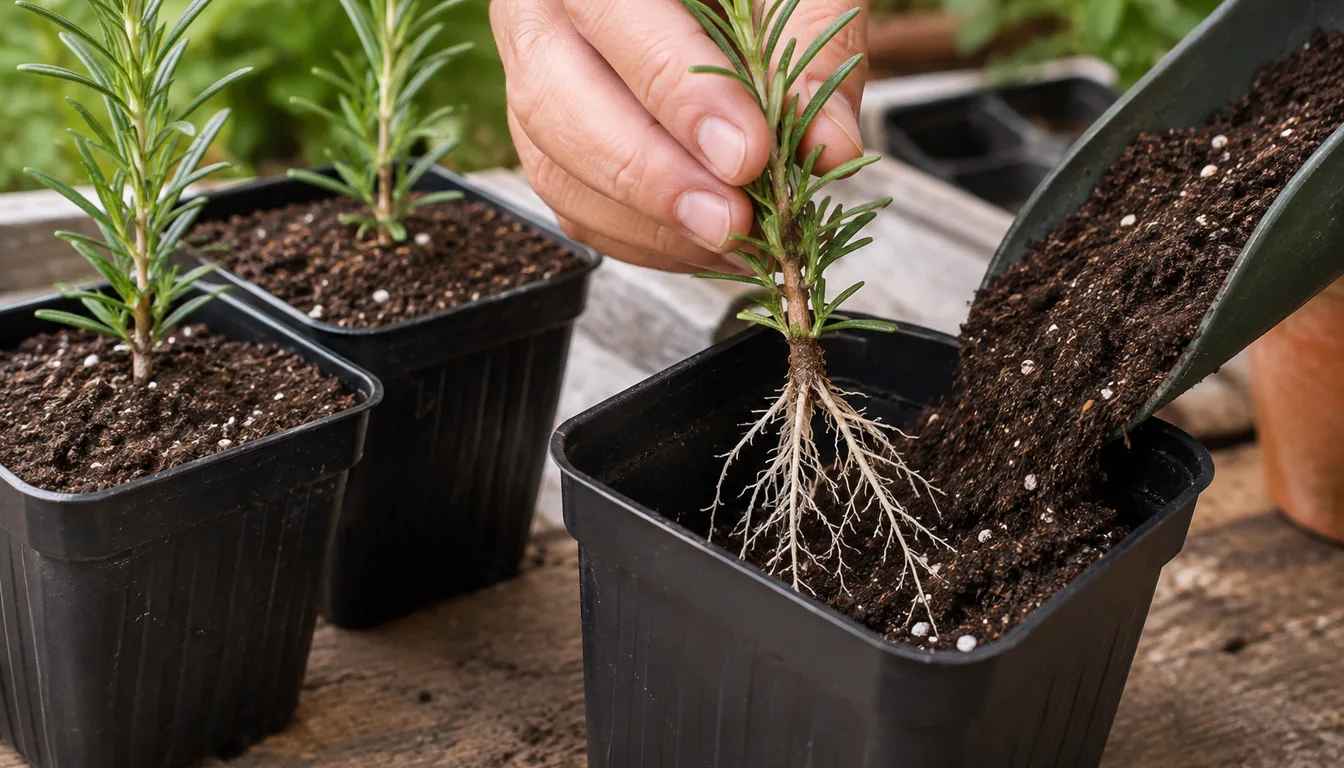
- Several pale or light-colored roots are visible and feel firm rather than brown and soft
- The stem remains upright after the humidity cover is opened for longer periods
- Fresh growth is present without blackening at the stem base
- The medium releases from the tray without exposing a single threadlike root
- A clean pot, free-draining mix, label, and sheltered recovery place are ready
Lift a mix-rooted cutting from below and hold the plug, not the tender top. Set it at the same depth so the former rooting medium is covered but the leafy stem is not buried.
For a water-rooted cutting, make a generous hole and lower the roots without folding them upward. Add moist mix around them in stages, then water once to settle it instead of squeezing the pot hard.
Return the young plant to bright filtered light for a few days and watch its leaves. A slight pause in top growth is normal, but collapse, a dark stem base, or mix that remains saturated calls for immediate investigation.
Begin opening the humidity cover before potting rather than removing it for the first time after roots are disturbed.
Over several days, lengthen the open period until the rooted cutting holds its leaves normally in room air.
Wait for resumed growth before considering fertilizer. Fresh potting mix commonly supplies enough nutrition for this stage, while fertilizer cannot correct roots damaged by poor drainage or an oversized wet pot.
How Do You Move a Rooted Cutting Outdoors?
A rooted cutting raised indoors is not ready for an abrupt move into full sun and drying wind.
Let it make stable new growth in its pot, then acclimate it in stages during mild weather.
Start in a sheltered bright-shade location for a short period and return the plant indoors before conditions become harsh. Increase outdoor time and morning sun over about a week or longer, pausing when strong wind, cold, or unusual heat makes the next step unsafe.
A frost-free forecast matters more than a generic hardiness-zone number for a young plant. Rosemary cultivars differ in cold tolerance, and a small newly rooted plant has less reserve than an established shrub.
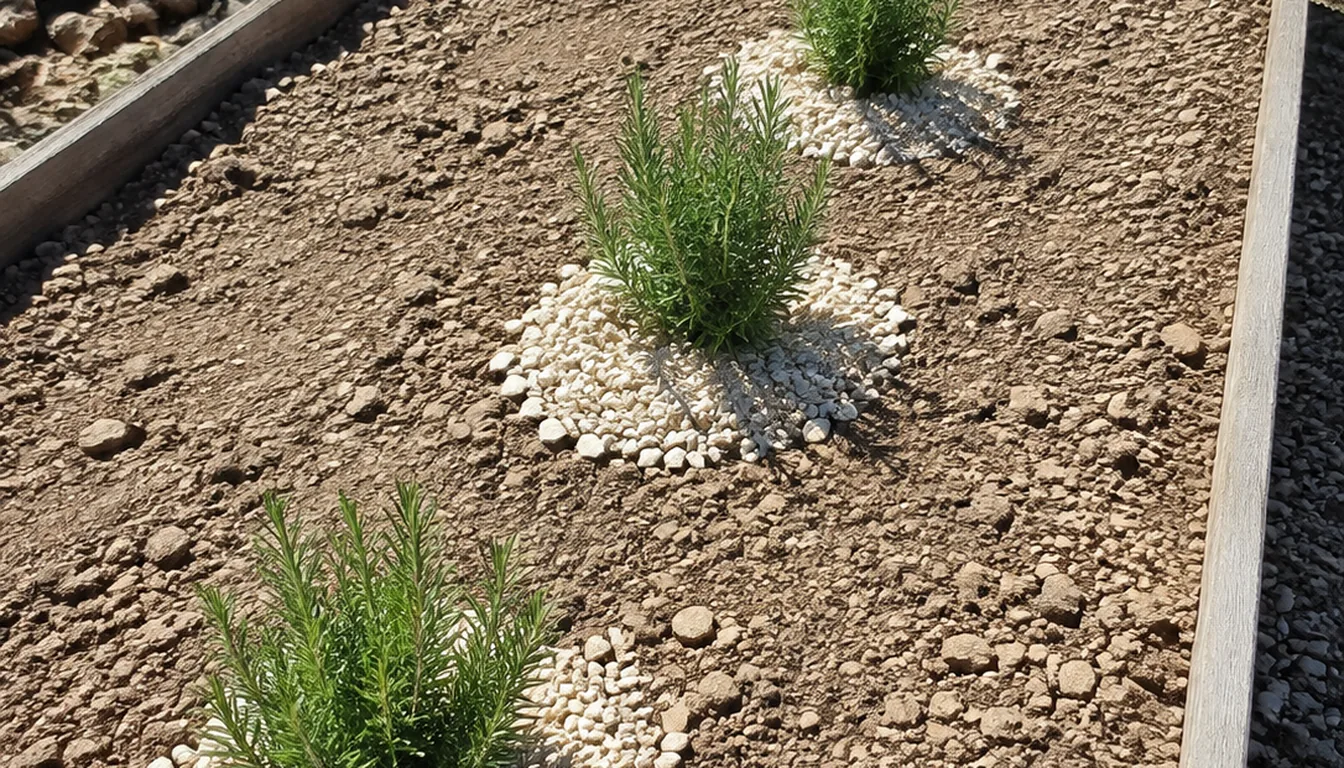
Choose a permanent container or garden position with strong light and excellent drainage. If a planting hole fills with water or the surrounding bed stays saturated, improve the site or keep the plant in a drained container rather than asking young roots to survive without air.
Set the root ball at its existing depth and water the surrounding soil thoroughly once.
After that, check the root ball itself and water when it is beginning to dry instead of giving automatic daily sips.
Keep mulch and dense compost away from the stem base. A clear collar makes it easier to see whether the crown is buried and prevents wet material from resting against young bark.
Delay substantial harvesting and shaping until the plant is extending several healthy shoots. Light tip pinching can encourage branching later, but the first job is building a larger root system that can support the leaves already present.
If cold winters prevent dependable outdoor survival, keep one rooted plant in a movable pot.
Bring it to a very bright, cool indoor location before damaging cold, then reduce watering as growth slows.
Why Are Rosemary Cuttings Wilting, Rotting, or Stalling?
A failed cutting usually points to a condition you can change. Read the stem base, leaves, roots, medium, and recent environment together before reaching for fertilizer or taking another identical batch.
| What you see | Likely direction | Best next action |
|---|---|---|
| Leaves droop but the stem base is firm | Water loss is exceeding uptake | Restore a loose humidity cover, move out of direct light, and confirm the medium is moist |
| Stem base turns brown or black and soft | Decay in wet, airless, or contaminated conditions | Remove the cutting, clean the container, and restart in fresh porous medium |
| Leaves bleach or develop crisp pale areas | Excess light or heat under the cover | Move to bright indirect light and keep the cover out of direct sun |
| Cutting stays green but has no roots at the expected check | Stem was too mature, conditions are cool, or the medium is poorly balanced | Wait if the tissue is sound, then compare with a new batch of younger growth |
| Roots are brown and soft | The root zone has remained too wet | Discard badly affected cuttings and correct drainage and watering before restarting |
| Rooted cutting wilts after potting | Roots were damaged or humidity dropped too quickly | Shelter it from direct sun, keep the mix lightly moist, and reduce leaf stress without sealing it wet |
| New growth is long and weak | Light is too dim after rooting | Increase light gradually while continuing to avoid a sudden jump into harsh sun |
Do not reuse water, medium, or a dirty container from a rotted batch.
Cleaning only the scissors leaves the original failure conditions around the next stem.
When most cuttings fail in the same way, change the shared condition first. One blackened stem may have been damaged during preparation, while six blackened bases usually point to the medium, moisture, sanitation, or enclosure.
Record the parent plant, stem type, date, method, and result. Those few notes tell you whether spring softwood, later semi-hardwood, a looser mix, or a less enclosed setup works best in your home.
Layering is a useful alternative when a low rosemary branch already touches the soil. Keep part of the flexible stem attached to the parent, secure a section against moist well-drained soil, and separate it only after roots develop, allowing the parent to supply water during the process.
Pro Tips
- Prepare the damp rooting medium before removing any shoots from the parent plant.
- Take several healthy nonflowering tips so one damaged stem does not decide the whole attempt.
- Keep every remaining leaf above the medium or waterline.
- Use a humidity cover to slow water loss, but open it daily and keep it out of direct sun.
- Pot up when several firm roots have formed rather than relying on new leaves alone.
- Label the cultivar, date, stem type, and rooting method so each batch teaches you something.
Frequently Asked Questions
How long do rosemary cuttings take to root?
Softwood rosemary cuttings may root in about 2 to 5 weeks, while semi-hardwood material can take roughly 4 to 6 weeks under suitable conditions. Treat those ranges as inspection windows because stem maturity, temperature, light, moisture, and cultivar can change the result.
Do rosemary cuttings need rooting hormone?
No, rooting hormone is optional for rosemary. It may speed rooting or make a batch more uniform, especially with firmer material, but healthy stems, clean tools, porous medium, suitable moisture, and bright indirect light still determine whether the cuttings survive.
Is it better to root rosemary in water or soil?
A porous rooting medium is the better default because the new roots develop with both moisture and air and can move into potting mix with less change. Water is useful when you want to observe roots, but keep leaves above the water and handle the roots carefully during transfer.
Can you propagate rosemary from a grocery-store sprig?
A very fresh, flexible, nonflowering sprig may root if it still has a healthy tip and several nodes. Refrigeration, drying, bruising, and unknown age reduce the odds, so cuttings taken directly from a healthy growing plant are more dependable.
Can rosemary be propagated by layering?
Yes. A flexible low branch can form roots where part of its stem is held against moist, well-drained soil while the tip remains exposed, and trailing rosemary sometimes layers naturally. Separate it from the parent only after the buried section has made roots.
Sources & References
- University of California Master Gardeners, Herb Gardening Basics
- UC Cooperative Extension, Rosemary
- University of Illinois Extension, Cuttings
- University of Illinois Extension, Rosemary
- Oregon State University Extension, Turn Fall Cuttings Into Free Plants by Spring
- Penn State Extension, Herb Garden Plants: Rosemary
Related Guides

Best Butterfly Garden Plants for a Complete Habitat
The best butterfly garden plants do two different jobs. Host plants feed caterpillars, while nectar…
15 min read
Best Fall-Blooming Flowers for Color Near Frost
A bed that still carries flowers in October usually was planned before temperatures fell.
9 min read
Best Fast-Growing Trees for Shade and Privacy
The best fast-growing tree is the one whose mature crown, roots, climate range, and maintenance…
16 min read
Best Fragrant Flowers for Every Yard and Season
The best fragrant flowers depend on climate, light, space, and the hours you use the yard.
15 min read
Best Full-Sun Perennials for Hot, Bright Beds
The best full-sun perennials are the ones that match the bed's soil moisture and drainage, local…
14 min read
Best Ground Cover Plants for Sun, Shade, and Slopes
The best ground cover is a plant that survives the site and performs the job without escaping into…
18 min read