
Why Is My ZZ Plant Turning Yellow, and Is It Serious?
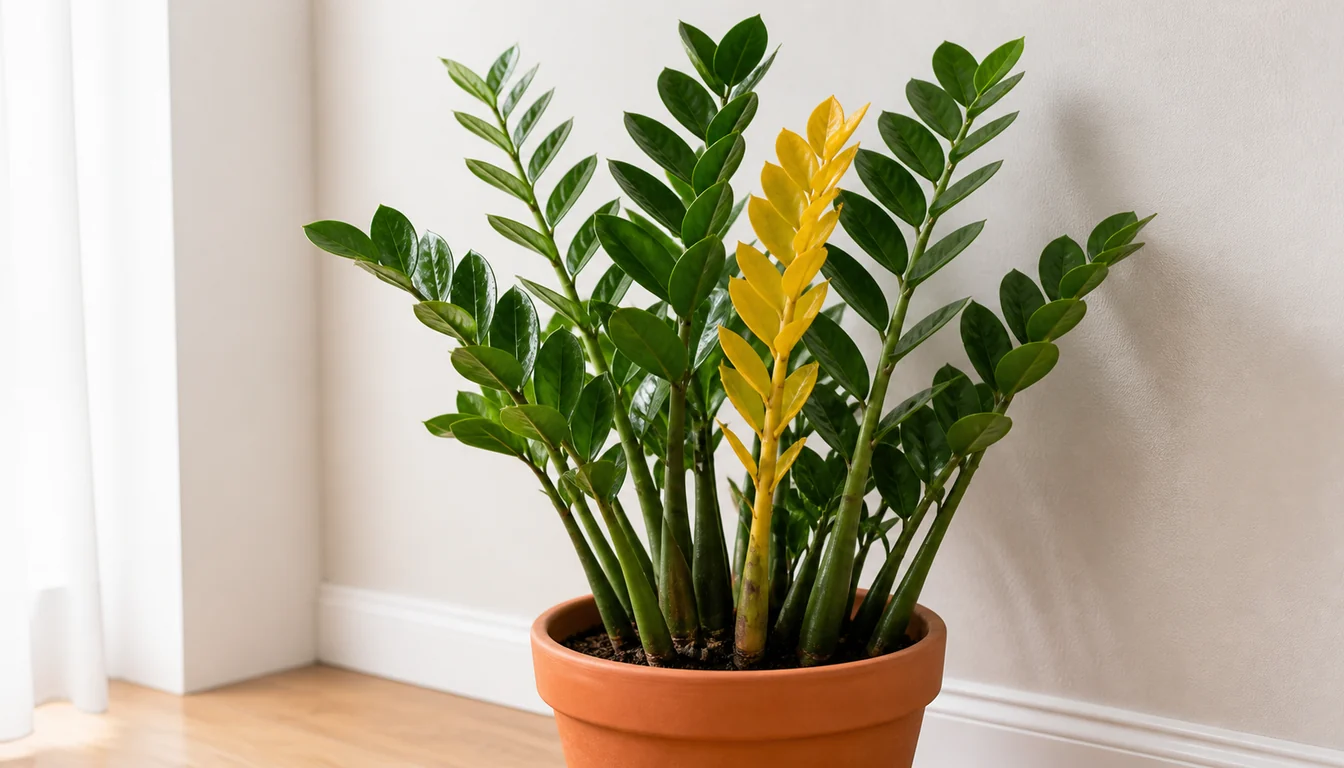
Yellow ZZ leaves do not automatically mean rotten rhizomes. Older foliage can age, while prolonged wetness, drought, exposure injury, and pests can also change leaf color.
The useful first checks are moisture below the surface, drainage, the pattern of damage, and recent changes. Root inspection is a later step when those findings or continuing decline justify disturbing the plant.
Quick diagnosis
Assess the pot and the changing leaves together
A gradually yellowing older leaflet on an otherwise stable plant can reflect aging. Several changing leaves, a collapsing base, or progressive wilting need a broader check.
Wet mix is a reason to investigate aeration and drainage, not proof of rot. A very dry root ball supports drought, but neither leaf color nor rhizome firmness alone establishes the condition of the whole plant.
Open the full diagnosisWhat You Are Seeing
What looks like a ZZ stem above the mix is usually the stalk of a compound leaf. Its individual leaflets can change color separately, so one yellow leaflet and a collapsing whole leaf are different observations.
The ZZ plant stores water in fleshy underground rhizomes and thickened tissues. Those reserves help it endure dry periods, but they do not make it immune to drought or allow roots to function indefinitely in poorly aerated mix.
Color also depends on the cultivar and leaf age. New growth on Raven ZZ emerges lime green and darkens toward purple-black as it matures. That documented color change differs from an established leaf becoming yellow, and does not explain wilting or collapsing tissue.
Common Causes
01 Possible
Gradual aging of older foliage
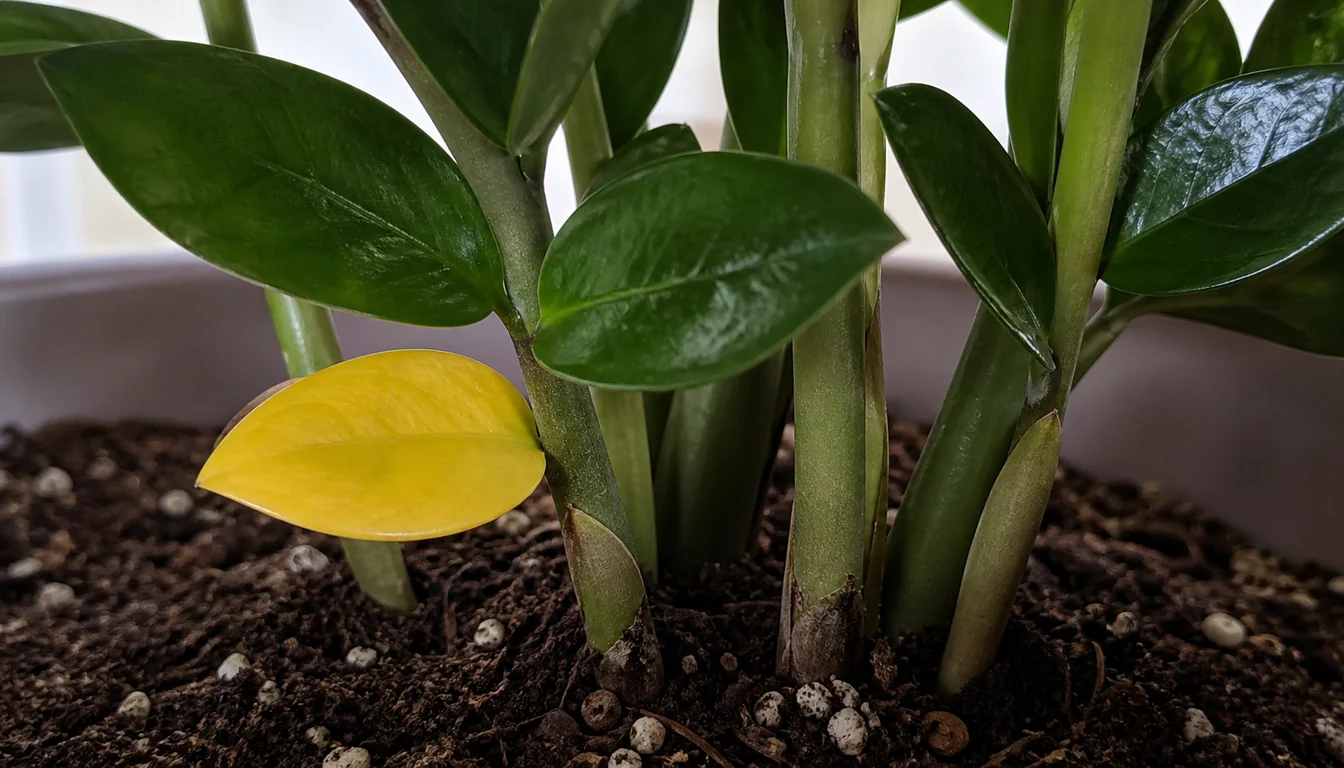
An older leaflet may yellow and eventually detach while the rest of a ZZ plant remains stable. Leaf age is therefore useful context, but there is no fixed number of yellow leaflets that certifies normal aging. The tallest leaf is not necessarily the oldest.
Photographs taken before the change help establish whether this is slow turnover or an accelerating problem. New damage, a collapsing leaf base, or a persistently wet or extremely dry root ball deserves attention even if only a small part of the plant is yellow.
How to identify it
- The change is gradual and limited to established foliage.
- Remaining leaves appear stable, without a new pattern of collapse, lesions, or pest signs.
- The watering and exposure history offer no obvious stress event, while continued observation remains useful.
What to do
- Avoid adding water or fertilizer simply to reverse the color of an aging leaflet.
- Leave useful green tissue intact. A dry leaflet can be allowed to detach naturally or removed without tearing adjacent tissue.
- Reassess if the rate of change increases or the pot condition suggests a separate problem.
02 Possible
Wet roots and possible rhizome decay
Mix that stays saturated has less air available to roots. Poor drainage and reduced water use can prolong that condition, and damaged roots or rhizomes may decay. Yellowing alone does not show whether decay has begun or how long it has been present.
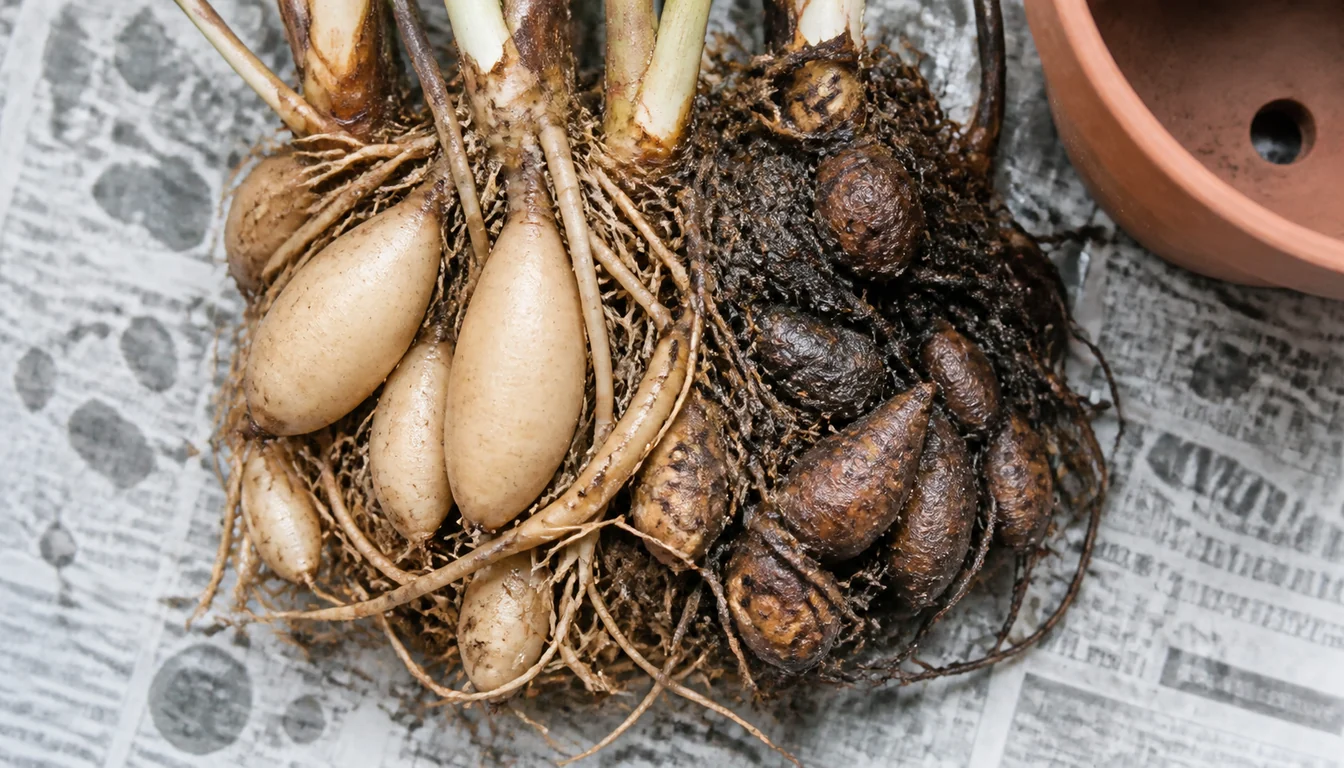
A collapsing leaf base, deteriorating rhizome, or continued decline in wet mix makes root inspection more useful than repeatedly changing the watering interval. A heavy pot without declining growth may simply be drying slowly, so weight needs to be interpreted with moisture and plant condition.
How to identify it
- Wet mix coincides with continuing wilting, yellowing, or loss of support at the leaf bases.
- Standing water, a blocked drainage opening, or a large volume of wet mix surrounds a small root system.
- A justified inspection reveals collapsing tissue or roots whose outer layer comes away. Brown color alone does not establish rot.
What to do
- Empty standing water and correct an obstructed drainage path before adding more water.
- If decline or structural damage warrants it, slide out the root ball gently and inspect without squeezing or cutting every rhizome.
- Assess the extent of damage before repotting. Clearly dead tissue and failed mix may need removal, but firm pale tissue is not a guarantee of disease-free stock.
- Pause fertilizer while root function and the cause of decline remain uncertain.
03 Possible
Runoff trapped around the nursery pot
A decorative outer pot can hold water below the visible surface. The inner pot then remains in contact with that reservoir even after the top of the mix feels dry.
Reducing watering frequency does not remove water already trapped underneath. Checking the container separately from the watering routine explains why a plant may remain wet despite a longer interval between waterings.
How to identify it
- Water is visible below the inner pot when it is lifted from its decorative cover.
- The inner pot lacks an open drainage hole or sits where runoff cannot escape.
- Much more wet mix surrounds the root ball than the remaining roots occupy.
What to do
- Empty collected runoff and let the nursery pot drain freely before returning it to its cover.
- A container with open drainage holes provides an exit for water. A stone layer cannot replace that exit.
- At a necessary repot, choose a container appropriate to the root mass rather than automatically moving to a much larger pot.
04 Possible
A dry root ball despite stored water
Water storage delays the effects of drought but cannot supply the leaves indefinitely. A very dry root ball, leaf loss, and reduced fullness together can support a water-shortage explanation.
Dry mix sometimes resists wetting or separates from the container wall. Water flowing quickly into the saucer can therefore leave the root-ball center dry. Wrinkling or yellowing alone is less useful because damaged roots can also fail to supply water.
How to identify it
- The root ball is dry below the surface and the pot is light compared with its own watered weight.
- Water runs around the root ball without moistening its center.
- A prolonged dry period fits the history, but other injury has not been ruled out.
What to do
- Water slowly and check whether the root-ball center becomes moist.
- If the mix resists wetting, shallow bottom watering can help rehydrate it. Remove the pot when the mix has rewetted and allow it to drain fully.
- Continued collapse after moisture is restored warrants reassessment. There is no guaranteed week-by-week return to firmness.
05 Possible
Chilling or cold contact
ZZ is a tropical plant, and cold transport, an unheated porch, or contact with chilled glass can injure foliage. The severity depends on the actual temperature, exposure time, and plant condition, rather than the mere fact that a night felt cool.
Damage near an exposed window or following a known cold event supports investigating chilling. It does not establish that the roots escaped injury, and lower temperatures can slow the drying of the pot.
How to identify it
- A specific cold exposure preceded the change.
- Foliage near cold glass or an exterior opening is affected more than sheltered tissue.
- Damaged tissue becomes discolored or collapses, requiring observation for further deterioration.
What to do
- Move the plant to stable indoor warmth away from cold glass and drafts.
- Keep it away from direct heater output, which creates a different exposure stress.
- Continue checking root-ball moisture rather than assuming the previous watering interval remains suitable. Remove clearly dead or decaying tissue with clean tools.
06 Possible
Scorch after an abrupt increase in sunlight
Leaves formed in lower light can be damaged by a sudden move into strong direct sun. Pale, dry patches on exposed leaflets and a matching change in position make scorch a useful possibility to investigate.
Window direction alone cannot predict the outcome because shading, season, glass, and previous exposure vary. Nor is a particular shade of yellow unique to sun injury. Cold contact, other physical injury, and disease can leave overlapping marks.
How to identify it
- A move or seasonal light change exposed previously shaded foliage to stronger sun.
- Damage is concentrated on exposed surfaces, though other causes may coexist.
- Patches become dry or papery rather than remaining simply lighter new growth.
What to do
- Filter the strongest rays or move the plant to a position with suitable indirect light.
- Increase light gradually during future moves instead of applying a universal distance from the window.
- Judge ongoing injury and new growth in the context of the cultivar. Raven new leaves are naturally lighter than mature leaves.
07 Possible
Mites, scale, or other visible pests
Fine stippling and webbing can accompany spider mites, while scale or mealybugs may leave raised covers, cottony clusters, or sticky deposits. These signs prompt closer inspection rather than a pesticide choice based only on yellow leaves.
Leaf undersides and sheltered junctions are easy to miss. Pest injury and moisture stress can occur together, so discovering one does not clear the other.
How to identify it
- Magnification or a tap over white paper reveals moving mites near stippled tissue.
- Raised covers or cottony material are associated with actual insects.
- New damage appears near affected leaflets or sheltered junctions.
What to do
- Separate an infested plant and inspect nearby plants.
- Gentle rinsing or wiping removes some pests without scraping healthy tissue.
- For identified spider mites, use only a product labeled for the pest, plant, and indoor setting. Test and repeat according to its label, not a universal weekly schedule.
- Continue checking after treatment because protected stages can remain.
08 Possible
Excess fertilizer salts or unsuitable feeding
Dissolved salts from fertilizer or irrigation water can accumulate in container mix. High concentrations interfere with water uptake and can injure roots, but a pale crust does not measure the concentration or prove why a leaf turned yellow.
Feeding history and the product dose provide context. A slow-growing ZZ uses nutrients differently from a fast-growing plant, yet neither a calendar month nor a white deposit alone justifies diagnosing fertilizer injury.
How to identify it
- Symptoms follow an excessive dose or repeated feeding that did not account for slow growth.
- Deposits occur on the pot or mix, with water and fertilizer history still needed to interpret them.
- Root injury or uneven moisture could also explain the leaf change.
What to do
- Pause fertilizer while assessing root condition and reviewing the dose.
- Where salt accumulation is supported and drainage works, leaching may help. Repeatedly soaking a saturated, declining plant can compound its root problem.
- Resume suitable feeding only when plant condition supports it, following an appropriate label. Persistent unexplained injury may justify water or media testing.
What recovery can and cannot look like
Fully dead tissue will not recover, and an aging leaflet may continue declining after the original stress has ended. Yellow color alone is therefore a poor measure of whether a correction worked.
A stable plant with no new collapse and suitable root-ball moisture is more encouraging than one whose yellowing continues spreading. New growth adds evidence, but ZZ growth can be slow and its timing varies with conditions.
Fertilizer is not a general cure for yellow leaves. Adding it to a plant with damaged roots or excess salts can worsen the problem. The reason for decline needs to guide the response.
When root inspection leads to repotting or propagation
Root inspection answers a limited question about the tissue you can see and assess. It cannot identify every pathogen, date the damage, or promise that a surviving rhizome will recover.
- Slide the root ball out gently when progressive decline or structural damage warrants inspection. Remove enough loose mix to assess the affected area without automatically washing and cutting every root.
- Compare tissue integrity across the root mass. Clearly collapsed or decayed tissue is concerning, while color alone is not a reason to cut.
- If damage is limited, remove clearly dead material with clean tools and consider repotting in fresh suitable mix and a clean, draining pot matched to the remaining roots. Extensive rhizome or base collapse may make replacement more practical.
- Keep potentially infected pieces separate from healthy plants. Clean tools and containers before reuse.
The repotting decision depends on the surviving roots and the condition of the mix. Fresh houseplant potting mix still needs moisture management. A fixed dry week or a day of callusing does not guarantee that decay will stop.
Division and leaf cuttings are different propagation options. They may preserve suitable, apparently unaffected material, but a cutting from a declining plant is not automatically clean stock and may take a long time to establish.
ZZ plant tissue contains irritating calcium oxalate crystals. Keep cut pieces away from children and pets, avoid sap contact with eyes and mouth, and wash hands after handling. Suspected ingestion warrants prompt poison-service or veterinary advice rather than waiting for symptoms.
Recovery Plan
Record what continues to deteriorate
Old damaged leaflets may remain yellow. New collapse, enlarging lesions, or additional declining leaves provide a stronger reason to reassess than the appearance of a single old leaflet.
Interpret moisture with the whole plant
Pot weight changes with evaporation as well as plant water use. A lighter pot does not prove that rhizomes have healed, and a slow-drying pot does not by itself prove they are dead.
Compare it with the cultivar
Stable, well-formed new growth is encouraging alongside improved plant condition. Raven growth begins lime green, so dark-green new leaves are not a universal recovery requirement.
Checking moisture below the surface and emptying trapped runoff helps prevent repeat water stress. Changes in light, temperature, container size, or root condition can change the time between waterings.
A draining pot reduces one risk but cannot prevent every cause of yellowing. Regular observation during watering makes new pests, exposure damage, or a changing leaf pattern easier to notice.
Sources
- NC State Extension Plant Toolbox: Zamioculcas zamiifolia
- UF/IFAS EP252: Cultural Guidelines for Commercial Production of Interiorscape ZZ
- Queensland Poisons Information Centre: Zanzibar gem (Zamioculcas zamiifolia)
- University of Minnesota Extension: Insects on Indoor Plants
- University of Georgia Extension, Growing Indoor Plants with Success, Bulletin 1318
- Zamioculcas zamiifolia Raven (Dowon), NC State Extension
- Properly Watering Container Houseplants, Virginia Cooperative Extension, SPES-804P
- Houseplant Diseases & Disorders, Clemson Cooperative Extension, HGIC 2251