
How Do You Get Rid of Spider Mites on Houseplants?
Spider mites on houseplants often can be reduced by repeatedly washing the leaf undersides. If live mites and fresh injury persist, an insecticidal soap or horticultural oil labeled for the plant and indoor use may help.
Confirm the pest before spraying. Old stippling, yellow leaves, or a few strands of webbing do not establish that a damaging colony is still present. A hand lens, a rinse that reaches the undersides, and follow-up inspections give you better evidence than the appearance of one damaged leaf.
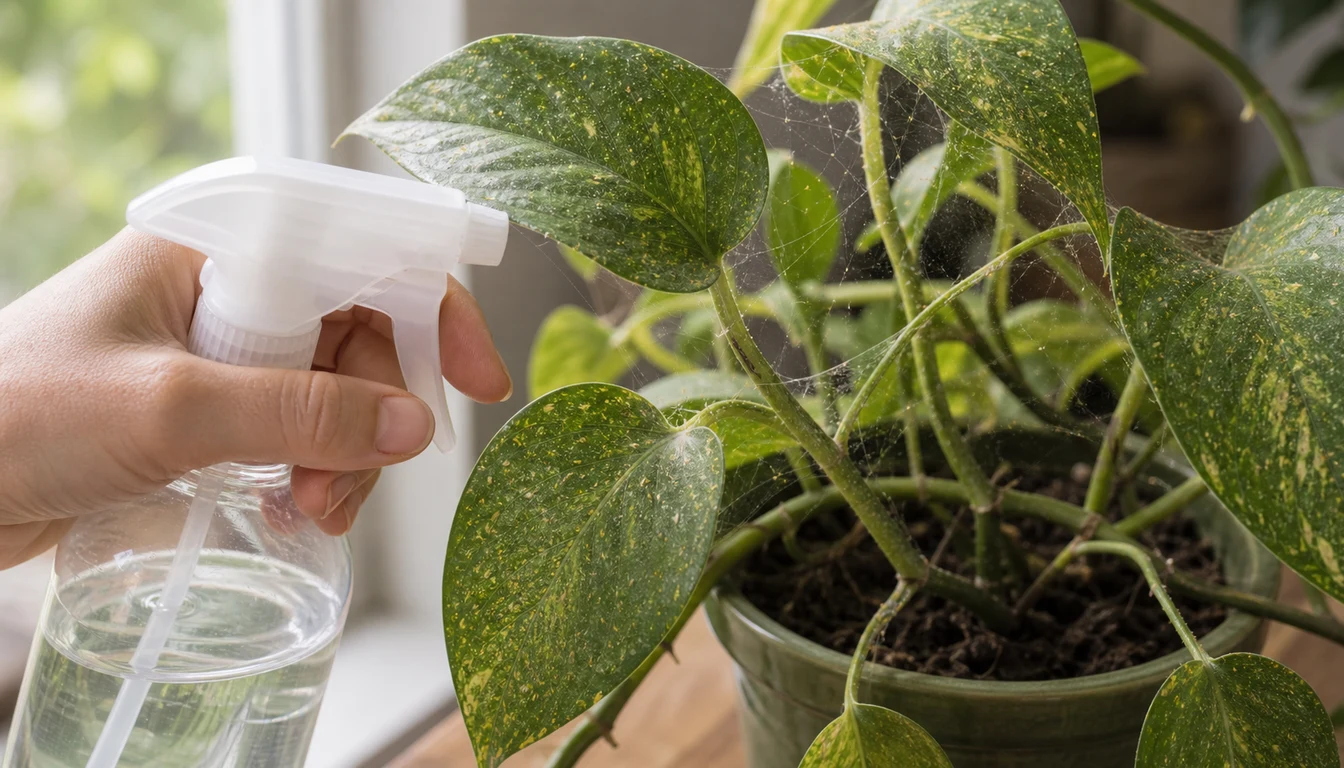
At a glance
Is it spider mites or another problem?
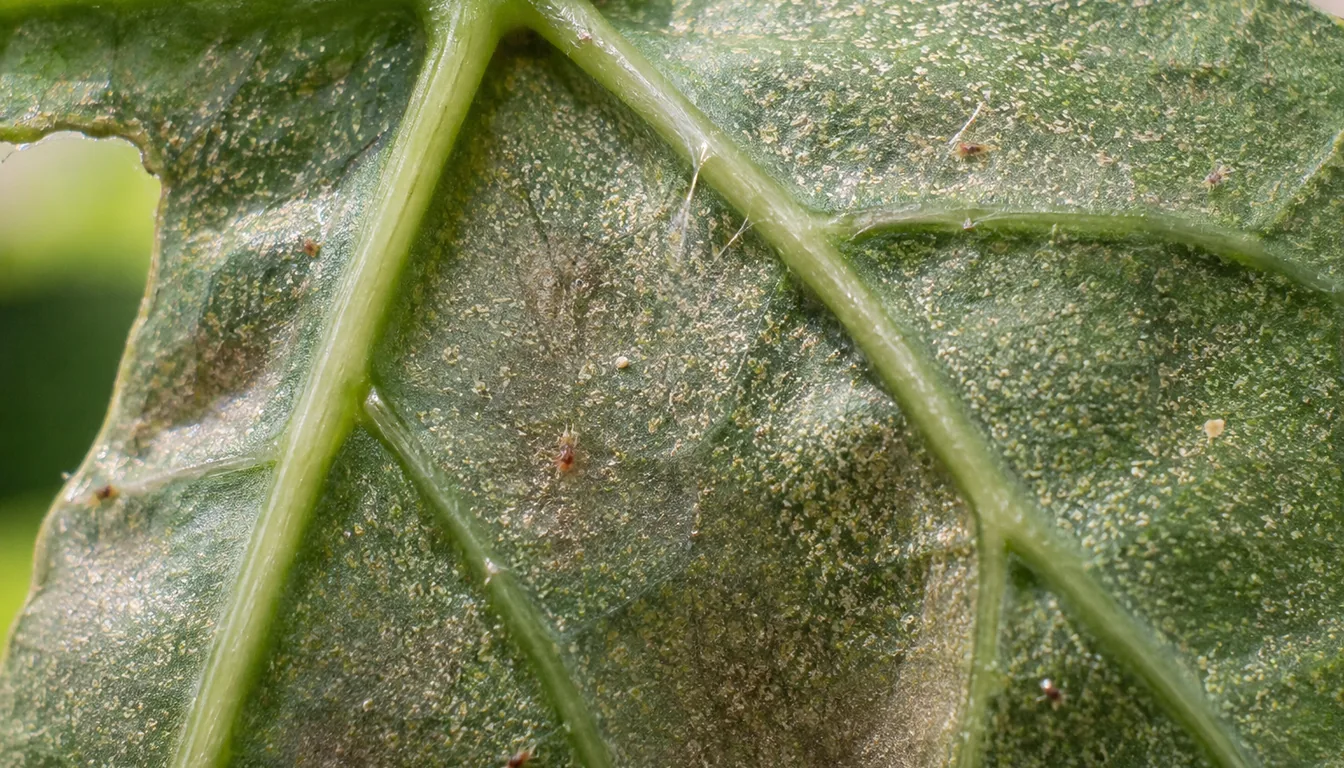
Spider mites puncture leaf cells, leaving fine pale speckles that can merge into a dull, gray or bronze appearance. Dense webbing may accompany a heavy infestation, but its presence cannot tell you how many days or weeks the plant has been infested.
A useful inspection combines the animal, its location, and the damage. Hold white paper beneath a suspect leaf and tap it. Moving dots are easier to see against that background. Then examine the underside with a hand lens, looking along the veins for mites, round eggs and fine webbing.
Movement alone does not identify a plant-feeding mite. Predatory mites and small insects can also fall onto the paper. UC IPM describes adult spider mites as oval and eight-legged, while newly hatched larvae have six legs. A quick leg count is therefore not a complete test.
| Observation | Useful interpretation | Next distinction |
|---|---|---|
| Fine stippling with mites and webbing beneath the leaf | Fits an active spider-mite infestation | Inspect more than one affected leaf and compare nearby plants |
| Marked leaves but no live mites found | May be old injury or another problem | Reinspect rather than treating the color alone |
| Elongated insects with silvery scars and dark fecal spots | May be thrips | Confirm the insect before choosing a treatment |
| Fast-moving mites without a matching feeding colony | May include beneficial predators | Seek identification if the lens view is unclear |
| Yellowing without an identifiable pest | Several care or root problems remain possible | Review moisture, light and roots without assuming mites are absent |
Distorted new growth without webbing can also involve other tiny mites, including broad or cyclamen mites. Those require a different assessment. An extension diagnostic service can help when the pest remains uncertain. A photograph of the damage and a magnified view of the animal are more useful than a description of “tiny bugs.”
How to rinse an infested houseplant
For a plant with foliage sturdy enough to wash, water removes mites without adding pesticide exposure. Colorado State describes repeated washing as a way to dislodge both mites and eggs. It does not promise that one rinse removes every life stage.
The useful force is enough to clear the leaf surface without tearing it. A light mist that only raises humidity is a different treatment from a rinse that carries pests away. Delicate leaves and plants too large to move may be better suited to gentle wiping where their foliage tolerates it.
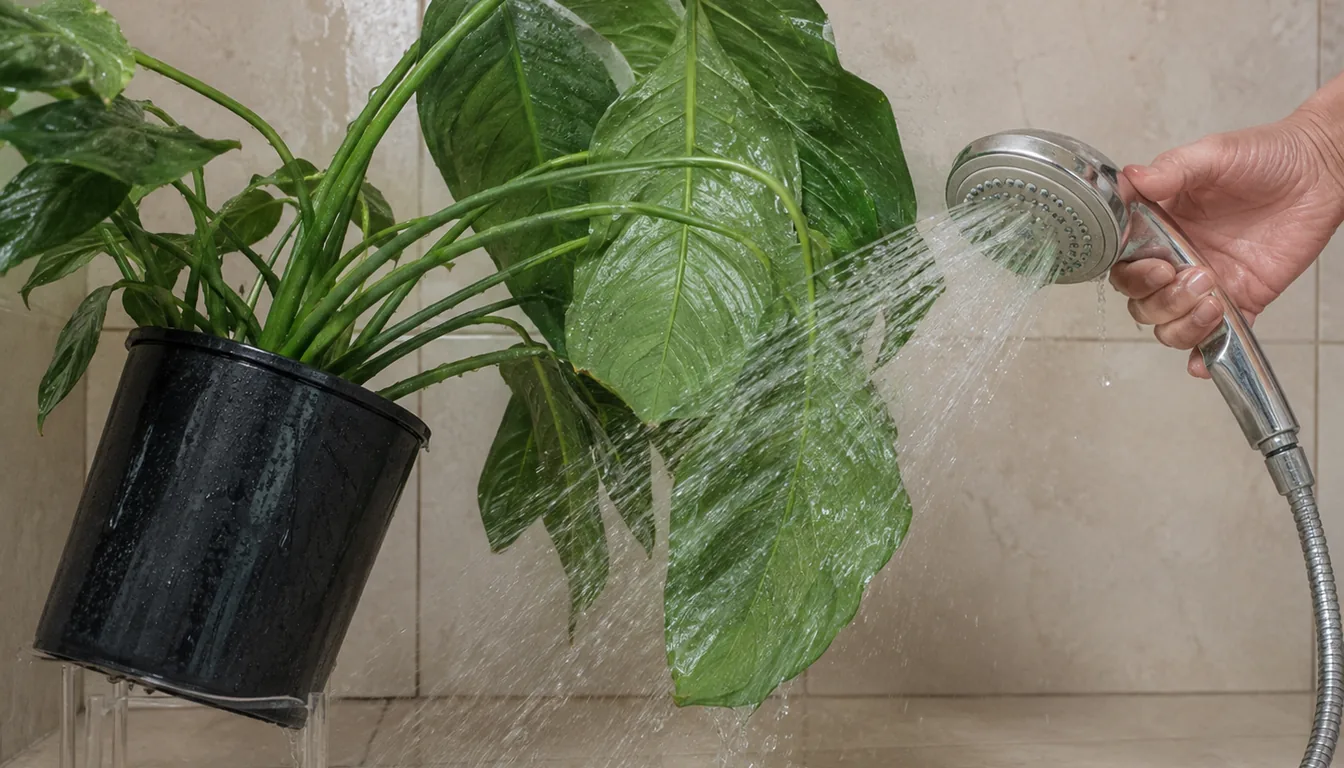
- Prepare the plantMove it away from other foliage to a sink or shower. Support the pot and stems rather than holding the plant by its leaves.
- Angle the foliageTilt or turn the plant so water reaches the lower leaf surfaces. Keep loose potting mix from washing out.
- Rinse carefullyWork across the undersides with plain water at a comfortable temperature. Reduce pressure if leaves bend sharply or tear.
- Let excess water drainEmpty collected water from a saucer or outer pot. Washing foliage is not a reason to leave the root ball soaked.
- Inspect againRevisit the same leaves and nearby growth with a lens. Repeat washing when mites persist and the plant tolerates it.
Selective removal of heavily infested leaves can reduce the colony, but stripping every marked leaf can weaken a plant that still needs its foliage. Healthy new growth and remaining green leaf area matter more than making the plant look spotless immediately.
Which nearby plants need attention?
Mites can crawl between plants or be carried to new ones, so isolation works best with an inspection of the surrounding collection. A second plant may have mites before its damage is obvious. That possibility is a reason to examine it, not proof that every nearby pot is infested.
Keep affected foliage from touching other plants and inspect susceptible neighbors during the same round. Where several plants carry confirmed spider mites, coordinated washing or label-permitted treatment reduces the chance of leaving a nearby colony unmanaged.
Colorado State recommends treating susceptible houseplants together during control. For pesticide use, the product must still be appropriate for each plant and indoor location. That advice does not mean spraying every moving speck or coating an unidentified problem. A sensitive plant may need physical cleaning or separate advice instead.
Cleaning fallen leaves, shared work surfaces and tools helps keep the treatment area orderly. Handling unaffected plants before infested ones also reduces unnecessary contact. No particular shelf distance proves that a plant is protected, and a plant with thick leaves is not automatically mite-free.
Choosing a soap or horticultural oil
A labeled contact treatment is a reasonable next option when washing leaves a damaging population. Colorado State favors horticultural oils for houseplant spider mites and describes insecticidal soap as less reliable against twospotted mites, while UC IPM includes both as selective options. Plant tolerance, formulation and thorough coverage still affect the result.
| Option | Useful role | Important limitation |
|---|---|---|
| Repeated water rinsing | Physically reduces mites and can dislodge eggs | Requires access to leaf undersides and foliage that tolerates washing |
| Insecticidal soap | Treats exposed mites directly contacted by the spray | Can injure sensitive foliage; a missed colony receives no protection after the spray dries |
| Horticultural oil | Provides contact control where the product permits indoor use | Temperature, plant stress, species sensitivity and recent pesticide use can limit application |
| Neem-derived product | May contain an oil fraction or a different active ingredient such as azadirachtin | Products carrying the same plant name do not necessarily control the same pest or life stage |
The active ingredient and directions matter more than the word neem. Clarified neem oil and azadirachtin products differ, so a recommendation for one cannot set the rate or expected effect of the other. A concentrate needs its own dilution instructions. A ready-to-use spray does not need an improvised recipe.
Household dish detergent and cooking oil are not substitutes for a formulated pesticide. Added soap, alcohol or another pesticide can change leaf wetting and injury risk. Use only combinations permitted by the label, and retain the original container so precautions and first-aid directions remain available.
Coverage and plant safety during treatment
Oils and soaps need direct contact with their targets. Spraying only the top of the canopy can leave colonies on the lower surfaces untouched, while adding extra concentrate cannot compensate for missed leaves.
Before treatment, confirm the allowed indoor use, target pest, plant restrictions, dilution, repeat interval and protective equipment. Test a small part of a sensitive or previously untreated plant and allow the label's observation period. UC IPM advises observing treated foliage for several days before a full application. A clean test does not cancel other restrictions.
- Keep children and pets away as directed and protect food and household surfaces from overspray
- Wait until a drought-stressed plant has recovered; do not assume watering makes it ready immediately
- Follow temperature, light and recent-spray restrictions, including incompatibilities with sulfur
- Turn or part the foliage to reach the undersides at the coverage level the label specifies
- Keep the mixture at its labeled rate and maintain any required agitation
- Follow drying, reentry, storage and disposal directions
There is no universal instruction to spray until every leaf drips. Some labels call for thorough wetting with limits on runoff. Pesticide runoff and leftover mixture must be managed by the product directions, rather than poured down the sink used for an earlier plain-water rinse.
Why follow-up matters and how to time it
Eggs, sheltered mites and incomplete coverage can leave survivors after a treatment. Colorado State says most miticides do not affect eggs, which is different from saying that every product misses every egg. Activity against life stages depends on the product. Neither washing nor spraying guarantees complete removal.
Development also changes with conditions. CSU describes a houseplant mite life cycle of roughly one to two weeks under favorable conditions, while UC IPM reports that a generation can take less than a week when temperature and food are favorable. These ranges explain why an apparently quiet plant needs follow-up, without establishing a fixed household hatch date.
The product label sets pesticide timing. CSU's general one- to two-week treatment guidance is background, not permission to shorten a label interval or exceed its application limit. Inspections between allowed applications can reveal whether another treatment is actually needed.
Record the product and treatment date, then examine the same leaf undersides and fresh growth. The useful result is a decline in live pest mites and new injury. When repeated inspections find neither, ongoing monitoring is more useful than routine preventive spraying. There is no universal number of clear checks that certifies eradication.
What persistent damage means
Leaves do not become unmarked as soon as mites disappear. Previously injured tissue can remain pale or bronze, so the old damage alone cannot tell you that treatment failed. The important distinction is between scars already present and continued feeding on leaves that were previously unaffected.
| What you find | What to investigate |
|---|---|
| Live mites remain in patches under leaves | Missed surfaces, dense foliage, webbing and whether the product actually contacts the colony |
| Numbers fall and then rise again | Surviving life stages, nearby infested plants and whether the allowed repeat schedule was followed |
| Old flecks remain but no live mites or new injury appear | Residual damage rather than an automatic need for more pesticide |
| Fresh scorch or wilt follows spraying | Plant sensitivity, concentration, heat, drought stress or incompatible recent products |
| Mites persist through a correctly applied labeled course | Identification, product suitability and possible resistance; seek extension advice before escalating |
A rebound does not prove that one neighbor caused it, and no single cause accounts for every failed treatment. If you need diagnostic help, the product name, application dates, plant identity and magnified pest photographs let an adviser assess more than the current leaf color.
When removal or disposal makes sense
A severely infested plant that cannot be isolated or treated effectively can threaten a larger collection. Disposal is a reasonable option, especially when decline continues and the plant offers little healthy growth to preserve. It is not determined by a fixed number of sprays or a percentage of speckled leaves.
Selective pruning can remove concentrated colonies where the plant has enough healthy foliage left. Removing a third of the leaves is not a safe rule for every houseplant, and a hard cut may remove a growing point or more leaf area than a weakened plant can replace. The plant's growth habit and condition should guide that choice.
Bag infested prunings or a discarded plant before carrying them past other foliage, then remove them from the growing area. A sentimental or valuable plant may justify isolation and professional identification before disposal. Keeping it still requires a practical way to monitor and prevent contact with the rest of the collection.
Why some insecticides make mite problems worse
A product used for another insect may have little effect on spider mites while killing their predators. UC IPM and CSU describe mite outbreaks associated with certain broad-spectrum insecticides. This matters especially on plants that spend time outdoors among natural enemies.
The label's mite-control claim matters more than whether the front of the bottle says “insect killer.” Mites are arachnids, but that classification alone does not prove a product ineffective, since some insecticides also have mite activity. Replacing one unsuitable product with a stronger mixture adds risk without resolving the mismatch.
Purchased predatory mites are a separate option for some larger indoor plantings. Their success depends on species, humidity, pest abundance and compatibility with earlier sprays. They should not be released into an incompatible pesticide treatment, and a small household collection may be easier to manage by washing and close inspection.
Reduce stress without soaking the plant
Hot, dry conditions favor twospotted spider-mite outbreaks, and a drought-stressed plant is less able to tolerate feeding damage. Correcting avoidable stress supports recovery, but it does not remove an established colony by itself.
A plant beside a heating vent may need a less drying position that still supplies suitable light. Dust removal also makes leaf inspection easier. Raising humidity is part of CSU's houseplant advice, but misting is not equivalent to physically washing mites away, and a humidifier is not evidence that the pests are gone.
Root-zone watering still follows the needs of the plant and its potting mix. Repeatedly soaking an already wet pot because mites favor dry air confuses air humidity with soil moisture and can create another problem. Drainage and an actual moisture check are more useful than a new fixed watering calendar.
Inspect new and returning plants
New purchases and plants returning from outdoors can bring mites into a collection. CSU recommends keeping new plants in a separate area for at least three weeks while watching for pests. That is an observation period, not a guarantee that every possible infestation will reveal itself on schedule.
Leaf undersides, vein junctions and fresh growth deserve attention during that period. A suspect plant stays separate while the finding is identified and managed. The calendar alone is not a reason to place it against healthy foliage.
Periodic inspection during ordinary care makes small colonies easier to find. It also helps distinguish a new outbreak from damage that was already present when a plant arrived. Routine pesticide coating of apparently healthy plants is not a substitute for those observations.
Frequently Asked Questions
Do I need to replace the potting soil for spider mites?
For the webspinning spider mites described here, feeding colonies occur mainly on foliage. Replacing the mix does not remove mites and eggs left on the leaves, so repotting is not the routine control. A separate root or soil problem needs its own diagnosis.
Sources & References
Related Guides
Do Marigolds Keep Squirrels Away From Your Garden?
Squirrels can strip a bed of seedlings or freshly planted bulbs in a single morning.
11 min read
Do Squash Bugs Bite People?
No. A squash bug cannot bite you. Its mouthparts are a slender stylet built to pierce plant tissue…
9 min read
Does Dawn Dish Soap Kill Grubs? Why It Fails and What Works Instead
No. Dawn and other dish detergents do not bring white grubs to the surface, and they do not kill…
9 min read
How Much Neem Oil Per Gallon? Read and Scale the Label Rate
There is no universal amount of neem oil per gallon. The rate belongs to the exact product and its…
11 min read
How to Control Fungus Gnats in Houseplant Soil
Fungus gnat control works best when it addresses the larvae in potting mix as well as the adults…
15 min read
How to Identify Lawn Grubs Before You Treat the Grass
Brown grass, birds, or skunk damage can suggest white grubs, but none proves the diagnosis.
16 min read