
Calathea Brown Tips: Checking Humidity, Water, and Roots
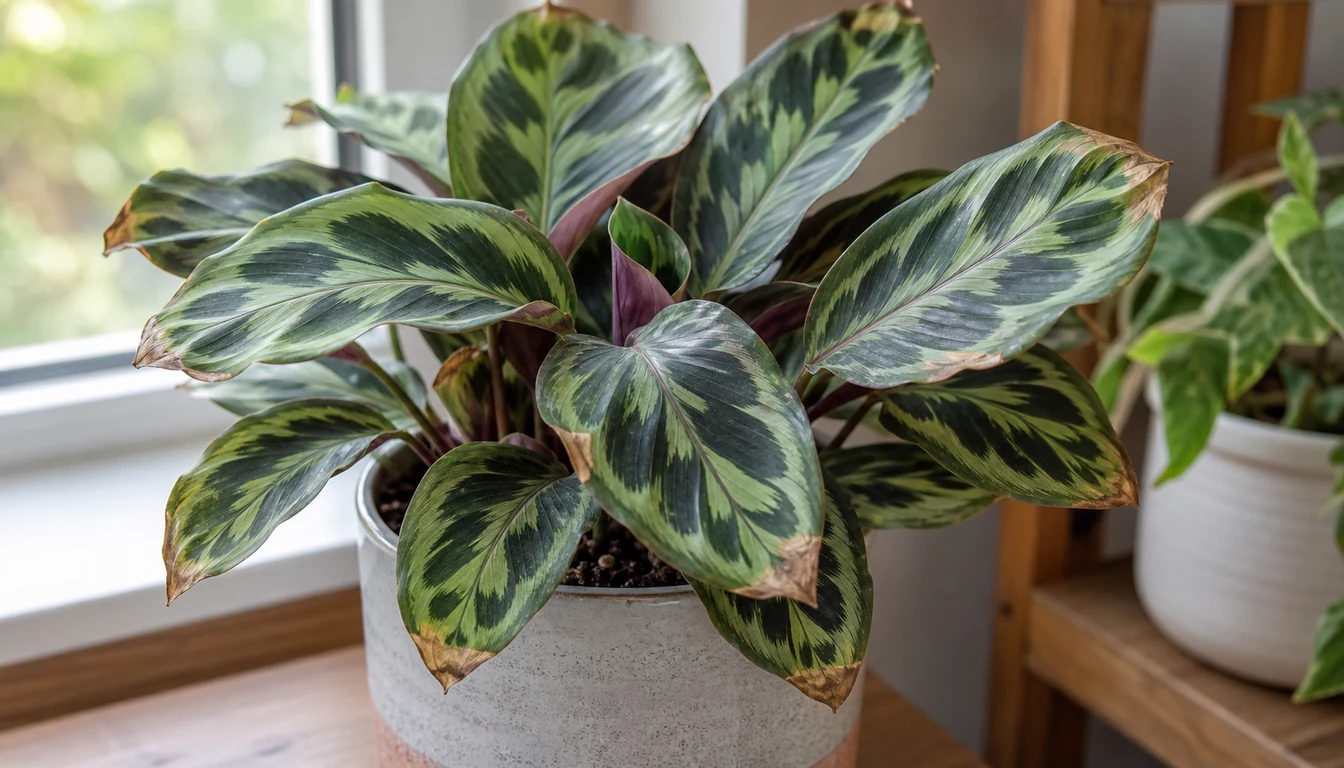
Dry brown Calathea tips are damaged tissue that will not turn green again. The same appearance can follow different stresses, so tip shape alone cannot separate water from humidity problems.
Conditions near the leaves, moisture inside the pot, feeding and water history, and recent exposure help choose the next check. Continued decline needs a broader assessment than adding humidity or changing water.
Quick diagnosis
Check the room and the root ball together
Dry tips on otherwise sound foliage justify reviewing humidity, airflow, water quality, and feeding. A wet pot still needs a root assessment when growth declines, because moisture in the mix does not guarantee uptake.
Spreading lesions, soft stems, visible pests, or continuing leaf loss need further investigation. A clean leaf center does not exclude a root problem or establish that dry air is the only cause.
Open the full diagnosisWhat You Are Seeing
Calathea and Goeppertia foliage is thin and sensitive to abrupt changes. The point can dry first under low humidity, moving air, root moisture swings, fluoride-sensitive water, or accumulated fertilizer salts even while most of the patterned blade stays intact.
Brown color alone cannot distinguish dry tip injury from a spreading lesion or another kind of tissue damage. Recent care and the whole plant help interpret it. Seasonal indoor watering changes follow actual pot moisture, not a fixed weekday.
This page focuses on localized tip injury. More extensive browning and curling also needs assessment of the same roots and environment. The broader crispy-leaf problem may overlap, rather than representing a separate cause.
Common Causes
01 Check the supporting evidence
Low indoor humidity
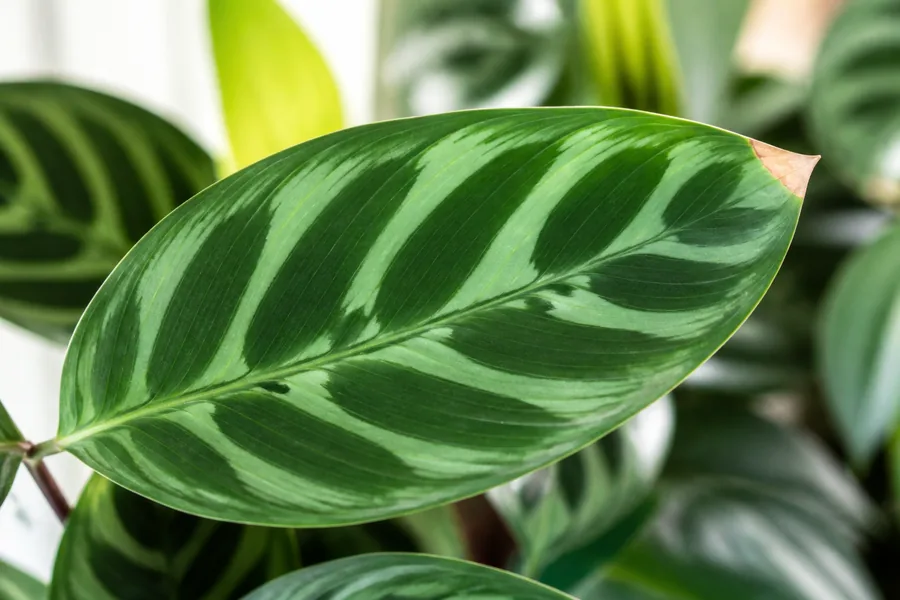
Dry room air and exposure to warm moving air can contribute to brown tips. Similar injury can occur with root stress or water-quality problems, so firm leaf centers do not settle the diagnosis. A humidity reading near the foliage and a check inside the pot provide different pieces of evidence.
How to identify it
- Several leaves show dry brown tips at the same time.
- Leaf centers remain green or patterned instead of yellowing through the blade.
- Damage is worse near heaters, fans, vents, or drafty windows.
- Measurements near the foliage indicate dry air, especially during heating or air-conditioning cycles.
What to do
- Measure humidity at leaf height and use a room humidifier when it remains too low for the plant.
- Move the pot away from heat vents, AC blasts, and direct fan airflow.
- Grouping nearby plants may affect the immediate conditions, but it does not guarantee adequate humidity. Measure rather than assuming a shared tray solves dry air.
- Keep the plant away from abrupt cold drafts as well as heated moving air.
- Trim only the dry dead point if it bothers you, leaving a narrow brown edge so you do not cut into living tissue.
02 Check the supporting evidence
Fluoride or mineral-heavy water
Some Calathea and Goeppertia species develop brown tips and margins with fluoride-containing or mineral-heavy tap water. New leaves continuing to burn after humidity and root moisture stabilize make the water source worth testing.
How to identify it
- Brown tips continue on new leaves after humidity has improved.
- Mineral deposits suggest checking dissolved salts, but do not identify fluoride or its concentration.
- Tip burn is worse after repeated use of the same tap-water source.
- Other sensitive houseplants nearby show similar margin burn.
What to do
- Consider distilled water when mineral or fluoride exposure is a concern. A filter removes only the substances specified for that device.
- Review the water source and fertilizer together while observing newly developing damage.
- Replace medium when degradation or accumulated deposits justify it, with attention to the existing roots and drainage.
- Letting water stand does not remove dissolved mineral salts. A water change cannot restore dead tips.
03 Check the supporting evidence
Dry-to-soggy watering rhythm
Severe drying can interrupt water supply to the leaves, while saturation can impair roots and also limit uptake. Pot weight and moisture at more than the surface help distinguish these conditions. A wilted plant is not automatically asking for another watering.
How to identify it
- The potting mix swings from bone dry to waterlogged.
- Lower leaves may yellow while upper tips brown.
- The pot feels heavy for days after watering or the mix pulls away from the container when dry.
- Tip damage appears after missed waterings followed by heavy rescue watering.
What to do
- Check surface and root-zone moisture. Rewet when needed without allowing the whole root ball to become hard and dry.
- Water slowly until excess drains, then empty the saucer so roots never sit in standing water.
- Use an airy indoor mix with moisture retention, not dense outdoor soil.
- Size a replacement pot to the sound root system rather than automatically choosing a larger container.
- Pair watering checks with humidity checks. A thirsty-looking Calathea in dry air may not actually need more water.
04 Check the supporting evidence
Fertilizer salt buildup
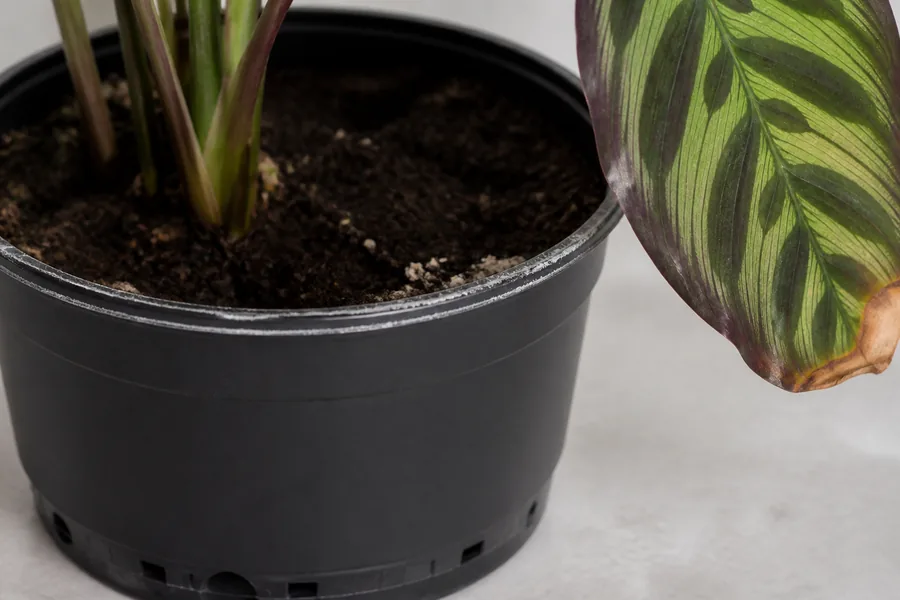
Soluble salts can accumulate from fertilizer and irrigation water. A crust and damage following a change in feeding support reviewing that history, but deposits alone cannot measure injury or exclude another cause.
How to identify it
- White or pale crystalline deposits appear on the mix, pot rim, or saucer
- New tip burn followed a stronger or more frequent fertilizer routine
- Water drains through the pot but the surface crust returns
- Humidity and the regular water source have not changed
What to do
- Pause fertilizer while the plant is stressed and actively producing damaged leaves.
- Flush only when drainage is open and the mix is not already saturated, then let excess water leave completely.
- Replace compacted or heavily crusted mix when water no longer moves evenly through it.
- Resume feeding only during active growth and use a pot-aware indoor fertilizer rate rather than a fixed garden formula.
05 Check the supporting evidence
A waterlogged or poorly drained root zone
Persistent saturation can impair root function. Yellowing leaves, soft petioles, odor, or a pot that stays wet justify checking drainage and roots before another watering. These signs do not name a pathogen, and adding humidity cannot restore air spaces in saturated medium.
How to identify it
- The pot remains heavy and the mix stays wet for many days
- Lower leaves yellow or petioles soften as tips brown
- The cachepot or saucer holds drainage water
- The mix smells sour or roots look dark and soft rather than firm
What to do
- Empty standing drainage water and confirm that the inner pot has open holes.
- Let the mix approach the plant's normal watering threshold before watering again.
- Inspect roots and repot only when persistent wetness, compacted mix, or damaged roots support it.
- Do not add a larger pot around a small root ball because extra wet mix dries more slowly.
06 Check the supporting evidence
Direct sun or a cold draft
Strong light, hot glass, and cold drafts can injure foliage. The exposed side and timing help identify a plausible event, but overlapping root or chemical stress can occur at the same time.
How to identify it
- Damage faces the window or appears on leaves touching cold glass
- A pale or bleached patch extends beyond the exact tip
- Protected leaves on the same plant remain cleaner
- The symptom followed a seasonal sun-angle change or cold night
What to do
- Move the plant into bright indirect light or filter harsh direct sun.
- Keep leaves from touching cold glass and move the pot away from door drafts.
- Change position gradually rather than moving from shade into strong light in one day.
- Judge the correction from new damage, because old scorched tissue remains tan.
07 Check the supporting evidence
Old stable tip damage
A dry dead tip remains brown after conditions improve. A stable boundary with sound new growth is encouraging, but one unchanged old leaf cannot certify that the whole plant has recovered.
How to identify it
- The brown line has not moved inward for several weeks
- New leaves open with clean tips and normal pattern
- No new lesions, pests, yellowing, or soft tissue appear
- The plant is producing steady firm growth
What to do
- Mark or photograph the old boundary and compare it over time.
- Leave the leaf in place while it contributes useful green tissue.
- Trim the dead point for appearance only with clean scissors, following the natural leaf shape.
- Avoid cycling through new remedies when current growth is clean.
Old Damage and Ongoing Decline Are Different
A dry dead leaf point will remain brown. The useful change is less new injury and continued sound growth, rather than the old tip recovering its color.
Humidity, root moisture, water quality, and exposure can contribute together. A symptom that persists after one adjustment is a reason to reassess the evidence, not proof that a stronger dose or more water is needed.
Rapid decline, spreading lesions, or soft stems deserves diagnostic advice. Trimming a dry tip for appearance cannot treat the underlying cause.
Read the shape and spread of the brown tissue
Touch and inspect the boundary in bright indirect light. A crisp tan point that follows the leaf shape fits tip burn, while soft dark tissue, a wet halo, or a circular expanding spot needs a disease or root-stress branch.
Map which leaves are affected. Many clean-centered leaves near moving air support humidity stress, window-facing patches support scorch, and damage paired with yellow blades or soft petioles points below the leaf tip.
Webbing, stippling, visible pests, expanding lesions, odor, or deteriorating roots justify a closer investigation. These clues may reveal another contributor; none should be interpreted as a laboratory diagnosis.
Test humidity without soaking the leaves
Place a hygrometer near leaf height for several days and note heating or air-conditioning cycles. A room average can hide a dry plume from a vent or fan aimed directly at the plant.
Moving the plant out of a direct vent stream can reduce that exposure. If measurements still show dry room air, a humidifier can improve humidity while drainage and root moisture remain separate concerns.
Misting wets a leaf briefly but does not hold room humidity after the droplets evaporate. Avoid repeated wet foliage when air circulation is poor, because that can add leaf-spot risk without solving dry air.
Separate thirsty roots from water-quality and salt injury
Pot weight and moisture help distinguish a drying root ball from one that remains wet. Wet medium does not rule out poor water uptake from injured roots, and more water may worsen that condition.
Inspect the soil surface, pot rim, and saucer for a thin crystalline crust. Pair that evidence with fertilizer history and the water source, and distinguish it from fuzzy mold before deciding to flush or change water.
Change one variable at a time when the plant is stable. Use a lower-mineral water source consistently or pause fertilizer, then judge the next unfurling leaves instead of interpreting permanent old damage.
Know when the problem has moved below the leaf tip
Persistent wetness, yellowing, soft petioles, odor, or deteriorating roots justify examining the root zone. Root color alone is insufficient, and these observations cannot identify every disease. More humidity does not drain saturated medium.
Remove the inner pot from its cachepot and confirm open drainage holes with no standing water. Compare root-ball size with container volume, because excess mix around a small root system can remain wet long after the plant has used its share.
Repot only when damaged roots, compacted mix, or failed drainage supports the disturbance. Use a clean, airy moisture-retentive mix and a container close to the root-ball size rather than automatically stepping up.
Judge the fix on new leaves
Photographs of the same tip over time can show whether its boundary has changed. A stable old mark is useful evidence, while developing leaves and the rest of the plant still need observation.
Watch the next leaves as they unfurl. Cleaner tips support the chosen correction, while fresh burn under the same conditions means another differential still needs evidence.
Keep old leaves while most of each blade is green, or trim only dead tissue for appearance. Removing every marked leaf at once reduces photosynthetic area and erases the record needed to judge whether damage is spreading.
Recovery Plan
Address the supported problem
Check humidity, root moisture, drainage, and recent care. Choose the corresponding adjustment instead of automatically adding humidity, flushing, feeding, and repotting together.
Compare further injury and growth
Old brown tips remain. Newly developing damage, growth, and the pot’s drying pattern help judge whether the change is useful. There is no fixed week that proves recovery.
Retain useful green foliage
Damaged tips may be trimmed for appearance with clean tools while green portions remain. Continuing decline needs reassessment rather than repeated cosmetic cuts.
Reduce recurring tip injury by measuring humidity near the leaves, avoiding vents and cold glass, using a tolerated low-mineral water source, and checking pot weight and mix before watering. Keep drainage open, feed only during active growth at the labeled rate, and judge success from new leaves rather than permanent old brown points.