
How Often Should You Water Seedlings Indoors and Outside?
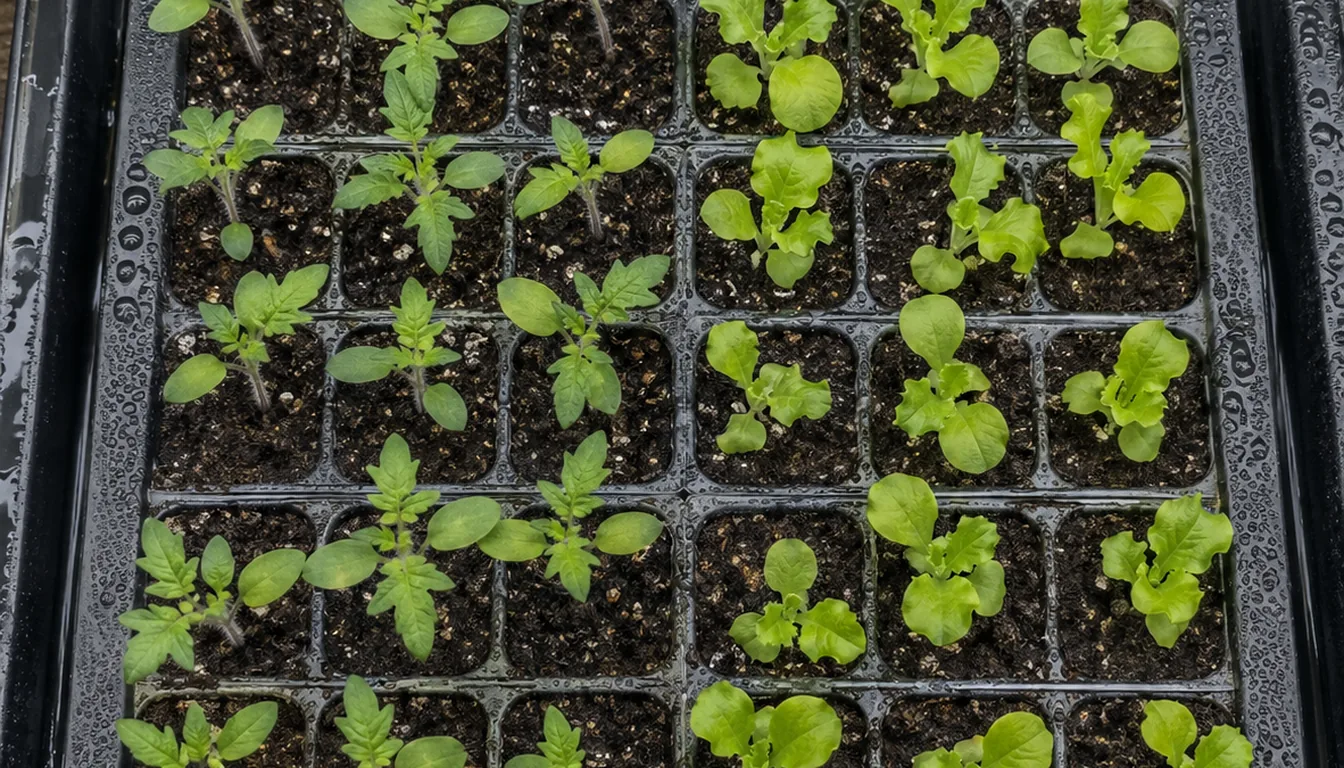
For established seedlings in cells or pots, water when the growing mix is nearly dry at the surface and the container feels noticeably lighter, then wet the full root zone and let excess water drain. Check at least daily because tiny cells can change quickly, but do not pour water simply because a clock or calendar says it is time.
A seedling needs both moisture and oxygen around its roots.
Saturated mix fills air spaces with water, while a completely dry plug can pull away from the cell and leave fine roots without contact.
The next watering is decided by the mix, container weight, and plant response together. Light, heat, airflow, cell size, root growth, and outdoor wind determine how fast those signs return.
Seeds still germinating need a continuously moist sowing layer. The near-dry surface check below applies after emergence, with enough moisture retained around the young roots.
At a glance
Moisture Signs Are More Useful Than a Fixed Schedule
No reliable rule says every seedling tray needs water every one, two, or three days.
Even neighboring cells can dry at different speeds when an edge catches more fan air or one plant has a larger canopy.
- Surface color
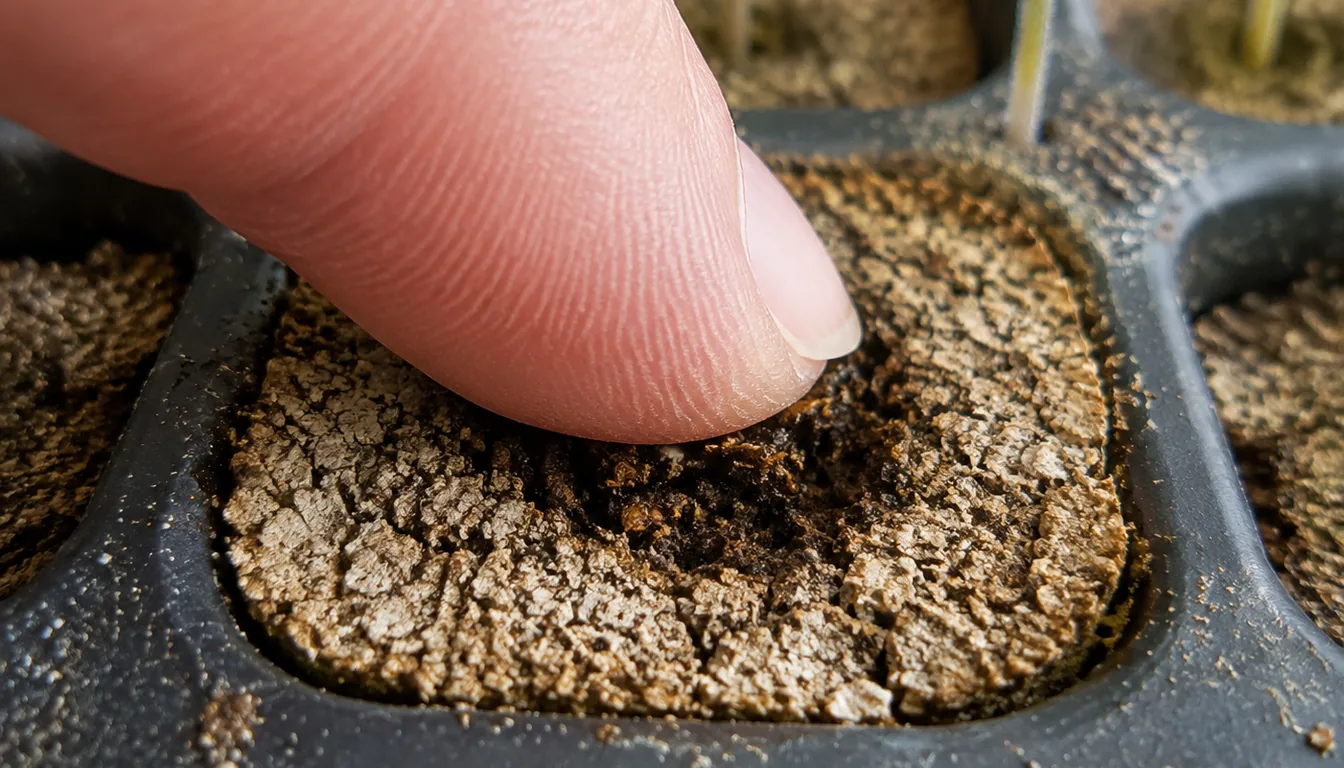
- Drying mix becomes lighter; freshly wet mix looks darker
- Touch
- The surface is nearly dry while the layer just below retains slight moisture
- Weight
- A tray or pot feels lighter than it did after a complete watering
- Plant response
- Leaves remain firm; wilt must be interpreted with the moisture signs
A light touch near the edge of a larger cell can reveal moisture below a dry crust. In tiny plugs, tray weight and the exposed surface are less disruptive than pushing a finger or tool into the root zone.
A wet-looking surface can also mislead when only the top was misted.
Lift the tray and check below the surface rather than assuming a dark patch means the full plug received water.
Learn the wet and nearly-dry weight of each tray. That comparison becomes faster and more consistent than guessing from leaf posture alone.
Give the Root Plug a Complete Drink, Then Drain It
Frequent sips wet only part of a cell and make the moisture pattern hard to read.
When the tray is ready, apply enough water to moisten the growing mix through the root zone and allow extra water to leave through open drainage holes.
Top watering works when a fine rose, squeeze bottle, or gentle wand delivers water without washing out seeds or bending stems. Move across the tray in more than one light pass so water can soak in instead of running off a dry surface.
Bottom watering places a shallow layer of water in the solid tray and lets mix wick moisture through the drainage holes.
Once the plugs have moistened evenly, lift the cell tray and let excess water drain. A dark patch on one cell is not evidence that every plug has wicked enough water.
- Add a shallow layerUse enough clean water to contact the drainage openings, not to float the cells.
- Watch the surfaceGive the mix time to wick until most cell tops darken.
- Lift and compareCheck that light edge cells have moistened instead of assuming the whole tray wicked evenly.
- Drain completelyEmpty the solid tray so roots regain air as excess water leaves.
There is no universal 15- or 30-minute soak because mix, cell depth, dryness, and drainage openings vary.
The visual endpoint is an evenly moistened plug without standing water.
Alternate methods when the tray needs it. Bottom watering helps avoid splash and stem wetting, while a gentle top watering can correct cells that fail to wick because the mix has dried and pulled from the sides.
Shared irrigation water can carry damping-off pathogens between seedlings. A tray with suspected disease belongs apart from healthy trays, and leftover water from it should not be reused for other seedlings.
Remove the Dome and Change the Watering Method After Germination
When you start seeds indoors, a humidity cover slows evaporation while seed is germinating. Once seedlings emerge, leaving the dome closed keeps humidity high and reduces the drying that young stems need.
Remove the cover as sprouts emerge.
Move seedlings promptly into strong, consistent light. If one crop emerges before another in a shared tray, separate the containers when possible instead of keeping all sprouts under a dome for the slowest seed.
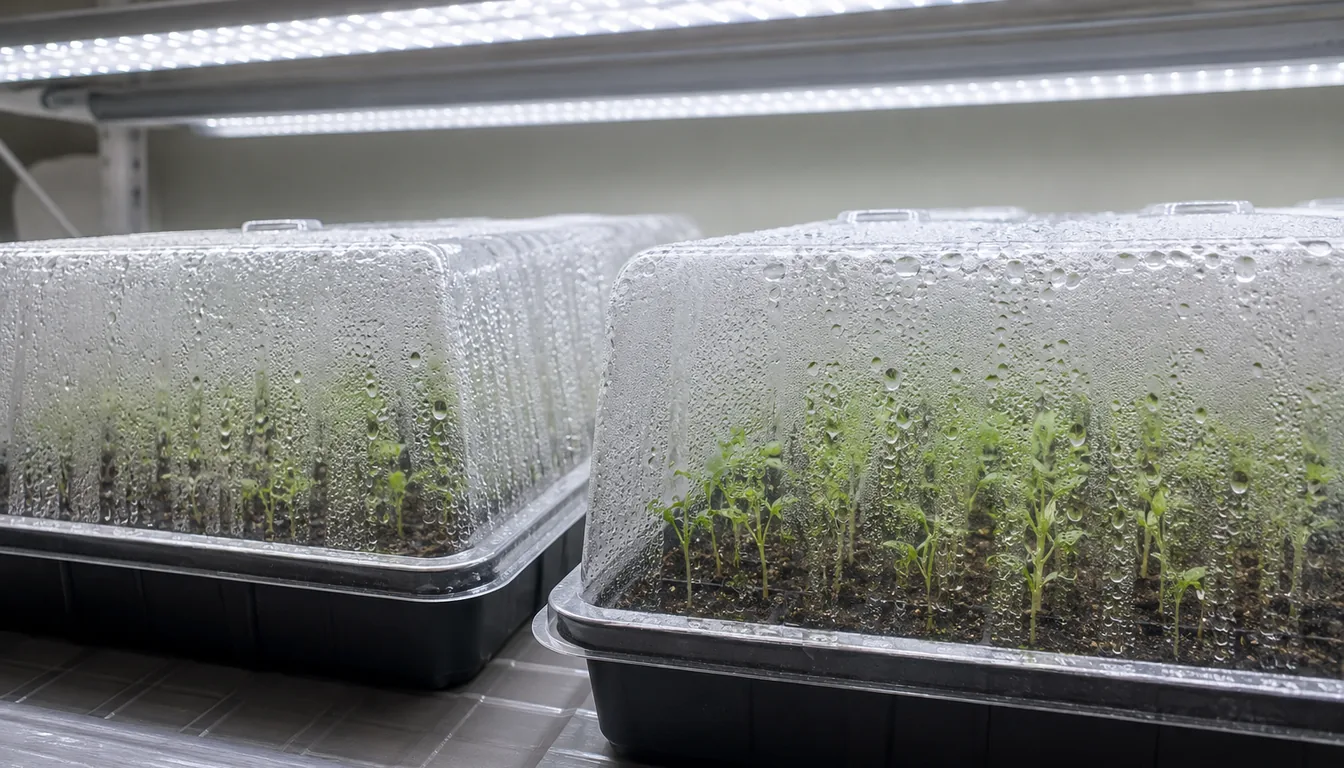
Tiny newly emerged roots occupy only part of the cell.
Keep the mix evenly moist without a deep pool. A gentle surface application or careful bottom watering can work as long as the plug wets evenly and drains.
As true leaves expand, the plant uses more water and the root system explores more of the cell. The same tray may move from slow drying after germination to rapid drying shortly before potting up.
Why One Indoor Tray Dries Faster Than Another
Grow lights affect water use indirectly through plant growth and heat. A close lamp, warm shelf, heat mat, or sunny window can raise the temperature of the mix, while a fan removes humid air from around leaves and the tray surface.
| Condition | What happens | Useful response |
|---|---|---|
| Small or shallow cells | Less mix stores less water | Check weight more often and pot up before roots crowd |
| Large leaves and filled cells | More roots and foliage use water faster | Expect the interval to shorten as seedlings grow |
| Heat mat left on | Warm mix loses water faster after emergence | Remove it when the crop no longer needs bottom heat |
| Steady fan airflow | Surface and edge cells dry sooner | Aim airflow across, not harshly at, tender seedlings |
| Cool weak light | Water use slows while stems may stretch | Improve light and wait for moisture signs before watering |
| Dry mix pulled from cell walls | Water bypasses the plug | Rewet slowly in several passes or wick from below |
A south-facing window can be hot on a clear afternoon and cold near the glass at night.
That swing makes a fixed “windowsill interval” less reliable than a morning weight check.
Clay, fiber, and plastic containers also lose water differently. Unglazed clay and porous fiber usually dry faster through their walls, while plastic cells retain more moisture but may have little storage because they are small.
Group trays by cell size and stage when practical. Watering one uniform tray is easier than trying to give a newly germinated flat and root-filled transplants the same treatment.
How Growing Roots and Leaves Change Water Demand
Cotyledon-stage seedlings use little water compared with stocky transplants carrying several true leaves.
A larger canopy can use the limited water held in a small cell more quickly. A root-filled cell can still hold water, so crowding does not prove that the plug is dry.
Watch the drainage holes and the sides of a removable plug. Roots filling the plug, quicker loss of weight, and a shorter interval between thorough waterings suggest that the container is becoming limiting. Roots merely reaching a cell wall are a normal part of growth; recurring wilt still needs a moisture and health check.
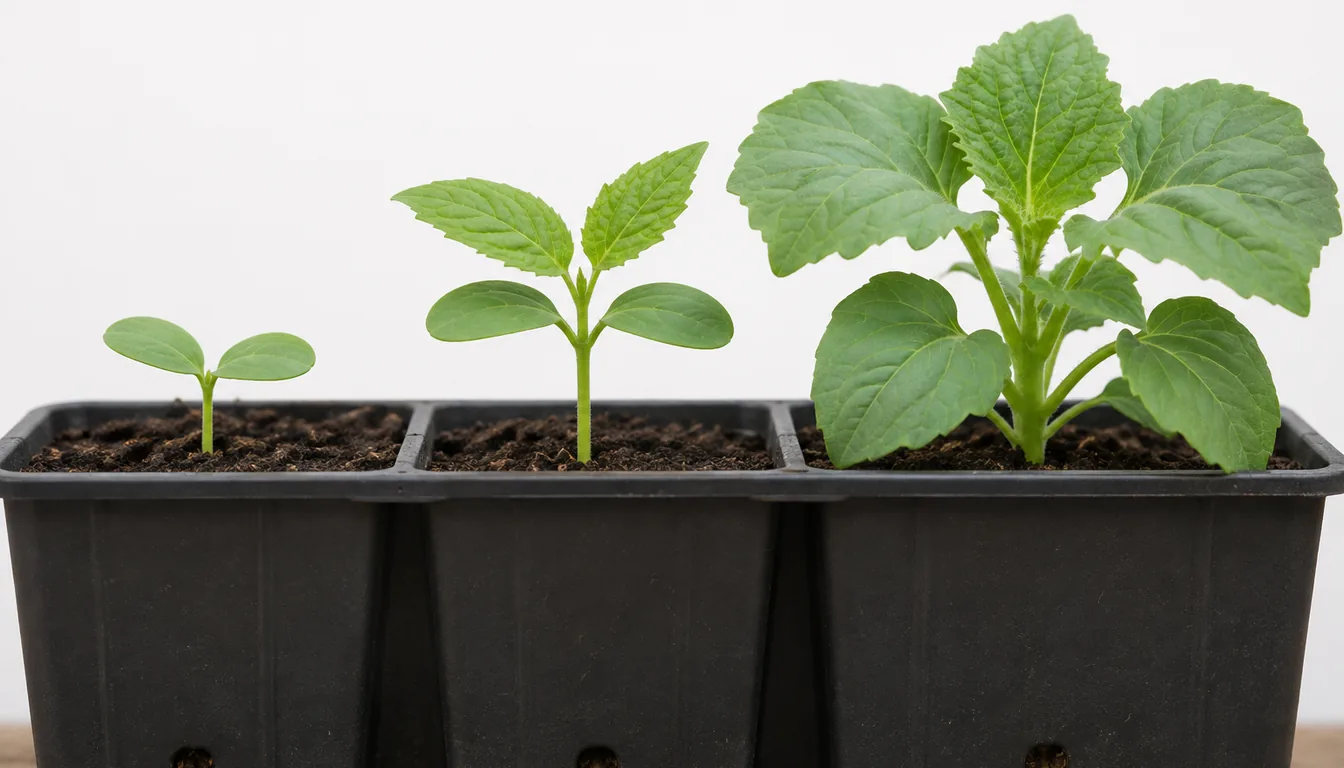
Germinating seed
Keep the sowing zone consistently moist without sealing emerged stems in stagnant humidity.
Cotyledon stage
Wet the small root zone evenly and prevent the plug from drying hard.
Several true leaves
Water the full plug and let the surface approach dry between drinks.
Root-filled cell
Check moisture more often and assess whether the crop needs potting up or is ready for planting out.
Freshly potted seedling
Moisten the new mix evenly, then check both the original plug and surrounding mix before the next watering.
Misting can keep the sowing surface from crusting, but it is not a complete watering once roots extend deeper.
A plant can wilt below a damp-looking top if mist never reaches the lower plug.
A root-filled cell needs more root space, not a permanent puddle. For a crop that tolerates potting up, a suitable larger container adds fresh growing mix and room for roots. The new mix still needs open drainage, and its larger volume may stay moist longer than the original plug.
Drooping Can Mean Dry Mix or Roots Without Oxygen
A thirsty seedling in a light, dry plug often regains firmness after a thorough drink.
A drooping seedling in heavy wet mix needs air and diagnosis rather than another pour.
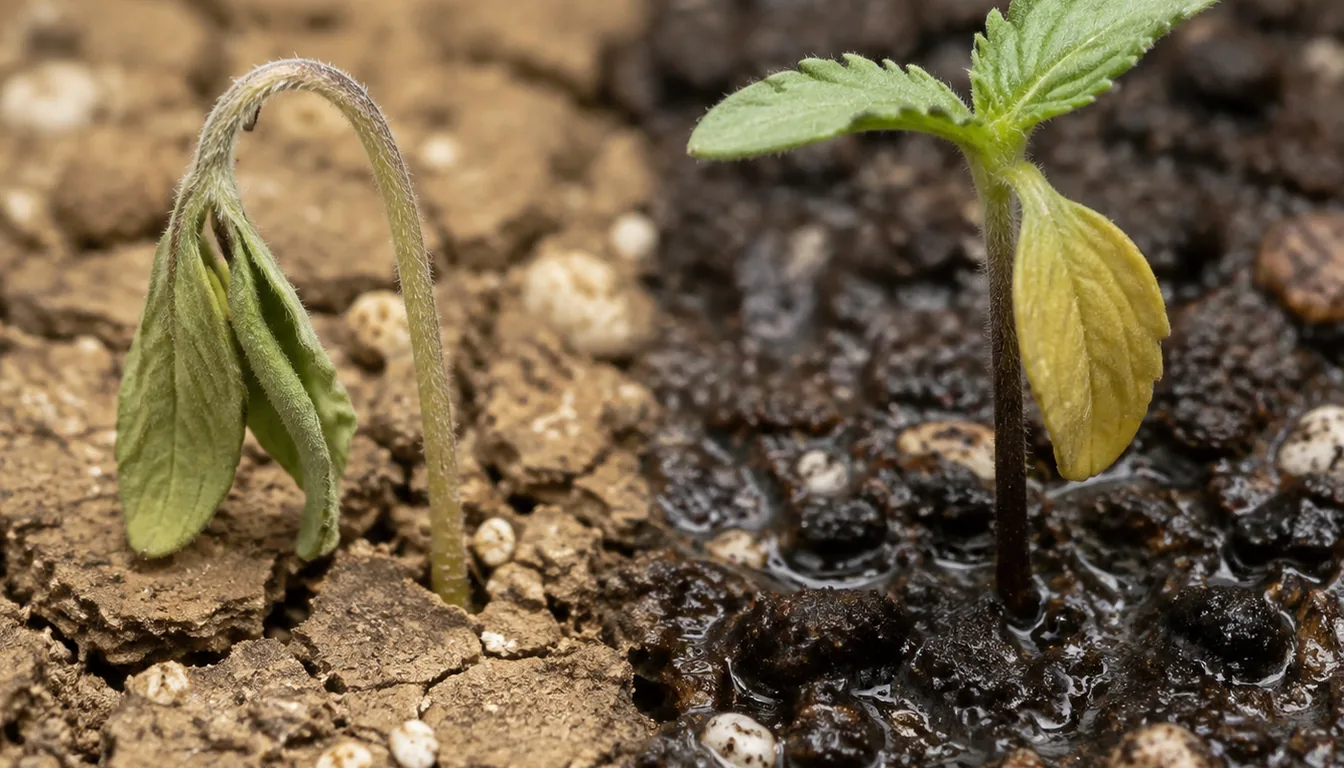
- Light container and pale, dry mix point toward thirst
- Heavy container and glossy or saturated mix point toward excess water
- A pinched, water-soaked stem at the soil line suggests damping-off
- Brown, soft, or sloughing roots suggest root disease or oxygen loss
- Apparently healthy visible roots do not exclude disease elsewhere in the plug. Also consider heat or transplant injury
Damping-off can kill seed before emergence or collapse young seedlings at the soil line.
Several fungi and water molds cause it, and excessive moisture, poor drainage, crowding, contaminated tools or mix, and high humidity increase risk.
Algae on the surface signals persistent light and moisture, but it is not itself proof that every root is rotten. Use it as a reason to review watering frequency, drainage, airflow, and light reaching exposed mix.
Wilt alone cannot identify a pathogen. If losses continue or the cause is unclear, a local Extension plant clinic can assess a sample that includes roots rather than leaves alone.
Outdoor Trays Need More Checks, Not an Automatic Daily Soak
Sun, wind, lower humidity, and warmer container surfaces can empty a small cell quickly outdoors.
Cloud cover, cool air, shade, and rain can extend the interval just as sharply.
Check outdoor trays in the morning and again during the afternoon when conditions are bright, warm, or windy. A second check is not an instruction to water twice, but a chance to catch a small volume before the plants become severely dry.
Place hardening-off trays in bright shade or sheltered light at first, then increase exposure gradually. Wind protection matters because tender leaves lose water faster before their stems and cuticle adapt to outdoor conditions.
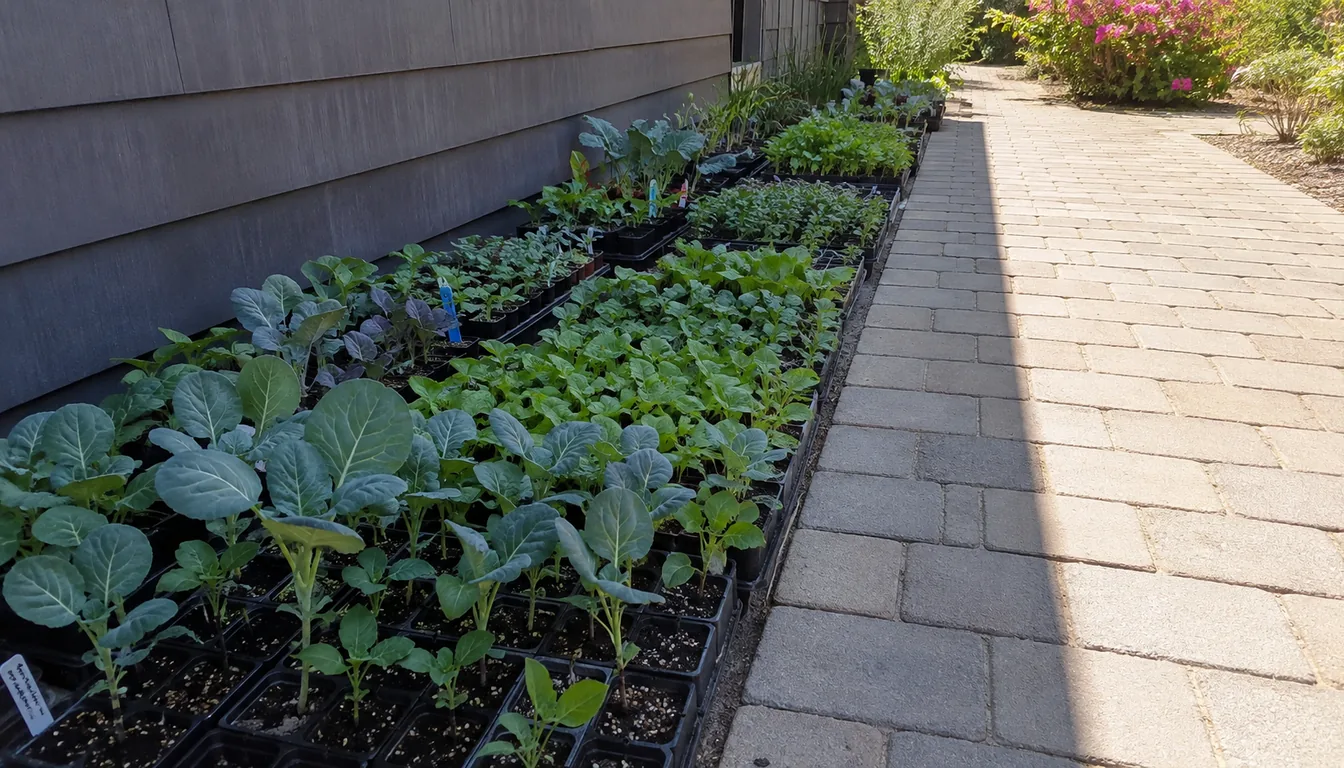
- Move it out of harsh exposureGive shade and wind shelter before deciding the cause.
- Check several cellsEdge plugs may be dry while the center remains moist.
- Water the dry root zoneWet those plugs fully and let the tray drain.
- Shorten the next exposureIncrease sun and wind more gradually after the plants recover.
Water seedlings before transplanting so the root plug is moist and holds together.
Set plants into pre-moistened garden soil. For the establishment period, check the soil beside the root ball because surrounding ground and the original potting mix may dry at different rates.
Rain does not always wet a tray beneath an eave or dense canopy. Confirm the plug rather than recording rainfall from elsewhere in the yard.
When Better Technique Cannot Fix the Container
A tray without open drainage holes cannot provide a dependable wet-to-nearly-dry cycle.
Water collects below the visible surface, so the top can look reasonable while the lower plug remains saturated.
Heavy garden soil is also a poor fit for small indoor cells. It compacts, drains unpredictably, and may introduce organisms into the warm, wet conditions used for germination.
| Problem | What you observe | Correction |
|---|---|---|
| Blocked or missing drainage | Heavy tray stays wet for days | Open drainage or move seedlings to draining cells |
| Hydrophobic dry mix | Water races down gaps at the edge | Rewet slowly in passes or from below |
| Uneven tray | One side stays flooded | Level the shelf and drain the solid tray |
| Oversized pot for tiny roots | Large wet volume changes slowly | Use a container proportionate to the root ball |
| Crowded plug | Dense roots and short intervals between waterings | Assess crop readiness for potting up or planting out; avoid unnecessary root disturbance |
| Shared tray with mixed crops | Cells dry at conflicting rates | Separate crops or sizes into independently watered trays |
Clean containers and fresh soilless seed-starting mix reduce disease risk.
If reusing trays, remove debris and follow current Extension sanitation guidance rather than rinsing visible dirt alone.
Do not solve poor drainage by giving smaller daily sips. The trapped lower water remains, while the shallow upper roots experience an erratic wet-dry pattern.
A Repeatable Daily Moisture Check
Look across the tray before touching it.
Note pale cells, leaning plants, edge drying, standing water, algae, or a patch of collapse.
Lift one side and compare its weight with the tray just after watering. Then test a representative edge cell and center cell because airflow and heat rarely reach them equally.
- ObserveCompare surface color, leaf firmness, and wet or dry patches.
- LiftUse weight to judge how much water remains through the tray.
- TouchConfirm moisture just below the surface in representative cells.
- Water or waitWet ready cells thoroughly; leave adequately moist cells alone.
- Drain and recheckEmpty standing water and confirm the dry plugs actually moistened.
Record only major changes, such as removing a dome, turning off a heat mat, adding a fan, potting up, or moving outdoors.
Those events explain why yesterday's interval may no longer apply.
The best routine is consistent observation followed by variable watering. It supplies water when roots can use it, preserves air in the mix, and adapts as seedlings grow from a damp sowing surface to transplants ready for the garden.
Sources & References
- University of Maryland Extension: Starting Vegetable Seeds Indoors
- University of Minnesota Extension: How to Prevent Seedling Damping-Off
- Penn State Extension: Safeguard Your Seedlings from Damping-Off
- Oregon State University Extension: Growing Vegetables in Central Oregon
- Penn State Extension: Seed and Seedling Biology
Related Guides
A Drought Tolerant Plant Is Not Drought Tolerant Yet
Colorado State puts it in one sentence. Drought tolerant plants are not drought tolerant until…
11 min read
An Overwatered Tree Hides It for a Year, Then Thins
A tree gives you almost no warning. Colorado State says the symptoms of root problems may appear…
12 min read
Best Time to Water Flowers for Stronger Blooms
Watering flowers at the wrong time does more damage than skipping a day.
10 min read
Best Time to Water Indoor Plants: Morning or Evening?
Morning is the better default for watering indoor plants.
6 min read
Best Time to Water Plants for Healthier Roots
Watering at the wrong time wastes water and stresses plants, even if you are generous with the…
11 min read
Deep Watering vs Frequent Watering: What Roots Need
Deep watering usually serves established lawns, vegetables, trees, and shrubs better than repeated…
17 min read