
How to Divide Hostas and Replant Them Safely
Healthy hostas rarely need division for plant health.
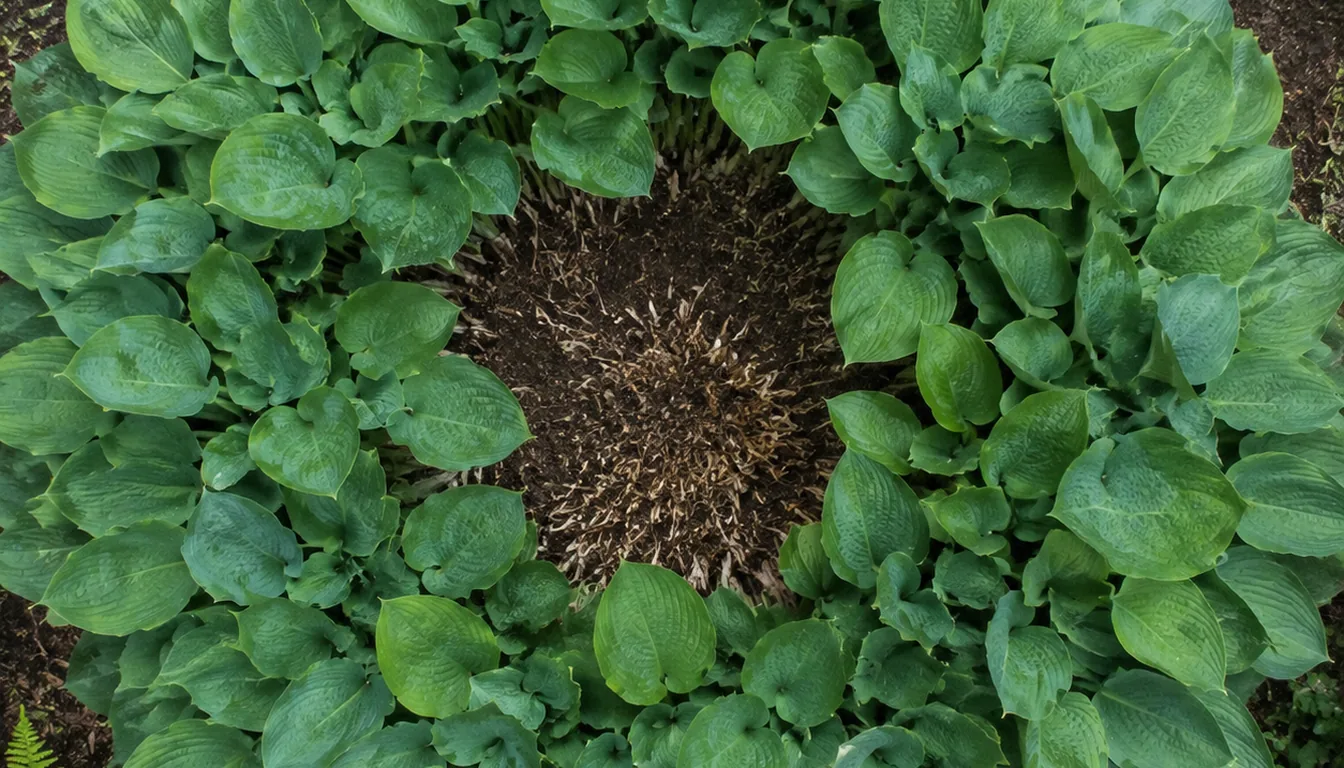
Divide a clump when you want more plants, need to stop it from encroaching on a path or neighbor, or find a declining or dead center.
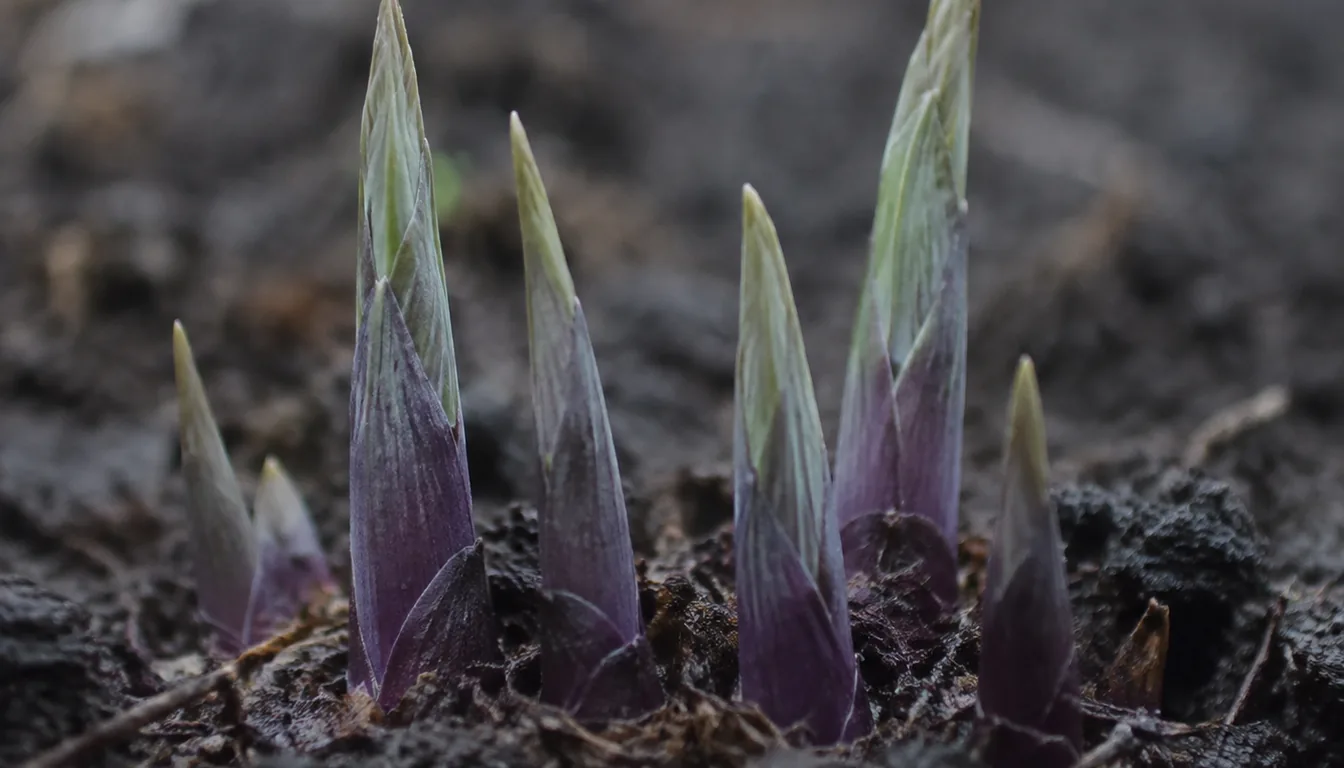
The easiest time is early spring as the pointed eyes emerge, when you can see the growing points before leaves get in the way.
Early fall also works when roots have enough cool, workable time before the ground freezes.
Summer division is possible, but open leaves lose more water while cut roots are trying to recover. If the move cannot wait, choose a cool, cloudy stretch and be ready to protect the divisions from direct sun while you monitor soil moisture closely.
At a glance
Decide Whether the Hosta Needs Division
A calendar does not tell you whether to divide a hosta. Growth rate changes with cultivar, light, moisture, soil, and available space, so a healthy clump can stay undisturbed for many years.
Division provides additional plants, brings an oversized edge back from paving or neighboring plants, and lets you remove a genuinely dead center while keeping healthy outer crowns.
| Situation | Best decision | Why |
|---|---|---|
| Healthy and fits its space | Leave it alone | Hostas can reach their best form when they are not divided too often |
| You want more plants | Divide a mature multi-eye clump | Division increases plant numbers without a fixed schedule |
| Leaves block a path or crowd a neighbor | Remove a wedge or reduce the clump | You keep the useful plant while reclaiming space |
| Center has no live eyes | Lift and inspect the clump | Healthy outer crowns may be saved while dead tissue is removed |
A hole in the foliage is not enough evidence by itself. Part the leaves and check the crown at soil level because shade, animal damage, or a broken leaf can make a healthy center look empty from above.
Do not divide merely because a fixed number of years has passed. A healthy, well-placed clump is better left alone unless you want extra plants.
Choose the Best Time from Growth and Weather
Early spring is the easiest window because the eyes are visible, the foliage is compact, and the plant has a growing season ahead to rebuild roots. Wait until the soil is workable rather than digging through frozen or waterlogged ground.
Early fall is a sound second choice when air temperatures have cooled but the soil is still workable. Use your local ground-freeze history and current weather, then divide only if several cool weeks remain for new roots to settle before repeated freezing and thawing.
| Window | What makes it workable | Main tradeoff |
|---|---|---|
| Early spring | Eyes are emerging and soil crumbles when dug | The ideal eye stage may pass quickly |
| Early fall | Heat has eased and ample rooting time remains before ground freeze | A late start can leave divisions vulnerable to heaving |
| Summer exception | The plant must be moved and a cool cloudy period is available | More leaf damage, wilting, and watering attention |
If the plant is fully leafed out, division is still possible. The leaves make the clump heavier, tear more easily, and demand water from a smaller root system, so postpone the job when there is no urgent reason to move it.
Whenever possible, choose a cloudy, still day so hot sun and wind do not dry the exposed fleshy roots before they return to soil.
Find the Crown, Eyes, and Roots Before Cutting
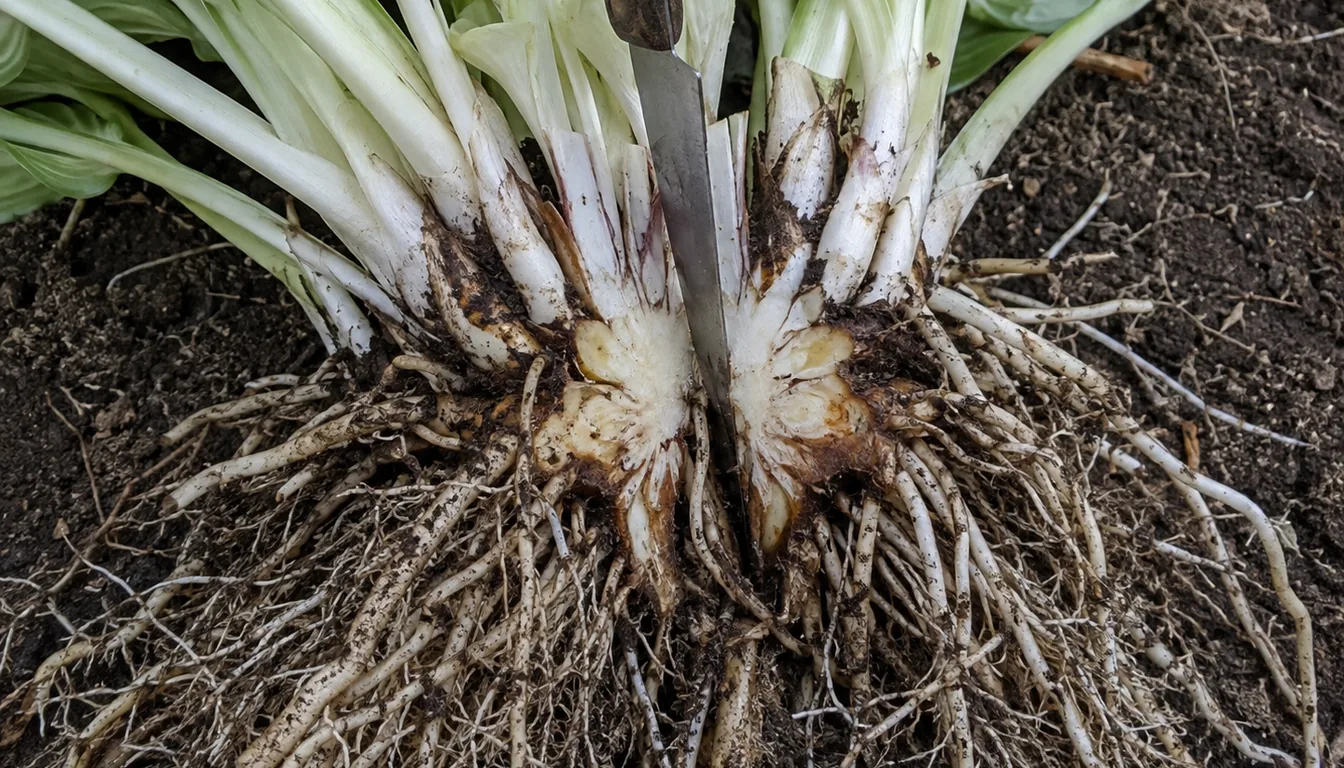
The crown is the firm junction where shoots meet roots at the soil surface.
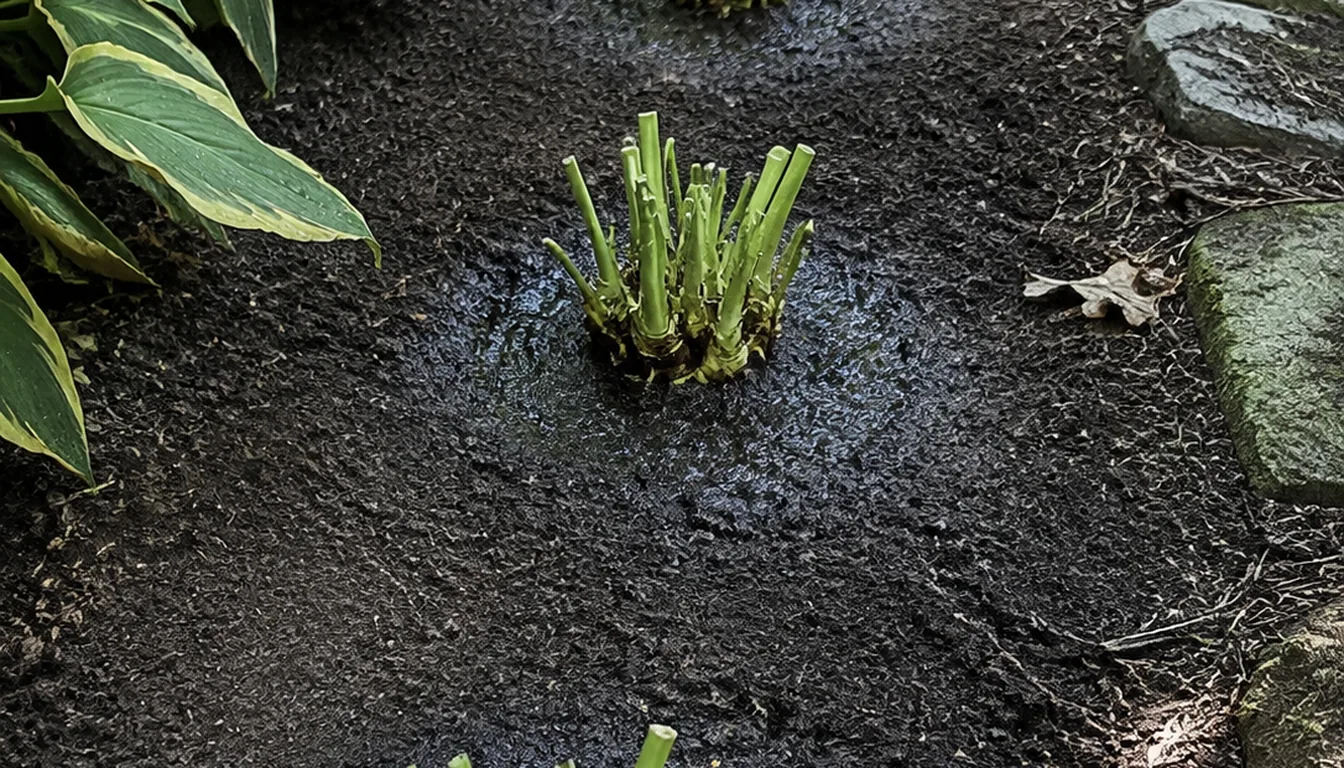
The pointed buds or emerging shoots are called eyes, and the pale fleshy roots below them store water and nutrients.
Every successful division needs crown tissue with at least one viable eye or bud and an attached share of healthy roots. Keeping several eyes together usually produces a full-looking clump sooner, while a small one-eye division needs more time to size up.
- Choose the destination and dig each planting hole before lifting the parent
- Check the cultivar's mature width so each new clump has enough room
- Label cultivars before leaves or roots are mixed on the work surface
- Water a day ahead when the soil is dry, but wait if the ground is saturated
- Set out a tarp, damp towel, or bucket so exposed roots stay shaded and moist
- Clean and sharpen cutting tools, then wear gloves and sturdy footwear
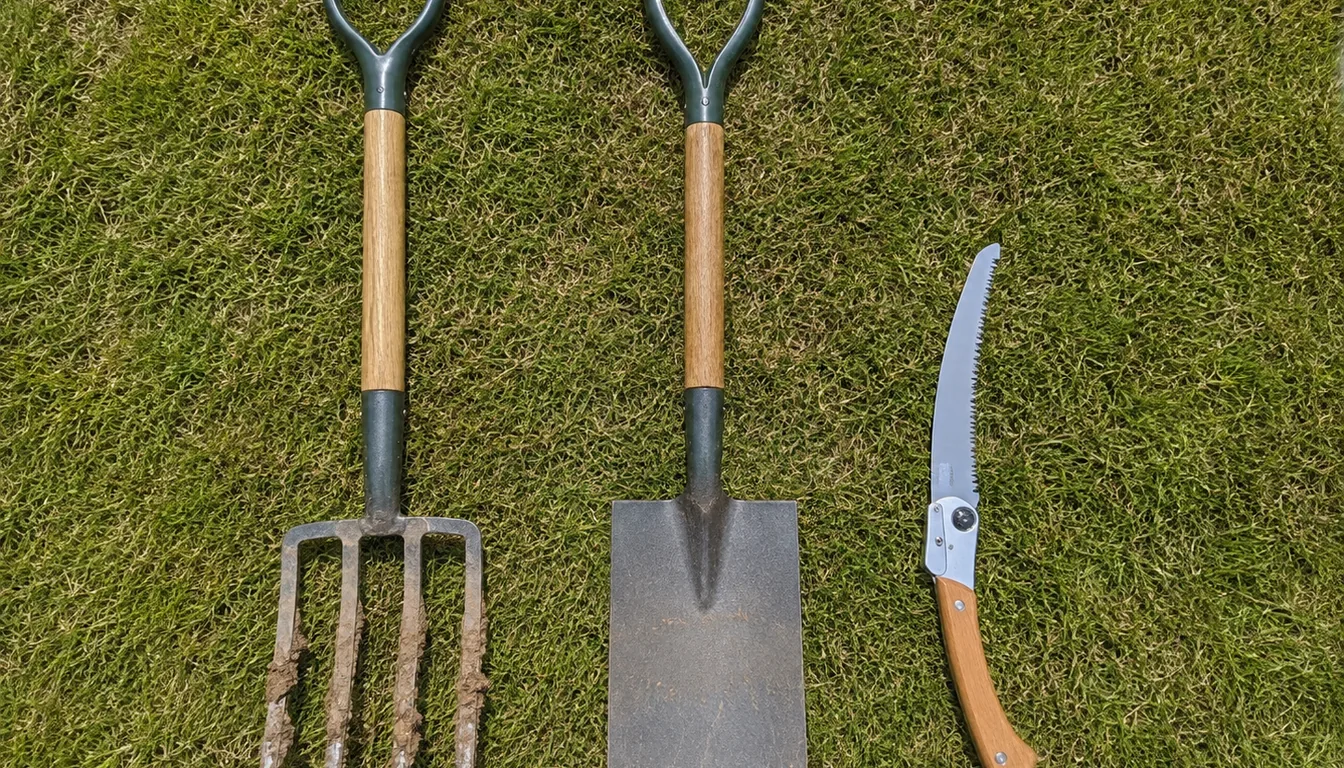
A spade or digging fork can lift a small or medium clump.
Hands or a garden knife may separate young crowns, while a sharp spade, two back-to-back forks, or a pruning saw gives more leverage on a dense old clump.
Use a stable work surface and keep your supporting hand out of the blade's path. A controlled cut through visible crown tissue is safer for you and the plant than repeated chopping at a root ball you cannot see.
Choose a Method That Fits the Clump
Lifting the whole clump gives the clearest view of its crown and roots. It is the best choice for small and medium plants, for a clump with a declining center, or when you want several balanced divisions.
A wedge causes less disruption when a large, established hosta is healthy and you only need one or two pieces. Cut a rooted slice from the outer edge, lift it, and refill the opening so the remaining clump can grow back into the space.
An enormous clump may be too heavy to lift safely in one piece. Cut it into a few large sections while it remains in the ground, then loosen and lift each section from beneath rather than straining against the full root mass.
| Method | Best use | Plant and safety tradeoff |
|---|---|---|
| Lift the whole clump | Small or medium plant, dead-center inspection, or several divisions | Best visibility but most root disturbance |
| Take an outer wedge | Healthy established clump when only a piece is needed | Parent stays mostly in place but the hidden cut needs care |
| Split in place, then lift | Very large clump that is unsafe or impractical to move whole | Less lifting weight but fewer roots are visible during the first cuts |
For example, a giant hosta leaning over a walkway needs only the encroaching edge removed, so a rooted wedge solves the problem with less disturbance.
A medium clump being propagated for sharing is better lifted whole because you can see how many rooted eye groups it can safely provide.
Do not force a chosen number of new plants from the parent. The crown's natural groups of eyes and the amount of root attached should decide how many divisions you make.
Divide the Hosta Step by Step
Move steadily once the clump is out of the ground, but do not rush the cuts. The aim is to preserve useful roots and keep each eye attached to living crown tissue.
- Dig outside the crownFollow the visible spread of the crown rather than a universal radius. Push the spade down around the plant and widen the circle if you meet a mass of thick roots.
- Loosen from several sidesWork underneath the root mass with a spade or fork. Pry a little at a time so one hard pull does not tear most roots from one side.
- Lift with roots attachedRaise the clump from beneath and move it onto a tarp or firm work surface. Cut a very large clump into manageable sections in place when lifting it whole would be unsafe.
- Expose the crownShake away or rinse off only enough loose soil to see the eyes, crown connections, and major roots. Keep the cleaned roots shaded and damp.
- Follow natural separationsPull small groups apart by hand when they release easily. For a dense crown, cut straight through with a sharp knife or spade, or place two forks back to back and pry the halves apart.
- Inspect every pieceKeep at least one firm eye or bud with healthy crown tissue and roots. Several eyes make a larger clump sooner, but do not trim away sound tissue just to make the pieces look even.
- Remove only actual damageCut away a dead, hollow, blackened, or mushy area when inspection confirms it is damaged. Keep firm living crown and roots, even if their shape is irregular.
Set finished pieces in shade under a damp covering and replant them promptly. Roots that dry while you finish another task have a harder start even when the cuts were made well.
If you took a wedge, backfill the opening around the parent and water it thoroughly. Check that the remaining crown still sits at its original soil level.
Replant at the Original Depth and Support New Roots
Set each division with the crown at the same soil level where it grew before. In spring, the growing tips should remain visible at the surface rather than being covered like bulbs.
Spread the roots over loosened soil without sharply folding them upward.
Backfill, firm the soil gently to close large air pockets, and water slowly until the entire root zone is wet.
Space by the mature width of the named cultivar, not by one standard measurement. A miniature hosta and a giant cultivar need very different footprints, so check the plant label or a reliable cultivar description before choosing the final position.
Apply an organic mulch if it suits the bed, but leave a clear ring around the crown. Mulch piled over the eyes holds moisture against crown tissue and can hide a planting-depth problem.
After the first thorough watering, check the soil itself rather than following a fixed daily schedule. Water when the root zone is beginning to dry, and check more often during warm, bright, or windy weather than during cool rainy weather.
Plan for no immediate fertilizer after division. Cut roots need time to establish before they can use added nutrients well, and a soil test should guide any later fertilizer decision.
Temporary wilt and torn leaves are common when hostas are divided after foliage opens.
Small divisions also take longer to form a full clump, so judge progress by firm eyes and new growth rather than expecting every piece to look mature in the same season.
Troubleshoot a Division That Is Not Settling In
Start with the crown and root zone because several problems produce the same drooping leaves. Check planting depth and soil moisture before assuming the plant needs fertilizer or more water.
| What you see | First check | What to do |
|---|---|---|
| Eyes fail to advance | Crown may be buried | Brush soil and mulch back to the original crown level without exposing roots |
| Leaves wilt and soil is dry | Root ball may not be wet through | Water slowly across the full root zone, then recheck below the surface |
| Leaves wilt and soil stays wet | Drainage may be poor | Stop routine watering, pull mulch back, and let air return to the root zone |
| One piece lags far behind | It may have too little root for its leaf area | Give it steady moisture and shade from hot afternoon sun while roots rebuild |
| Scorched or collapsed foliage | Sun, heat, or wind may exceed the reduced roots' supply | Provide temporary shade and water according to soil moisture |
| Lower leaves yellow or brown, then collapse | Hosta petiole and crown rot may be present | Inspect the leaf bases and crown before moving any division |
Soft, brown, mushy leaf bases that detach easily can support a diagnosis of hosta petiole and crown rot. White fungal threads or a mat, or small round sclerotia near the crown, strengthen that suspicion.
These signs may still need confirmation from a plant diagnostic clinic.
Do not move suspect divisions to another bed. Remove an infected plant, then scrape or wash soil from tools before using them elsewhere.
A division with no viable eye and almost no roots does not have the parts needed to establish well.
Do not remove sound leaves simply because they are torn. Trim only badly damaged or collapsing foliage, since remaining green tissue still helps the division rebuild.
Pro Tips
- Count eyes before cutting, then turn the clump over and confirm that each planned piece also has roots.
- Label named cultivars before the divisions leave the work surface because bare crowns can look alike.
- Carry a large clump on a tarp instead of lifting it by the leaves or leaf stems.
- Keep an unplanted division shaded and wrapped in a damp material while you prepare its hole.
- Use the mature width on the cultivar label to place divisions, even when the new pieces look small.
Frequently Asked Questions
Can I divide a hosta while it is flowering?
Wait until it is not flowering when you have a choice. Dividing outside bloom lets the plant direct its energy toward root and leaf growth.
Will a divided hosta bloom in the same year?
It may bloom, but division can reduce or delay flowering while the plant rebuilds roots and leaves. A lack of flowers in the first season does not by itself mean the division failed.
Can extra hosta divisions be planted in containers?
Yes. Use a container with drainage, set the crown at its original depth, and water the entire pot after planting. Container soil changes temperature and dries faster than garden soil, so check it more often.
What should I do if freezing weather arrives after a fall division?
Keep the soil from drying out before freeze-up. After the ground freezes, a loose winter mulch can reduce repeated freezing and thawing that may heave a newly rooted crown upward, but keep that mulch away from the crown when growth resumes.
Sources & References
- Dividing Perennials, Clemson Cooperative Extension
- When Is the Best Time to Divide Hostas?, Iowa State University Extension and Outreach
- Hosta Petiole and Crown Rot, Iowa State University Extension and Outreach
- When Should I Divide My Perennials?, University of New Hampshire Extension
- Hostas, University of Minnesota Extension
Related Guides

Best Butterfly Garden Plants for a Complete Habitat
The best butterfly garden plants do two different jobs. Host plants feed caterpillars, while nectar…
15 min read
Best Fall-Blooming Flowers for Color Near Frost
A bed that still carries flowers in October usually was planned before temperatures fell.
9 min read
Best Fast-Growing Trees for Shade and Privacy
The best fast-growing tree is the one whose mature crown, roots, climate range, and maintenance…
16 min read
Best Fragrant Flowers for Every Yard and Season
The best fragrant flowers depend on climate, light, space, and the hours you use the yard.
15 min read
Best Full-Sun Perennials for Hot, Bright Beds
The best full-sun perennials are the ones that match the bed's soil moisture and drainage, local…
14 min read
Best Ground Cover Plants for Sun, Shade, and Slopes
The best ground cover is a plant that survives the site and performs the job without escaping into…
18 min read