Fertilizingschedule11 min read
Composting Facts That Actually Help Your Garden
Straight answers on composting facts that matter for home gardens, from what to put in the pile to how long it really takes to get usable compost.
Good composting facts save you time, space, and a lot of bad smells. This guide focuses on numbers and details that change how your pile works. We will cover carbon to nitrogen ratios, moisture targets, temperature ranges, and how long real-world piles take.
We will also connect those facts to everyday decisions, like whether your yard suits a hot pile or a slow corner heap. If you fertilize a bed of tomato plants, keep reading so your compost helps growth instead of stealing nitrogen.
compostWhat Compost Really Is (And Is Not)
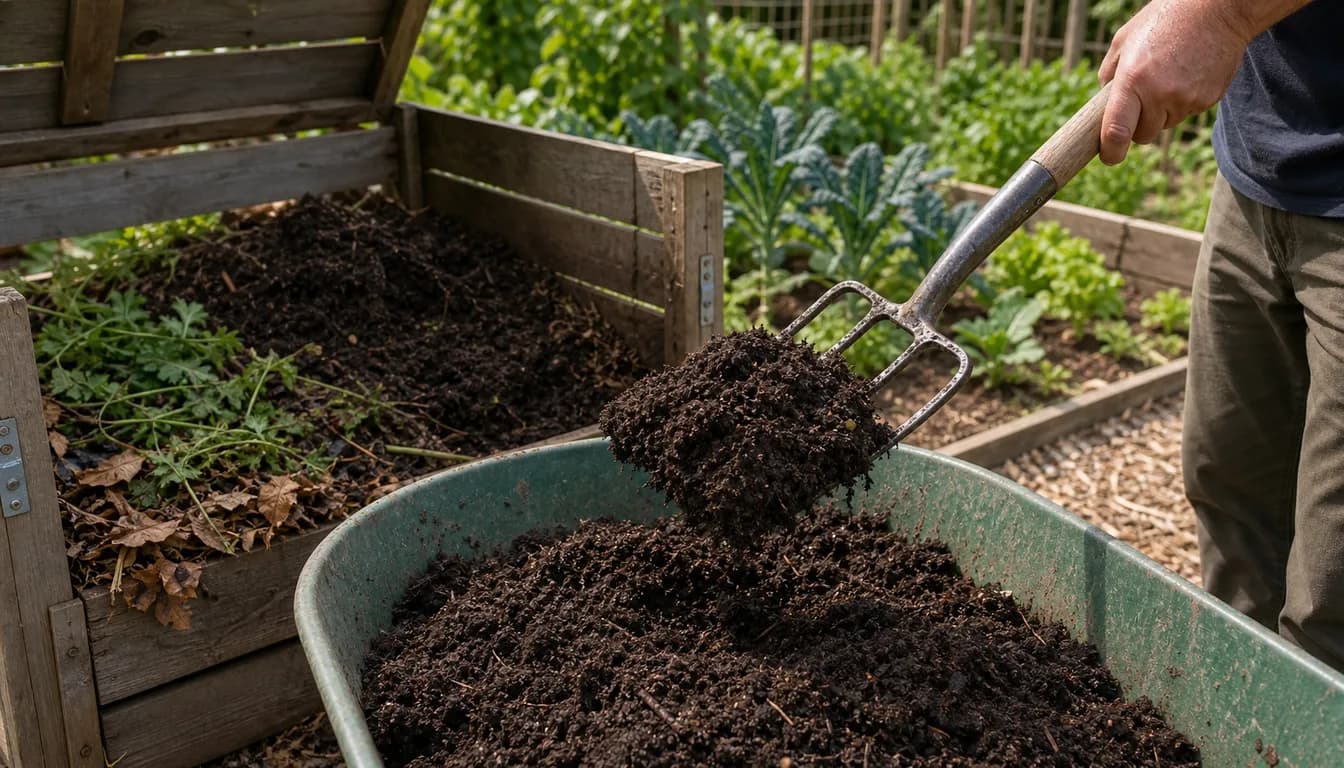
Compost is simply decayed organic matter that has passed through an active, living process. Bacteria, fungi, and tiny critters break down kitchen scraps and yard waste into a stable, soil-like material.
That stability matters. Half-rotted material still looks like old leaves or chips and can rob nitrogen from beds until it finishes breaking down. Finished compost looks dark, crumbly, and smells like forest soil, not garbage.
In a healthy pile, microbes eat, breathe, and multiply; they need four things in balance: carbon, nitrogen, water, and air. Get that balance close, and the pile heats up and shrinks fast.
Most failed compost piles are just out of balance, not truly broken.
If a pile smells like rotten eggs, it is not "too strong", it is too wet and air starved.
That smell usually means you need to open the pile up before you add anything else.

Finished compost looks dark, crumbly, and no longer shows clear food or leaf pieces.
- fiber_manual_recordCarbon sources: Dry leaves, straw, paper, cardboard, wood chips
- fiber_manual_recordNitrogen sources: Fresh grass clippings, food scraps, coffee grounds, manures
- fiber_manual_recordMoisture target: As damp as a wrung out sponge
- fiber_manual_recordOxygen supply: Fluffy structure plus turning or poking every few weeks
scienceBrown to Green Ratio: The Math That Matters
Carbon to nitrogen ratio sounds technical, but you do not need a calculator. You just need to favor browns over greens and watch how the pile responds over a few weeks.
Browns are carbon rich. Think dry leaves, straw, shredded cardboard, and sawdust. Greens are nitrogen rich, like kitchen scraps, grass clippings, and fresh plant trimmings from beds of basil or cut-and-come greens.
The science sweet spot is roughly 25–30 parts carbon to 1 part nitrogen by weight. In real yards that translates to about two to three buckets of browns for every bucket of greens you add.
If your pile stays soggy and stinky, you have too many greens or not enough airflow. If it stays dry and does not shrink, you have too many browns or too little moisture.
Add more browns first when troubleshooting, not more greens. Extra greens are what cause odors.
That one move fixes more backyard piles than any additive or compost starter ever will; it is the fastest correction most people can make.

Alternate brown and green layers to hit a workable carbon to nitrogen ratio.
- fiber_manual_recordEasy rule: Layer 3 inches of browns, 1 inch of greens, then repeat
- fiber_manual_recordFor grass clippings: Mix each mower bag with equal volume of dry leaves
- fiber_manual_recordFor kitchen scraps: Cover every deposit with at least 2 inches of browns
- fiber_manual_recordFor paper/cardboard: Shred to strips so it does not mat and block air
Guide — See AlsoBest Fertilizer for Vegetables by Garden TypeLearn how to pick the best fertilizer for vegetables by crop group, soil condition, and garden setup so you feed beds, r
chevron_rightthermostatTemperature, Speed, and How Long Compost Takes
Compost does not have to steam to work, but heat tells you microbes are happy and moving fast. A true hot pile runs between 130 and 160°F, which kills most weed seeds and many disease organisms.
You can track this with a long compost thermometer, or just by feel. If the center feels noticeably warm to your hand, you are in business. A hot, well built pile in an average backyard can finish in 8–12 weeks if it is turned often.
Cool, slow piles sit closer to air temperature and may never steam. They still break down over 6–12 months, which is fine for tucked away corner heaps behind a row of hydrangea shrubs.
More turning usually means faster compost, but a neglected pile still finishes.
Never add diseased plant material to a cool pile. Low temperatures will not kill those problems before you spread the compost.
That is the line between compost that is merely slow and compost that spreads trouble back into the bed.
- fiber_manual_recordHot pile size: At least 3 ft wide, 3 ft tall, and 3 ft deep
- fiber_manual_recordTurn hot piles: Every 7–14 days once they peak in temperature
- fiber_manual_recordTurn cool piles: Every 4–6 weeks or whenever you remember
- fiber_manual_recordCheck doneness: No visible food scraps and a steady, earthy smell
Email Updates
Join the KnowTheYard update list
Zone-specific advice, seasonal reminders, and new plant guides — no filler.
warningWhat You Can and Cannot Compost Safely
Most yard and kitchen scraps are fair game for home compost, but a few categories cause trouble. Knowing which is which keeps your pile safe for vegetables, trees, and flower beds.
Safe basics include fruit and vegetable scraps, coffee grounds, tea bags without plastic, crushed eggshells, yard leaves, small twigs, and grass clippings that have not been treated with long lasting herbicides.
Problem materials fall into three buckets, persistent chemicals, disease risks, and pest magnets. Pet waste, glossy or heavily inked paper, and anything soaked in motor oil or solvents should stay out. Meat, dairy, and large amounts of cooked food attract animals fast.
If you use herbicides on treated bermuda lawns, do not compost those clippings unless the label specifically allows it.
That label check matters more than people think, because persistent herbicides can move straight from the pile into next season's seedlings.
- fiber_manual_recordUsually safe: Veggie scraps, plain coffee, tea, dry leaves, straw, untreated chips
- fiber_manual_recordUse caution: Weedy seed heads, nut shells, citrus peels in large amounts
- fiber_manual_recordSkip entirely: Meat, bones, dairy, oils, pet waste, coal ash
- fiber_manual_recordCheck labels: Grass from lawns sprayed with broadleaf weed killers or "weed and feed" products
Guide — See AlsoWhen to Apply Fertilizer to Your Vegetable GardenLearn exactly when to apply fertilizer to your vegetable garden by soil type, crop, and growth stage so you get steady h
chevron_rightpotted_plantUsing Finished Compost in Beds and Containers
How you use finished compost matters just as much as how you make it. Treated right, it behaves more like a slow, gentle fertilizer than a bag of potting soil.
For in-ground beds, spread a 1–2 inch layer on top of existing soil, then lightly mix the top couple inches with a fork. That is usually enough for heavy feeders like tomato plants.
Around shrubs and trees, keep compost a few inches away from trunks. A 2 inch donut around the drip line feeds roots without piling against bark on a young apple tree sapling.
Container plants need a lighter hand. Mix 10–25% compost into potting mix, then back off on synthetic fertilizer or follow a lower-strength schedule from your indoor feeding plan.
Thick layers of compost right against stems can invite rot and vole damage.
That is why topdressing works better than burying compost deep against stems or trunks.
Lawns respond best to a thin topdressing. Screen compost through half-inch mesh, then rake in 1/4–1/2 inch over cool-season turf like home fescue lawns. Water it in so it sifts down to the soil surface.
In vegetable beds, side-dress long-season crops. Pull mulch back, sprinkle a 1 inch band of compost along the row of sweet corn stalks, then cover again. Water after you apply it.
Perennial borders are easy. Each spring, add an inch of compost between clumps of hosta foliage, then re-mulch. Daylily fans get stronger growth from the same steady layer without separate fertilizer products.
Treat compost as a soil booster, not a complete replacement for potting mix in most situations.

Use a thin layer of finished compost on top of existing soil, then water it in.
quizTroubleshooting Common Compost Problems
Most compost issues come back to three levers, air, moisture, and the brown to green balance. Once you know which lever to pull, fixes are fast.
A pile that smells like rotten eggs is starved for oxygen. Fluff it with a fork, add two parts dry browns like shredded leaves, and skip watering until it smells earthy again.
A bone-dry pile that never heats up needs moisture and nitrogen. Add a few inches of fresh greens, like grass clippings or weeds without seed heads, then water until it feels like a wrung-out sponge.
If you see swarms of fruit flies, cover every new kitchen layer with at least 2 inches of browns. Make a habit of tucking food scraps inside the pile instead of leaving them on top.
Rodent problems usually mean exposed food. Bury scraps deeply or switch to a sealed tumbler.
Slow, barely-warming compost is often short on greens. Mix in thin layers of fresh grass from areas away from recent pest treatments, coffee grounds, or garden trimmings until the pile hits at least 3 feet tall.
If a pile is sloppy and oozing, you overshot on greens or water. Fork the wet core into a new stack, layering with plenty of shredded cardboard or dried stalks of last year’s corn patch, then leave the bin open to breathe.
Persistent weeds sprouting from finished compost usually mean you never reached 130–150°F. Use that batch under shrubs or trees instead of in seed beds, and aim for a hotter pile next time.

Most compost problems disappear once you adjust moisture, air, and the brown to green balance.
Guide — See AlsoBest Time to Fertilize Your Lawn Around RainfallLearn exactly how to time lawn fertilizing with rain so you do not waste product, burn grass, or pollute runoff.
chevron_rightcalendar_monthSeasonal Timing and Cold Climate Adjustments
Compost behaves very differently in zone 3 than in zone 9, mostly because of temperature and how long the pile stays active. Your timing just has to match your climate.
In colder areas like zone 4 yards, build or refresh piles in late spring once nights stay above 50°F. That gives microbes a long, warm run before winter slows everything down.
We have good luck building a big fall leaf pile in zone 5, then waking it up with grass clippings and kitchen scraps the next spring. It will not fully finish over winter, but the head start pays off.
Gardeners in zone 8 and warmer can compost almost year-round. Shading the bin and keeping it slightly damp matters more than timing, especially if you grow heat lovers like pepper plants that drop lots of prunings.
Frozen piles are not dead, just paused. Do not bother turning them until the core thaws.
Winter still has jobs. Keep adding browns and frozen kitchen scraps to a holding bin, then fold all that into the active pile once spring soil thaws in zone 6 gardens.
Hot, dry summers dry piles fast. In zone 9–11, cover open heaps with a tarp or old carpet and check moisture weekly. Add water whenever a squeezed handful will not clump.
If your main goal is feeding a vegetable garden, back time your compost. Aim to have a finished batch ready a few weeks before you plant heavy feeders like pumpkin vines. Broccoli heads benefit from that same finished batch before cool-season planting.
yardChoosing Bins, Tumblers, and Simple Piles
Your compost system should match your space, muscle, and how fast you want results. Fancy bins are optional. Good contact with air and moisture is not.
Open heaps on bare soil work well if you have room. They let worms and soil life move in and help break things down, especially under spreading shrubs like spirea hedges.
Enclosed bins keep things neater in small yards. A simple 3×3 foot wooden or wire bin handles most family food scraps and fall leaves without attracting much attention.
Tumblers trade labor for convenience. Turning a drum every few days adds air without a fork, which is handy if you are working around tight spaces or formal boxwood borders.
Small tumblers fill quickly. Plan where extra fall leaves and clippings will go.
If you have lots of material, a three-bin system shines. One bin is for fresh additions, one is in the middle stage, and one is finishing. This keeps finished compost separate from new scraps.
Urban balconies can still compost. A sealed tumbler or worm bin handles kitchen waste, then you can use that compost on containers of balcony basil or return it to a community garden bed.
No matter the system, make sure there is airflow. Drill extra holes, leave small gaps between boards, or run perforated pipes through tall piles so the core does not go anaerobic.
Guide — See AlsoWhen to Fertilize Lawn in Fall for Strong Spring GrowthLearn the right fall fertilizing window for cool- and warm-season lawns, how soil temperature affects timing, and how to
chevron_righttips_and_updatesAdvanced Composting Tricks and Easy Mistakes to Avoid
Once you have basic composting down, a few small tweaks make piles faster, safer, and more useful. The same tweaks also prevent many beginner mistakes.
Shredding is the easiest upgrade. Run leaves through a mower or chip woody stems before adding them. Pieces under 2 inches break down much faster than whole branches from pruning a lilac thicket.
Layering materials loosely, instead of packing them, speeds airflow. Alternate four to six inch layers of browns and greens to keep that carbon to nitrogen balance close without doing constant math.
Moisture mistakes are common. Sprinkling lightly each time you add a green layer usually works better than soaking a dry pile once a month in beds near thirsty hydrangea shrubs.
Shiny food packaging labeled "compostable" often needs industrial heat and can linger in home piles.
If you are short on greens, dilute a bit of fish fertilizer, urine, or unfinished manure tea and sprinkle it over dry layers. That can kick-start a sluggish heap without adding more volume.
Avoid relying on compost for every nutrient need. Heavy feeders like sweet corn and indeterminate tomatoes often still benefit from a targeted feeding based on your vegetable fertilizing schedule.
The fastest compost piles always balance plenty of air with steady, moderate moisture.
Do not stress over perfection. The biggest mistake is never starting a pile at all, or throwing good material in the trash that could be feeding next year’s beds of garden roses.
tips_and_updates
Pro Tips
- check_circleKeep a small countertop pail so kitchen scraps make it to the compost instead of the trash.
- check_circleChop big pieces like melon rinds or broccoli stems to palm size so they break down faster.
- check_circleStore a bin of shredded leaves or cardboard nearby so you can cover wet food scraps immediately.
- check_circleIf the pile dries out, water it in layers like a cake instead of soaking the top only.
- check_circleIn cold climates, build piles in fall so they have enough mass to stay active into winter.
- check_circleUse finished compost as a 1–2 inch topdressing around established roses instead of digging it deep.
- check_circleSift finished compost through hardware cloth if you want a finer product for seed starting mixes.
quiz
Frequently Asked Questions
How long does it really take to make usable compost?expand_more
In a well-balanced hot pile, you can get usable compost in 8–12 weeks. A passive heap that you rarely turn often takes 6–12 months, especially in cooler climates with short summers.
Can I use compost instead of fertilizer?expand_more
Compost improves soil structure and adds gentle nutrients, but it is usually not concentrated enough for heavy feeders. For crops like large tomato vines or sweet corn rows, combine compost with targeted fertilizer as needed.
Is compost safe for houseplants and indoor pots?expand_more
Yes, in small amounts. Mix 10–20% compost into fresh potting mix for plants like sturdy snake plants. Trailing pothos can use the same light blend, but avoid dense, un-screened compost that stays soggy indoors.
Why does my compost pile never heat up?expand_more
A cool pile usually lacks nitrogen, moisture, or size. Aim for at least 3×3×3 feet, add more green materials, and water until it feels like a wrung-out sponge. Turning more often also helps raise the temperature.
Can I compost weeds and diseased plants?expand_more
You can compost most weeds before they go to seed. Avoid diseased plant material and woody stems from things like infected rose canes unless you are certain your pile consistently reaches 140–160°F for several days.
menu_book
Sources & References
Related Guides

Benefits of Composting for Healthier Soil and Plants
Learn how composting turns kitchen scraps and yard waste into free fertilizer, improves soil, and boosts plant health in any size garden.
12 min read
Best Fertilizer for Indoor Plants
Learn how to choose the best fertilizer for indoor plants by growth style, season, and pot size without burning roots or overfeeding slow growers.
14 min read
Best Fertilizer for Vegetables by Garden Type
Learn how to pick the best fertilizer for vegetables by crop group, soil condition, and garden setup so you feed beds, rows, and containers without wasting nutrients.
11 min read