
When to Harvest Butternut Squash So It Ripens Fully and Keeps
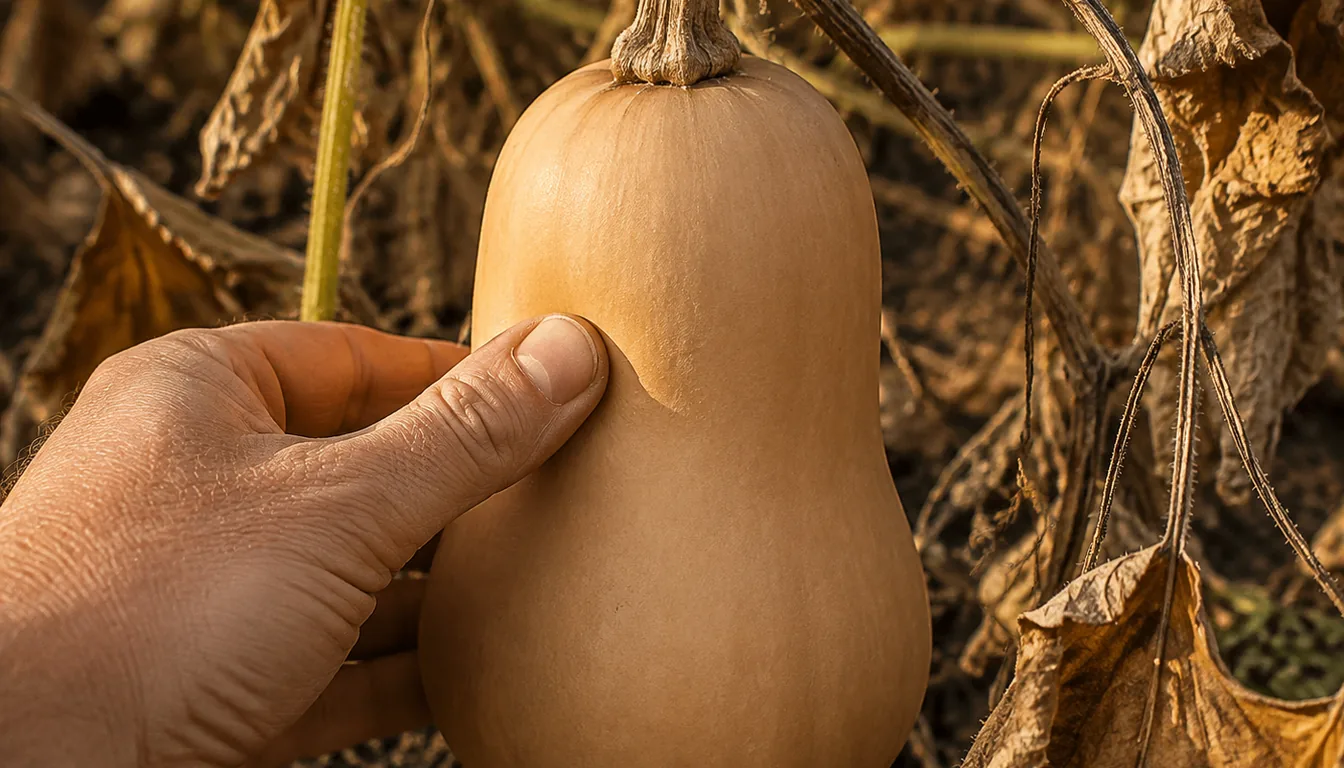
Butternut squash is ready to cut when the whole rind has turned an even, dull tan, a thumbnail pressed into it leaves no dent, and the fruit has had about 50 to 55 days on the vine since its flower was pollinated. The tan color shows up roughly two weeks before the fruit is mature, so a squash picked the week it colors is usually picked early.
Weather sets the outside limit. A light frost kills the leaves without hurting mature fruit, but a freeze near 28°F that lasts more than a couple of hours damages the fruit, so mature fruit should be off the vine before that night. After harvest, curing and a 50 to 55°F shelf decide how long the squash keeps, and the first month or two of storage is also when butternut turns its starch into sugar.
At a glance
Why a Tan Butternut Can Still Be Two Weeks Early
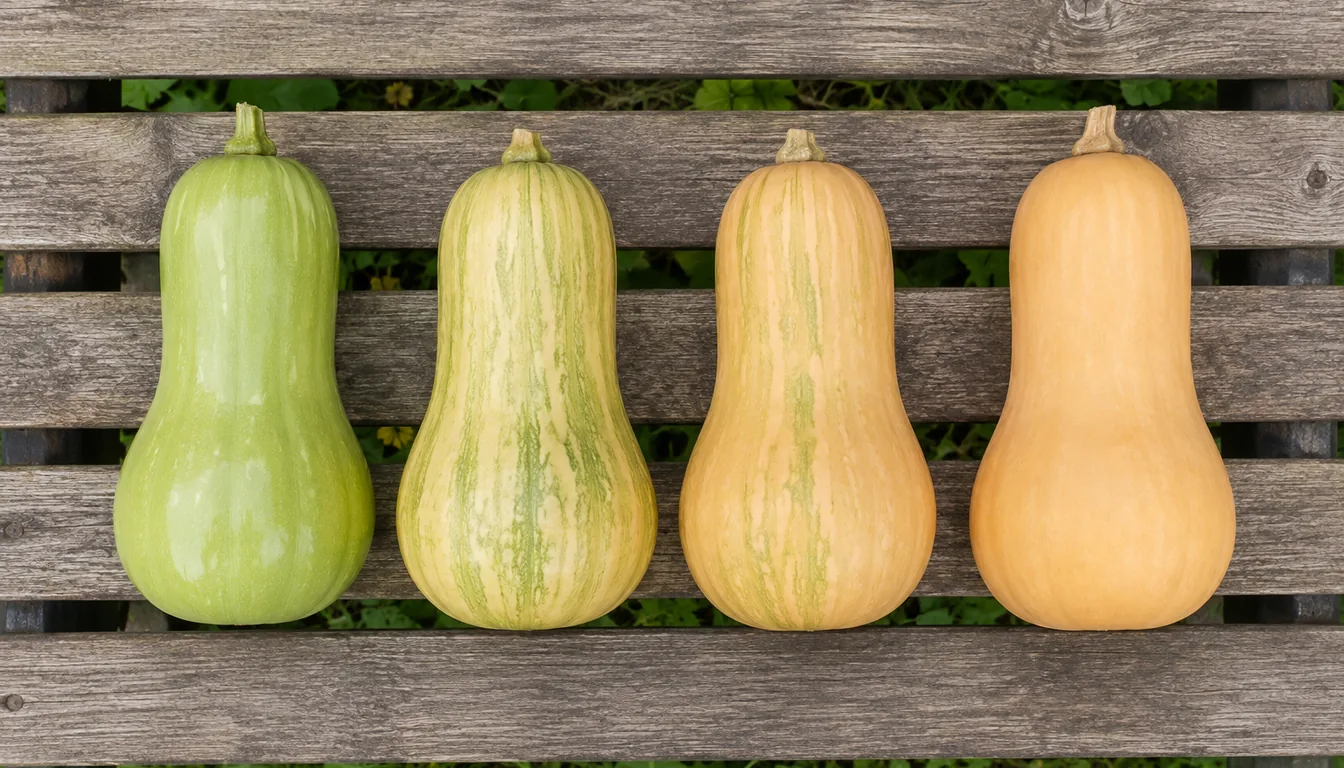
Each squash ripens on its own clock, which starts the day its flower is pollinated. University of Massachusetts vegetable specialists report that most winter squash reaches maturity 50 to 55 days after fruit set. Butternut turns tan at about 45 days, so a fruit that has just finished coloring still needs about two more weeks on the vine.
Those two weeks are about the seeds. A mature squash has completely filled seeds. When a squash is cut before that point, it keeps filling its seeds after harvest and pulls starch out of its own flesh to do it. The flesh turns out poorer in texture, and there is less starch left to become sugar during storage.
Because fruit sets over several weeks, one vine can carry a ripe squash and a green one at the same time. Tagging a few fruits with the date their flowers opened turns the 50 to 55 day count into a real harvest date for each one.
- Rind turns tan
- About 45 days after pollination
- Fruit fully mature
- About 50 to 55 days after pollination
- Seed packet days to maturity
- Counted from sowing, so it marks when checks begin
- Freeze limit for fruit
- About 28°F for more than a couple of hours
Rind and Surface Checks That Confirm Ripeness
Checks on the fruit itself confirm what the date suggests. They work best together, because a fruit can pass one and still be short of maturity.
The rind should be evenly tan with no green streaks. Iowa State University Extension's test is that the skin cannot be punctured with a thumbnail. South Dakota State University Extension describes the same stage as a shell hard enough that a fingernail barely marks it, with a surface that has gone dull rather than glossy. A nail that sinks in or leaves a groove means the rind has not finished hardening.
The stem is a weaker signal on butternut than on some other squash. UMass names a dry, corky stem as the harvest cue for kabocha, buttercup, and hubbard types, which belong to a different species. For butternut, UMass relies on the tan color plus the extra two weeks, so the thumbnail test and the date carry more weight than the stem.
The ground spot, where the fruit rested on the soil, often ends up a different color from the rest of the squash. That difference is normal and does not by itself mean the fruit is unripe.
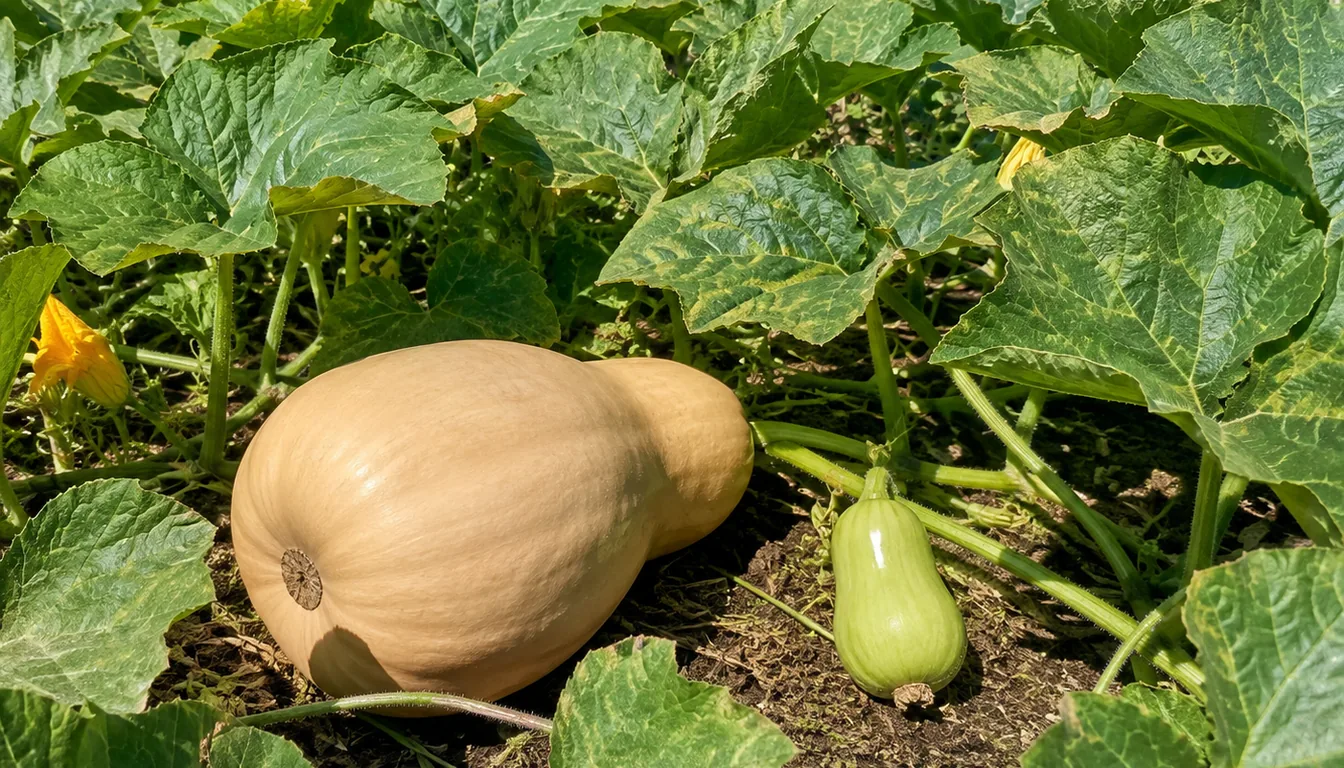
- Rind evenly tan, with no green streaks
- Surface dull rather than shiny
- A thumbnail pressed into the rind leaves no dent
- About 50 to 55 days since the flower opened, or two weeks since the fruit turned tan
- No cracks, soft spots, or holes on fruit meant for storage
Using Days to Maturity Without Picking by the Calendar
Seed packets give days to maturity, and for butternut the number is long. Johnny's Selected Seeds lists 'Waltham Butternut' at 105 days from direct seeding and advises subtracting about 14 days for transplants, since those plants spent their first weeks in a pot.
That figure tells you when the first fruit could be ready. It does not cover a squash pollinated in late summer, which is weeks behind one set in July on the same vine. The packet number is a good date to start checking rinds, and the 50 to 55 day count from pollination decides each fruit.
The same count shows which late fruit has a chance. Counting back about 55 days from your average first fall frost gives the last useful fruit-set date. A squash pollinated after that point is unlikely to mature before cold weather, and those are usually the small green fruits still on the vine at frost. A first frost date for your ZIP code makes that count specific.
Where frost comes late or not at all, the same rind and date checks still decide harvest. Mature fruit can come in as soon as it passes them instead of waiting for fall.
What a Light Frost and a Hard Freeze Do
Frost harms the plant and the fruit at different temperatures. Illinois Extension notes that a light frost will kill squash vines but won't harm the fruit. A hard freeze is different. South Dakota State University Extension puts the danger point at temperatures near 28°F for more than a couple of hours, and fruit that freezes generally does not store well afterward.
Cold that never reaches freezing counts too. UMass specialists explain that squash builds up chilling injury whenever it sits below 50°F, in the field or in storage, and the injury grows as temperatures drop and the hours add up. A run of nights in the low 40s before the first frost is already shortening storage life, which is a reason to bring mature fruit in when it is ready instead of at the last possible night.
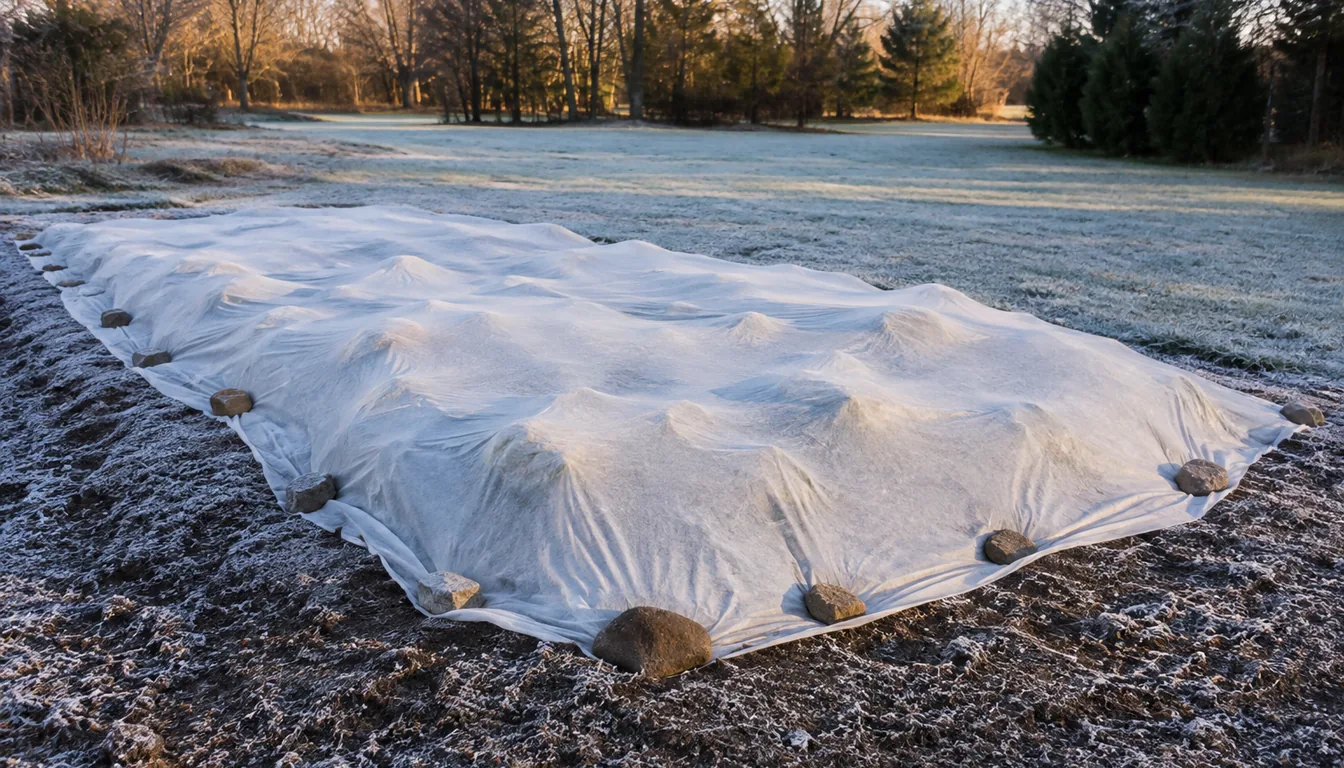
For a single cold night, SDSU suggests covering the squash with old blankets or a tarp when a heavy frost or freeze is predicted.
| Forecast | Effect on the crop | What to do with mature fruit |
|---|---|---|
| Nights below 50°F | Chilling injury starts adding up in the fruit | Harvest fruit that passes the rind test and start curing |
| Light frost | Kills the leaves, leaves the fruit unharmed | Harvest mature fruit while the rinds are sound |
| Freeze near 28°F for hours | Damages the fruit and its storage life | Pick all mature fruit first, or cover the patch for one night |
| Fruit already frozen | Does not store well | Cook it soon instead of storing it |
Sorting Fruit That Is Not Fully Ready
Frost often arrives while some fruit is mature, some is partly tan, and some is still green. Sorting them at harvest keeps short-lived squash from being stored with the keepers.
Fully tan fruit that resists a thumbnail goes to curing and storage. Fruit that is mostly tan but still a little soft has not finished filling its seeds, so its flesh is weaker and it has less starch to sweeten in storage. It belongs in the first few weeks of cooking.
Green, glossy fruit is immature. It is edible, but it is short on the starch that later becomes sugar, and Illinois Extension notes that immature winter squash lacks flavor, so it is best used soon. Fruit with frost damage, cracks, or soft spots is not storage fruit either, because decay organisms move in once the rind is broken.
One exception is size. UMass notes that mini-butternut types can be eaten at harvest and store for about three months, while standard butternuts are better after time on the shelf.
Cutting, Handling, and Curing the Harvest
Squash rind looks tough but bruises and punctures easily, and UMass specialists note that decay organisms invade once it is broken. Cutting each fruit free with pruning shears avoids the wound that forms when a stem snaps off flush with the fruit.
Extension sources leave different amounts of stem, from about 1 inch at Iowa State to 2 inches at Illinois Extension. Either works as long as the stem stays on and is not used as a handle, since the weight of the fruit can break it. UMass notes that butternut in particular can have its stems removed so they do not puncture neighboring fruit in a bin, provided the scar heals during curing before the fruit is stored.
Curing hardens the skin, heals small wounds, and speeds the conversion of starch to sugar. The recommendations differ mainly in how warm a space they assume.
| Curing method | Conditions | Time | Source |
|---|---|---|---|
| Warm room | 80 to 85°F and 80 to 85% relative humidity | About 10 to 14 days | Iowa State University Extension |
| Warm room, shorter | 80 to 85°F and 80 to 85% relative humidity | 5 to 10 days | UMass Extension |
| Room temperature | About 70°F | 10 to 20 days | Illinois Extension |
| Outdoors in sun | Nights no lower than 60°F | 5 to 7 days | Johnny's Selected Seeds, UMass |
Curing is not required for every fruit. UMass notes that a wound-free butternut going into several months of storage converts its starch during that time anyway. Curing earns its keep on fruit with small nicks and on squash you plan to eat in the fall, because a cured fruit reaches good eating quality sooner.
Where to Store Butternut and How Long It Keeps
After curing, butternut wants a cool, dry room, not a cold one. The sources agree on a narrow band.
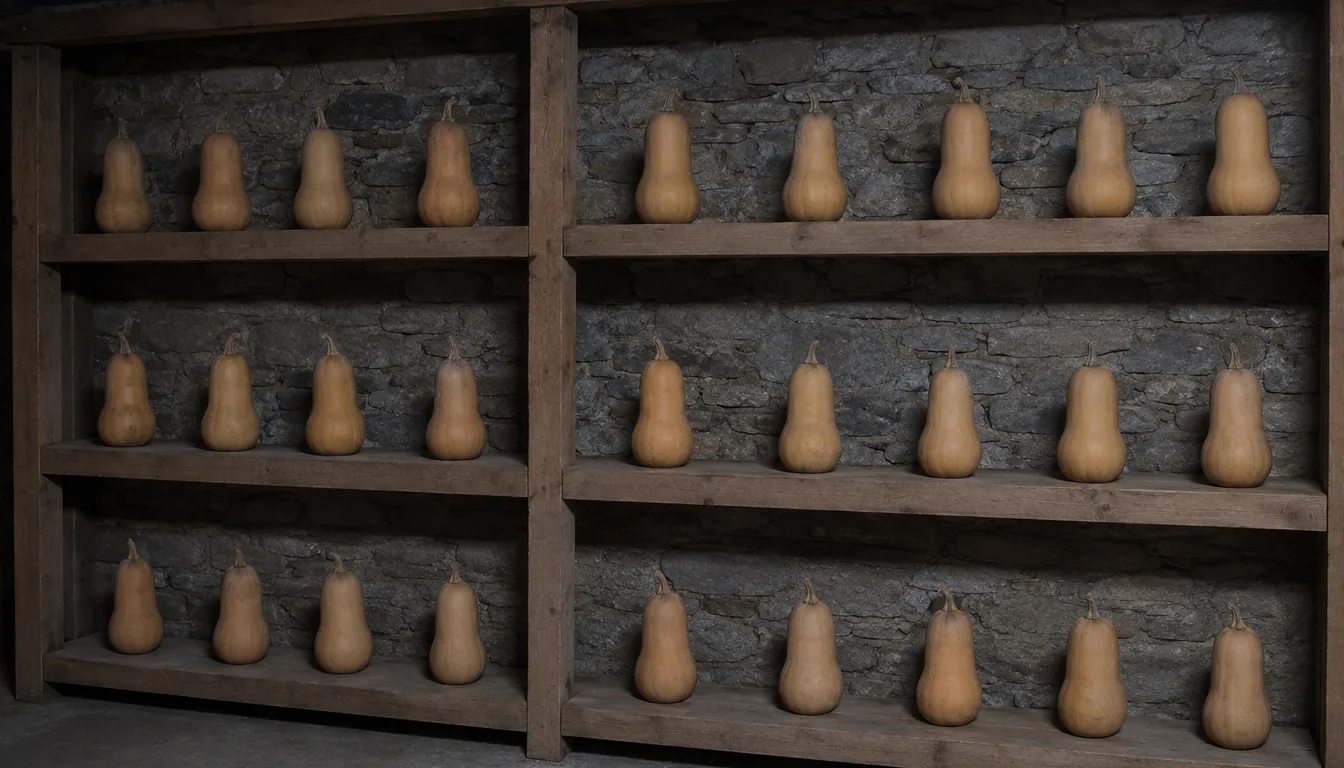
| Condition | Target | Why it matters |
|---|---|---|
| Temperature | 50 to 55°F | Below 50°F chilling injury builds, and long storage above 60°F costs weight |
| Relative humidity | 50 to 70% | Above 70% favors rot organisms, and below 50% dries the fruit |
| Steadiness | Small temperature swings | Big swings cause condensation on the fruit, which encourages rot |
| Neighbors | Away from apples and pears | Ripening fruit gives off ethylene, which shortens squash storage |
A refrigerator runs well below 50°F, so it is the wrong place for a whole squash. An unheated spare room or a dry basement shelf often comes closest. Potatoes, onions, and root crops each want different conditions, and a winter storage plan sorts those groups so squash is not kept where another crop needs cold, damp air.
Storage life depends on how close the room comes to those targets. Iowa State and Illinois Extension tell home gardeners to expect about 2 to 3 months from butternut. UMass, writing for farms that can hold steady temperature and humidity, gives 4 to 6 months. Lifting each fruit every week or two to check for soft spots near the stem end catches decay while the rest of the shelf is still sound.
Why Butternut Tastes Sweeter After a Month or Two
Butternut is one of the squashes that improves after harvest. UMass explains that butternut, hubbard, and kabocha types need time to convert starch to sugar, and it recommends holding standard butternuts 1 to 2 months before eating. Carotenoids, the pigments behind the orange flesh, also increase during storage.
That sets the order for using the harvest. Fruit that was picked a little early, nicked at harvest, or touched by frost gets cooked first, because it will not keep. The best mature fruit stays on the shelf, where it gains sweetness over the first couple of months instead of losing it.
Pro Tips
- Tag a few fruits with the date their flowers opened, then start rind checks about 45 days later.
- Carry harvested squash by the fruit, not the stem, since the weight of a butternut can snap its stem off.
- Cook frost-touched, nicked, or partly green fruit first and save the hardest, evenly tan squash for winter.
Frequently Asked Questions
How do I know when butternut squash is ready to pick?
The rind is evenly tan and dull, a thumbnail pressed into it leaves no dent, and the fruit has been on the vine about 50 to 55 days since its flower was pollinated. Butternut turns tan around day 45, so the color alone arrives about two weeks early.
Will butternut squash ripen after it is picked?
Its starch keeps turning to sugar in storage, but an immature fruit cannot make up for the vine time it missed. A squash cut before its seeds are filled uses starch from its own flesh to finish them, so the flesh ends up poorer and less sweet.
Can butternut squash stay on the vine after a frost?
Mature fruit survives a light frost that kills the leaves. A freeze near 28°F lasting more than a couple of hours damages the fruit, and nights below 50°F already add chilling injury, so mature squash is better harvested before the first hard freeze.
Should I store butternut squash in the refrigerator?
Not a whole squash. Refrigerators run well below 50°F, where chilling injury builds. A dry spot at 50 to 55°F with 50 to 70% humidity keeps it far longer.
Do I have to cure butternut squash before storing it?
Not always. A wound-free butternut headed for months of storage converts its starch during that time anyway. Curing at 80 to 85°F helps most with nicked fruit and with squash you want to eat within the first month or two.
Sources & References
- Pumpkin and Winter Squash Harvest, Curing, and Storage, UMass Extension Vegetable Program
- When should I harvest butternut squash?, Iowa State University Extension and Outreach
- Winter Squash, Illinois Extension
- Harvest abundant squash for food, decoration, Illinois Extension
- Time to Harvest Those Winter Squash, South Dakota State University Extension
- Waltham Butternut Squash Seed, Johnny's Selected Seeds
Related Guides
Best Butterfly Garden Plants for a Complete Habitat
The best butterfly garden plants do two different jobs. Host plants feed caterpillars, while nectar…
15 min read
Best Fall-Blooming Flowers for Color Near Frost
A bed that still carries flowers in October usually was planned before temperatures fell.
9 min read
Best Fast-Growing Trees for Shade and Privacy
The best fast-growing tree is the one whose mature crown, roots, climate range, and maintenance…
16 min read
Best Fragrant Flowers for Every Yard and Season
The best fragrant flowers depend on climate, light, space, and the hours you use the yard.
15 min read
Best Full-Sun Perennials for Hot, Bright Beds
The best full-sun perennials are the ones that match the bed's soil moisture and drainage, local…
14 min read
Best Ground Cover Plants for Sun, Shade, and Slopes
The best ground cover is a plant that survives the site and performs the job without escaping into…
18 min read