
How to Prune an Overgrown Crape Myrtle
An overgrown crape myrtle should be thinned and reduced selectively, not cut flat across the top. Start with dead, damaged, rubbing, and low unwanted growth, then shorten an overlong limb back to a suitable side branch only when the tree truly needs a smaller spread.
A tree that was topped in earlier years needs restoration rather than another round of topping. Keep a small number of well-placed shoots from each old cut, remove competing sprouts, and improve the structure over more than one dormant season when large wounds or major canopy loss would otherwise result.
Before cutting, confirm that the tree is not touching a utility line and that the branches can be reached safely from the ground. A certified arborist should own work that requires climbing, power equipment overhead, or removal of a large decayed stem.
[ky_keyfacts] Best general window | Late winter, adjusted for local freeze risk First cuts | Dead, broken, rubbing, inward-growing, and unwanted basal shoots Correct final cut | Just outside the branch collar, without a flush cut or long stub Size control | Reduction to a suitable lateral branch, not heading every limb to one height Stop and hire help | Utilities, large decay, hanging limbs, or unsafe reach [/ky_keyfacts]
Pick the Right Season and Level of Pruning
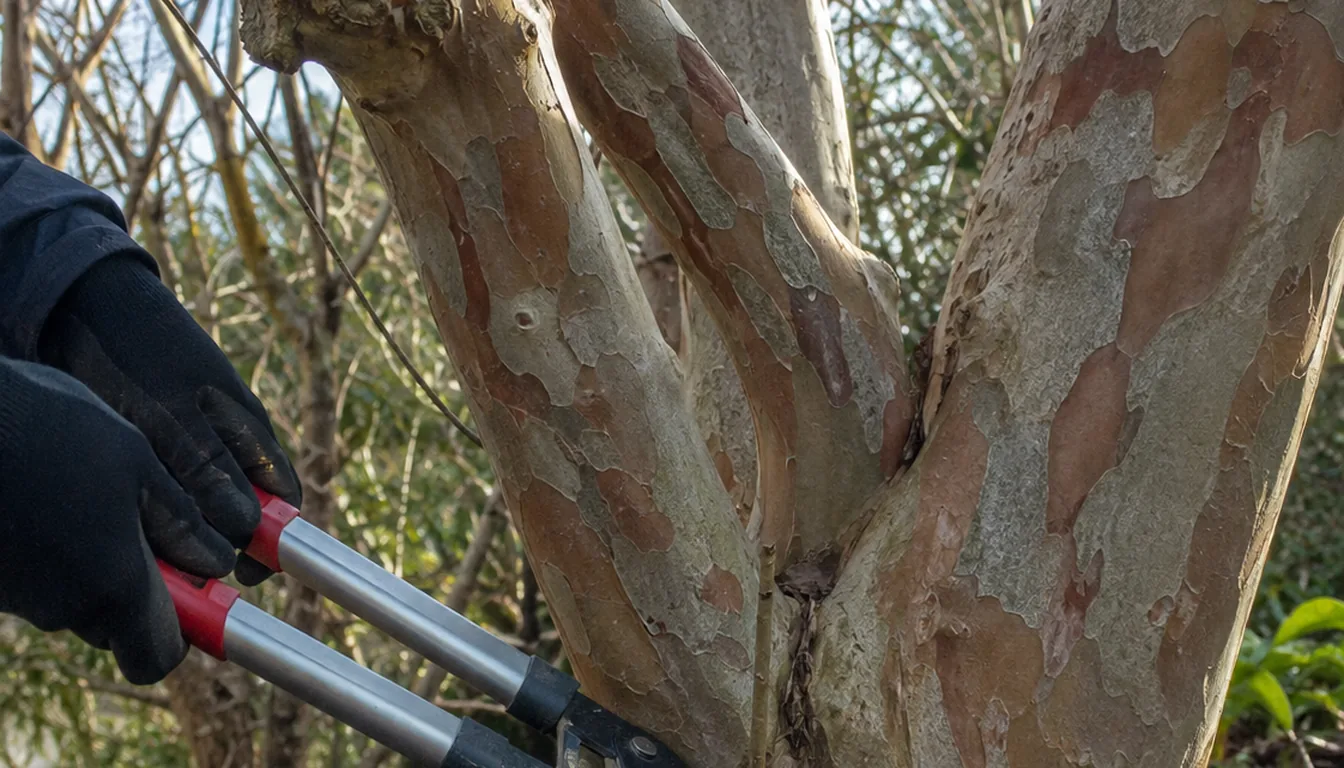
The calendar matters more than the size of your crepe myrtle. Heavy pruning is safest in late winter to very early spring while the tree is still dormant but the worst of deep freezes has passed.
In zones 7–9, that usually means February into early March.
Colder areas should wait until late March or even early April so new growth is not zapped by a freak cold snap.
Warmer zone 10 locations can start earlier but still avoid pruning during active summer growth.
Dormancy makes the structure easiest to inspect, but the amount removed still matters more than finishing every correction in one day. Trying to do heavy thinning during summer stresses the tree and cuts off the current season's flower buds.
If the tree was badly topped in the past, plan this as a two-year project.
Year one focuses on removing the worst stubs and excess trunks.
Year two cleans up leftover crossing or crowded branches. That slower pace keeps more live leaf area on the tree so it can recover.
Do not prune in fall. Fresh growth that follows is tender and often winter-killed, leaving more deadwood to fix next year.
Set the pruning level first so the rest of the work stays measured.
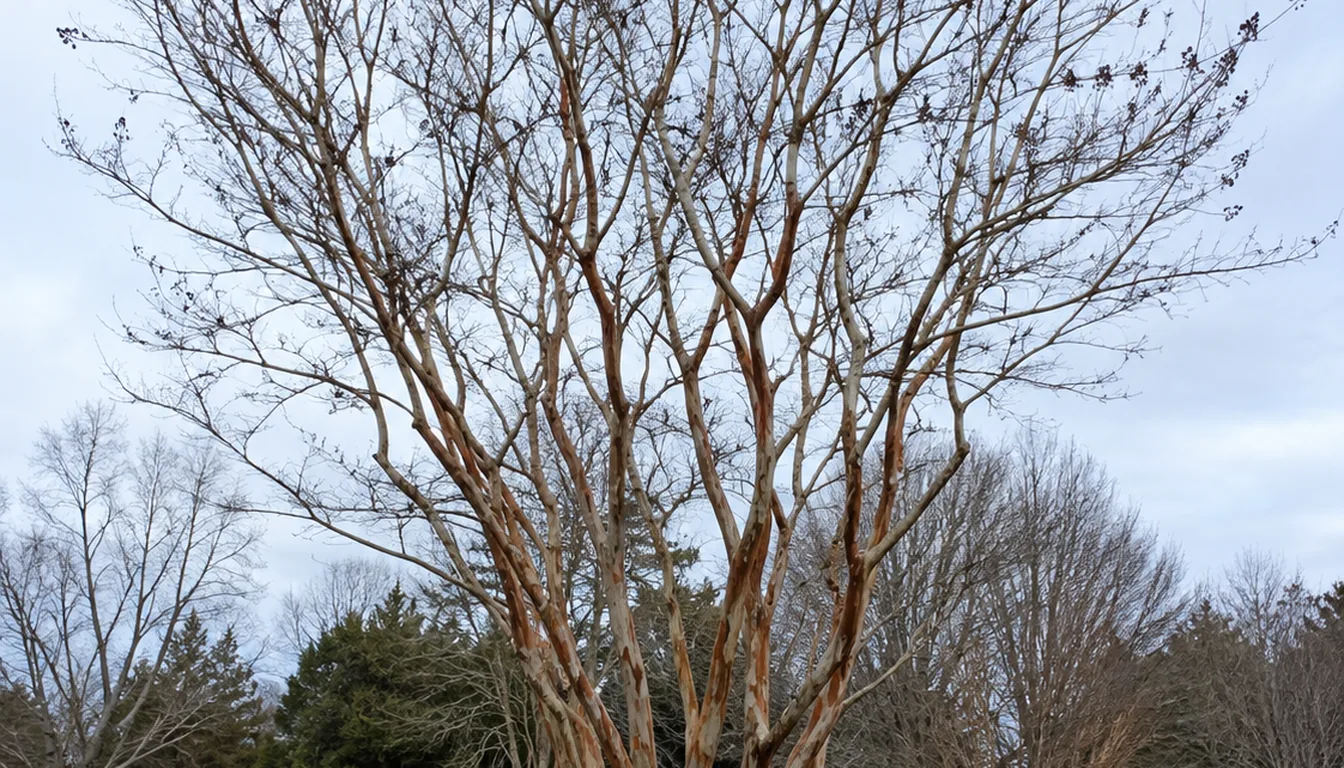
- Best timing: Late winter while dormant
- Light pruning: Anytime mid-summer after flowering
- Skip entirely: Fall and deep freeze periods
- Renovation schedule: One heavy year, one follow-up year
Study the Structure Before You Make a Single Cut
Before you grab the saw, stand back and look at the whole plant. A healthy crepe myrtle should have a few strong trunks, open branching, and no dense thickets of shoots at eye level.
Walk around the tree and identify the sound, well-spaced trunks that form its permanent framework. The right number follows the plant's existing form rather than a mandatory count.
Thick, straight trunks with good spacing and no major wounds are the ones you want.
If your tree has been topped, you will see clumps of skinny shoots bursting from the old cut points. These are weakly attached and more likely to split in wind, much like fast, soft growth on fruit trees that were overfed with high-nitrogen fertilizer such as you might use following a dense vegetable feeding schedule.
Mark the keeper trunks with a bit of tape or chalk so you do not second guess yourself once you are up close. Also mark any branches that clearly have to go, like those rubbing together, growing straight into the center, or leaning over driveways and walkways.
Do not thin simply to make every branch visible. Remove a branch only when it is dead, damaged, conflicting with a better branch, or causing a specific clearance problem.
Mark the framework before you start removing extra wood.
- Keep: 3–5 strong, well-spaced trunks
- Remove: Extra trunks, rubbing limbs, inward growth
- Aim for: V-shapes that open outward, not tight parallel stems
- Check first: Old wounds, decay, and included bark at crotches
Remove Suckers, Extra Trunks, and Obvious Deadwood
Cleanup cuts are the safest place to start. Thin shoots from the base and roots are suckers, and removing them reveals the permanent framework.
Cut suckers off right at their origin, not halfway up the stem. Use sharp bypass pruners so you get a clean slice instead of a ragged tear.
If they keep coming back, gently scrape a thin layer of bark at the origin point so fewer buds remain.
Next, remove whole trunks you decided not to keep.
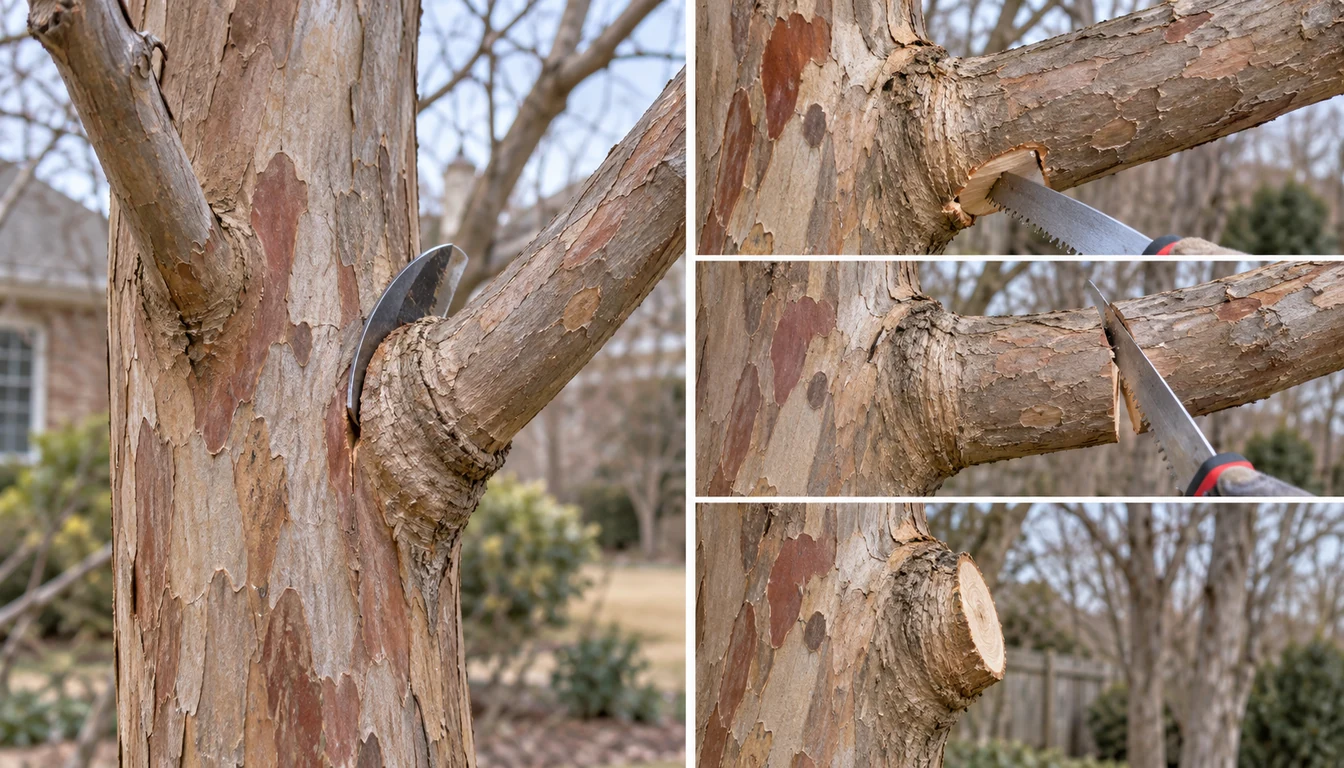
Remove an unwanted basal stem at its point of origin without cutting into the trunk or root flare.
On large trunks use a three-cut method common on bigger shade trees like red maples in yards so the bark does not peel down the remaining trunk.
Dead branches are easy wins too. They snap instead of bend and have no living buds.
Take these back to the branch collar, the swollen area where they attach, without leaving a long stub that will rot.
Routine wound paint is not recommended. Trees close wounds by compartmentalizing around a correctly placed cut, so protect the branch collar and leave the surface uncoated unless an authoritative local recommendation identifies a specific exception.
Clear these easy cuts before making any shape decisions.
- Step 1: Remove all root suckers at the base
- Step 2: Cut out unwanted trunks completely
- Step 3: Clear dead, diseased, or broken branches
- Goal: A cleaner frame with your chosen trunks visible
- Clear the work areaRemove trip hazards and keep people away from the drop zone.
- Remove dead and broken woodTrace each branch to a sound junction and preserve the collar.
- Cut basal suckers at originDo not leave a tall stub or slice into the parent trunk.
- Use three cuts on a heavy limbMake an undercut, remove the weight farther out, then make the final collar cut.
- Stand backRecheck balance and clearance before choosing another live branch.
Thin Crowded Branches and Fix Old Topping Cuts
Once the frame is set, shift to thinning.
Crowded, crossing branches rub and create a tangle of weakly positioned shoots. Selective thinning also improves light and air movement without stripping all small interior wood.
Start by taking out branches that grow straight into the center of the canopy. Then remove one of every pair of rubbing or parallel branches.
Choose the one with a better angle and position, just like you might choose a single strong leader on young apple trees to avoid weak crotches.
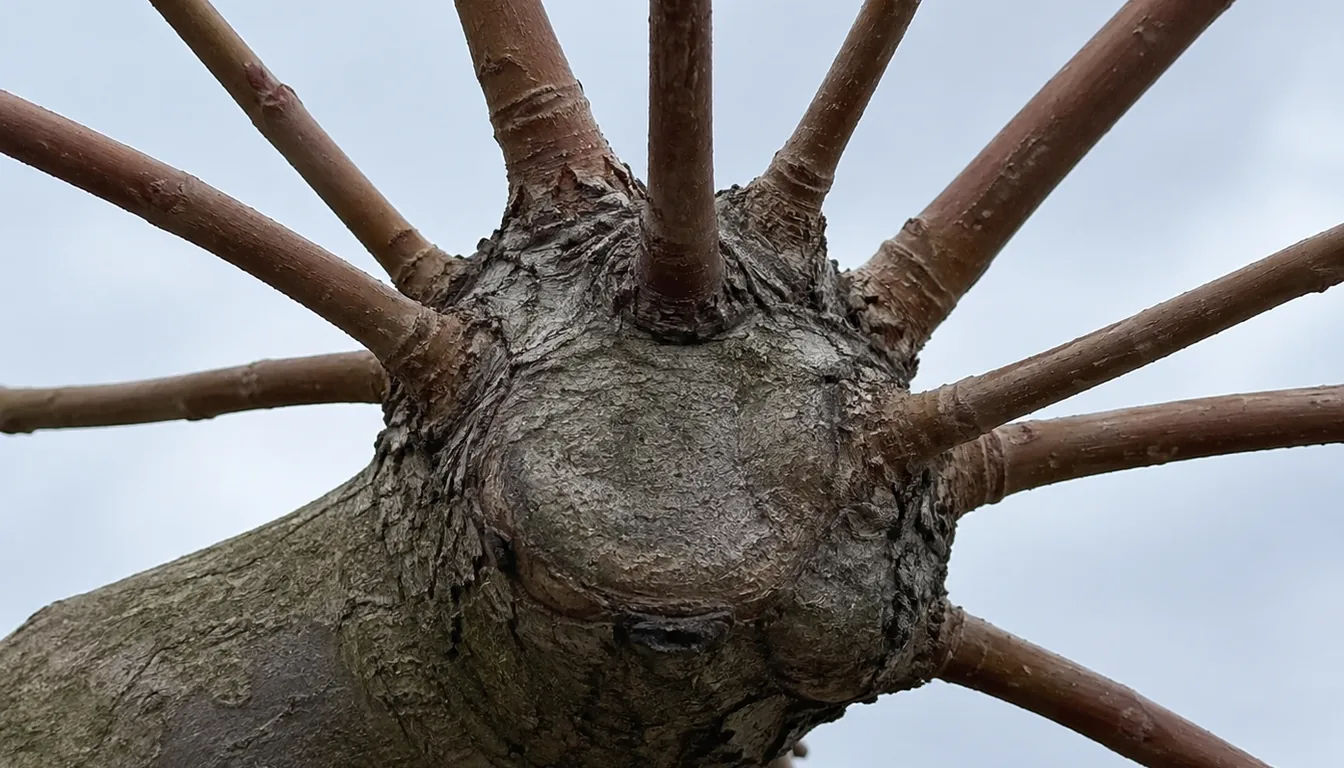
Where someone topped the tree in the past, look at the cluster of shoots that sprouted from each stub.
Pick one or two of the thickest, best-angled shoots from each cluster and remove the rest back at their origin.
Over time these selected shoots will become new, more natural-looking branches.
Do not cut back to the same knobby knuckle again. Instead, reduce length by cutting to a side branch that is at least one-third the diameter of the one you are shortening.
This is called a reduction cut and it avoids creating new knobs.
Handle old topping cuts slowly so you rebuild structure instead of making new knobs.
If you find decay at an old stub, shorten the branch back to solid wood with a strong side branch, even if it means removing more length than you planned.
Use the list below to keep each thinning cut tied to a purpose.
- Thin: Inward and crossing branches first
- Select: 1–2 strong shoots from topped stubs
- Shorten: To side branches, not random mid-branch points
- Result: Open canopy, fewer knobs, stronger flowering wood
Shape the Canopy Without Butchering the Top
The top of an overgrown crepe myrtle usually tells on the past pruning. Flat tops, fists of sprouts, and crossed branches all show heavy past cuts.
Start by standing back and deciding how tall you realistically want the mature canopy, not just this year.
Pick a few strong, upright branches that will be your future "scaffold" limbs. They should be well spaced around the plant, like the ribs of an umbrella, and rising from higher on the trunk, not right at the base.
Any tall branch that shoots straight through the middle of the canopy or rubs another chosen scaffold is a candidate for removal or shortening.
Do not cut all tall leaders to the same height. That creates a flat "crepe murder" plane that will sprout weak, crowded growth.
Use reduction cuts to step back lanky tips, cutting to a side branch that points outward. This shifts growth into those side shoots and opens the center.
Leave plenty of small side branches along each main limb. They hold flowers and shade the bark so it does not sunburn in hot zone 8 and 9 yards.
If your tree was topped in past years, live with some awkward stubs for a season or two while you grow new, better-placed branches from lower down.
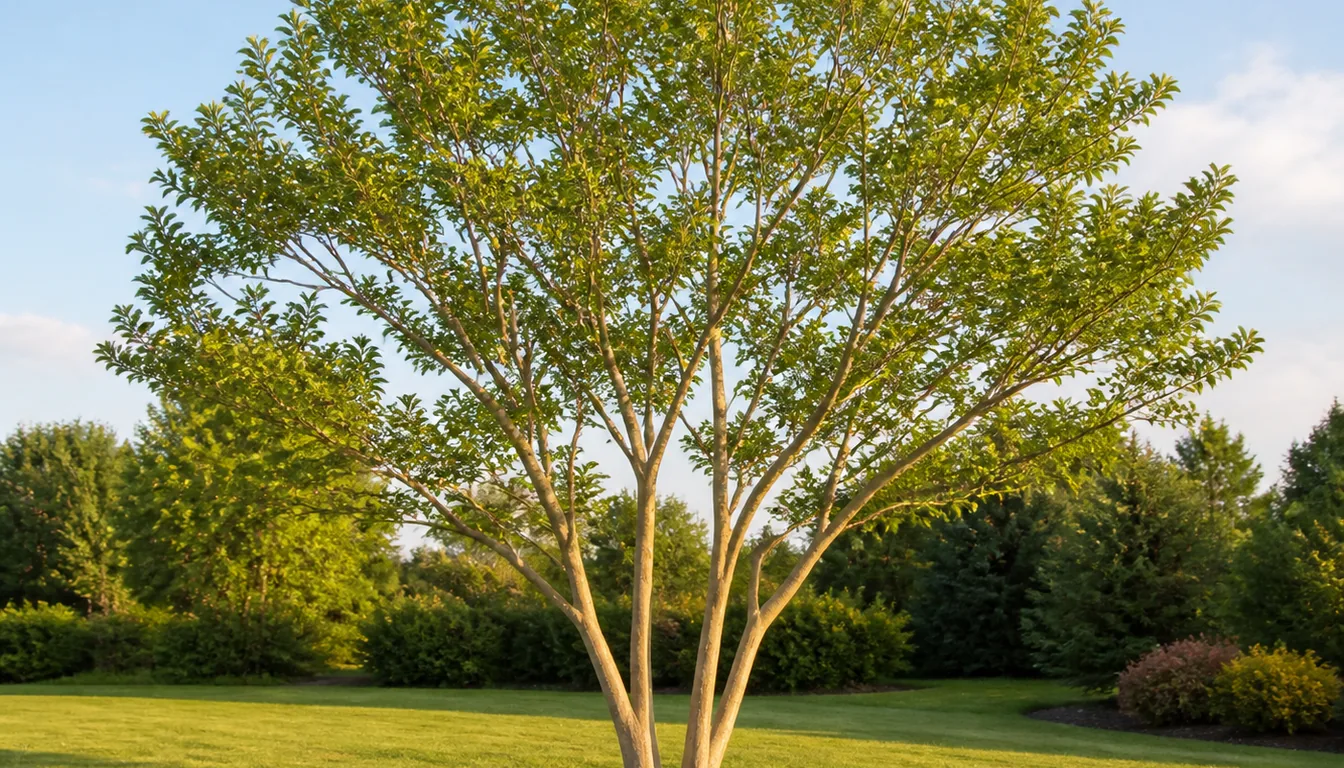
- Target canopy: About one third of total height
- Leader spacing: 6–10 inches apart around trunk
- Center opening: Fist-sized gap for airflow
- Cut angle: Slight angle, just above a side branch collar
- Keep the natural multi-trunk or tree form the cultivar was selected to make
- Preserve small branches that carry future flowering shoots
- Shorten a limb only to a lateral large enough to assume its role
- Check roof, path, and vehicle clearance from several viewpoints
- Stop before the canopy looks stripped or top-heavy
Support Recovery: Water, Mulch, and Light Pruning
Right after a hard prune, your crepe myrtle needs root support more than more cuts. The canopy is smaller, but the roots are still the same size and ready to push new growth.
Water deeply when the top 2–3 inches of soil are dry, instead of sprinkling the surface. Apply water slowly across the root zone when the soil is dry, then adjust the next irrigation to rainfall, heat, soil texture, and how quickly that soil drains.
In cooler or rainy spells, skip watering so you do not drown the roots. Deep, infrequent water is the same strategy we use for shrubs like bigleaf hydrangea shrubs.
Spread 2–3 inches of mulch over the root zone, stopping a few inches away from the trunk so the bark can breathe.
Mulch piled against the trunk keeps bark wet, which invites borers and fungal cankers on stressed crepe myrtles.
Watch for a flush of soft, light green shoots in the weeks after pruning. That is normal.
What you want to avoid is a dense broom of sprouts right at an old topping cut.
During the first growing season, walk around the tree and pinch or clip off weak, inward-facing sprouts. Quick five-minute cleanups keep the structure you created from disappearing.
A light, balanced feeding in early spring can help recovery, but skip heavy fertilizer after mid-summer. For timing and dosage on woody plants, see the same principles in our tree and shrub feeding guide.
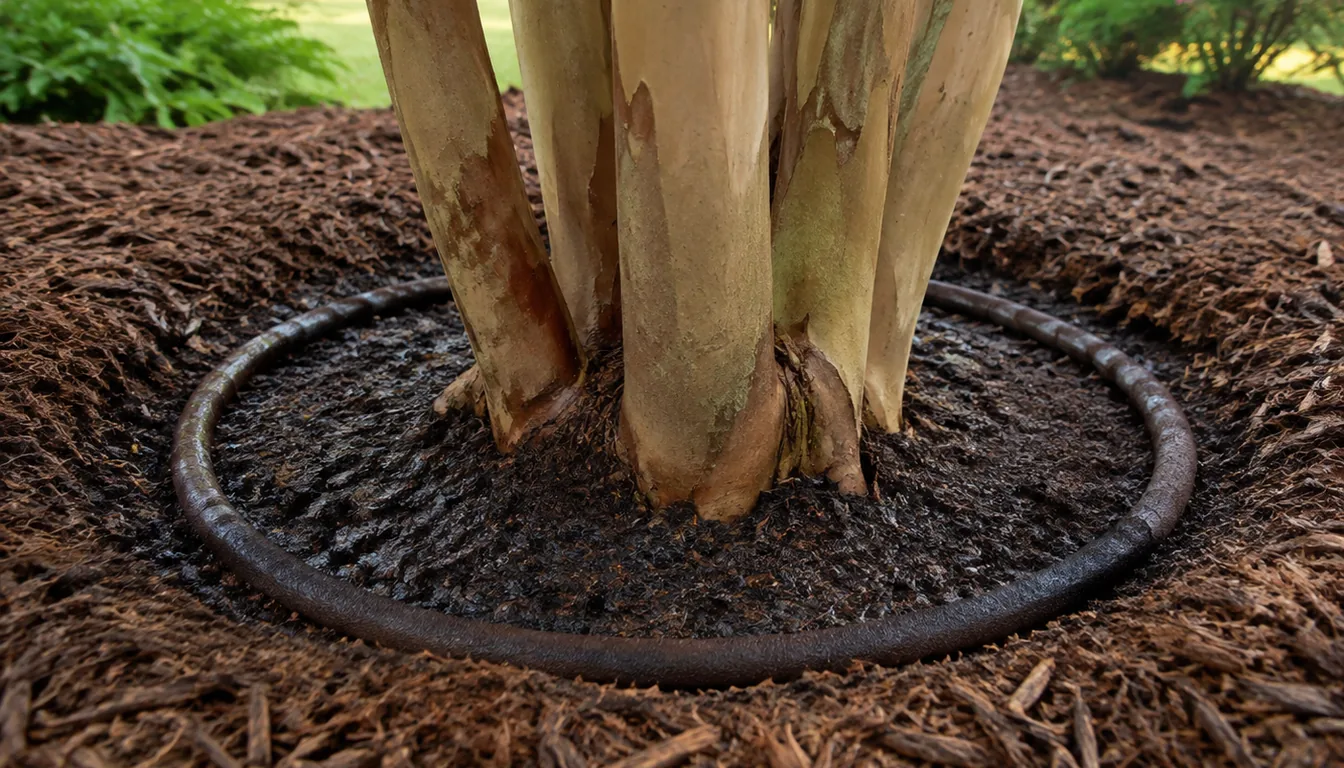
- Mulch depth: 2–3 inches over roots
- Watering frequency: Weekly in heat, less in cool spells
- Pruning touch-ups: Monthly 5–10 minute sessions
- Fertilizer timing: Early spring only on most soils
Fixing Old "Crepe Murder" Damage Over Several Years
Years of harsh topping leave knobby knuckles and broom-like sprouts on many older crepe myrtles. You can repair this, but it usually takes more than one winter.
Start by accepting that some knobs stay for a while. Sawing them off flush in one go often means huge wounds that invite decay.
In year one, pick a few of the strongest new shoots on each knuckle that point outward. Shorten or remove all the others so the chosen sprouts get the energy.
Make your reduction cuts just above those selected sprouts, not through them. Over time, those better-placed branches outgrow the old lump of wood.
The repair goal is to grow past the knuckle with new wood, not to grind it off and leave a flat stump.
If a knuckle cluster sits at an awkward height, follow the limb down to where a slimmer side branch joins at a better spot. Cut there instead to remove the whole mess.
On a severely damaged plant, stage the restoration. Address the branches with the clearest structural or safety problems first, then reassess new growth before the next dormant-season cuts.
This staggered approach is like what we do on old overgrown spirea shrubs, and it keeps some blooms and shade each year instead of resetting the whole plant at once.
- Repair timeline: 2–3 years of patient work
- Knuckle strategy: Grow past lumps with new wood
- Rejuvenation share: One third of stems per year
- Result: Taller, airy tree instead of stubby pollard
Common Crepe Myrtle Pruning Mistakes to Avoid
Most crepe myrtles look rough because of the same few habits that get repeated every year. Once you know them, they are easy to spot and skip.
The most famous one is cutting every main trunk straight across at the same height. That topping cut triggers a cluster of weak sprouts, which then get cut again next year.
Another mistake is stripping off every side branch up the trunks. That may look neat in winter, but it removes future bloom wood and exposes bark to sunscald.
Many people also cut simply because the calendar says so.
The better trigger is size and structure.
If the plant still fits the space, heavy pruning is optional.
If the crape myrtle fits the space, has sound structure, and blooms well, annual structural pruning is unnecessary.
A softer error is forgetting about nearby plants. Newly pruned crepe myrtles can throw more light onto shade lovers like hosta clumps underneath, which can scorch them if you do not adjust.
Finally, some of us use the wrong tool for the cut.
Loppers on big trunks crush fibers.
Use bypass pruners, loppers, or a pruning saw according to branch diameter and the tool manufacturer's capacity. A tool that crushes or twists the branch is too small for the cut.
- Skip topping: No flat-headed cuts across trunks
- Keep side shoots: Leave smaller limbs for flowers
- Prune for space: Not just by the calendar
- Match tools: Saw for thick, pruners for thin
Pro Tips
- Stand back every 5–10 cuts to keep the overall shape in check instead of chasing tiny fixes up close.
- Use bypass pruners and a sharp pruning saw, never hedge shears, to avoid the sheared "meatball" look.
- Disinfect blades between trees, especially if you removed cankered or diseased wood on one plant.
- Keep your final cuts just above outward-facing buds so new growth heads away from the center.
- Limit removal to about one-third of live growth per year so the tree is not shocked.
- Spread pruned branches on a tarp as you work so cleanup is easy and you can see how much you have removed.
- If you are unsure about a big branch, leave it for last; many of us regret the cuts we rushed.
- Water deeply the week after heavy pruning if the soil is dry, following the same deep-soak idea you would use for deep watering trees.
Frequently Asked Questions
Can I cut an overgrown crepe myrtle all the way to the ground?
You can stump a crepe myrtle and it will usually resprout, but you will lose several years of size and flowers. A staged rejuvenation over 2–3 winters is safer and keeps a better-looking structure.
How much can I safely cut off a mature crepe myrtle in one year?
Aim to remove no more than about one third of the total height in a single winter. You can take out entire problem trunks, but avoid shortening all remaining branches aggressively in the same season.
Will pruning an overgrown crepe myrtle reduce blooming?
Heavy structural pruning can reduce blooms for one season because you remove flower buds. If you time cuts in late winter and leave plenty of younger side branches, blooming usually rebounds strongly the following summer.
Is it okay to prune crepe myrtle in summer after it flowers?
You can deadhead spent clusters in summer, but avoid major cuts then. Large summer pruning encourages soft new shoots that may not harden before cold weather and can reduce next year's flower show.
Do I need to seal crepe myrtle pruning cuts with wound paint?
No, you do not need wound paint on crepe myrtles.
Clean cuts made just outside the branch collar heal best when left open to air.
Sealants can trap moisture and slow natural callusing.
Sources & References
Related Guides
Cutting Back a Leggy Houseplant Does Not Fix It
Most people cut a houseplant back because it has gone long and bare.
11 min read
Deadheading Daffodils Matters Less Than the Six Weeks After
Almost every page about spent daffodils tells you to remove the seed pod so the bulb is not…
11 min read
French Lavender Pruning Depends on the Plant and Season
French lavender needs light trimming within its leafy growth, rather than a hard cut into bare…
6 min read
Fruit Tree Pruning Starts With Where the Crop Forms
A fruit tree that gives small, crowded, scabby fruit is usually not underfed.
11 min read
How Deep Can You Cut a Spent Lavender Spike?
Deadheading lavender is the lightest cut you will ever make on the plant, and the one place people…
7 min read
How Do You Prune Spanish Lavender for a Second Flush?
Spanish lavender is the one that flowers first and the one that keeps going.
7 min read