
How to Contain Mint That Is Taking Over a Garden
Mint expands through underground rhizomes and surface runners that form new roots and shoots. Trace that living network before digging, then choose a container, maintained boundary, or removal plan based on how much mint you want to keep.
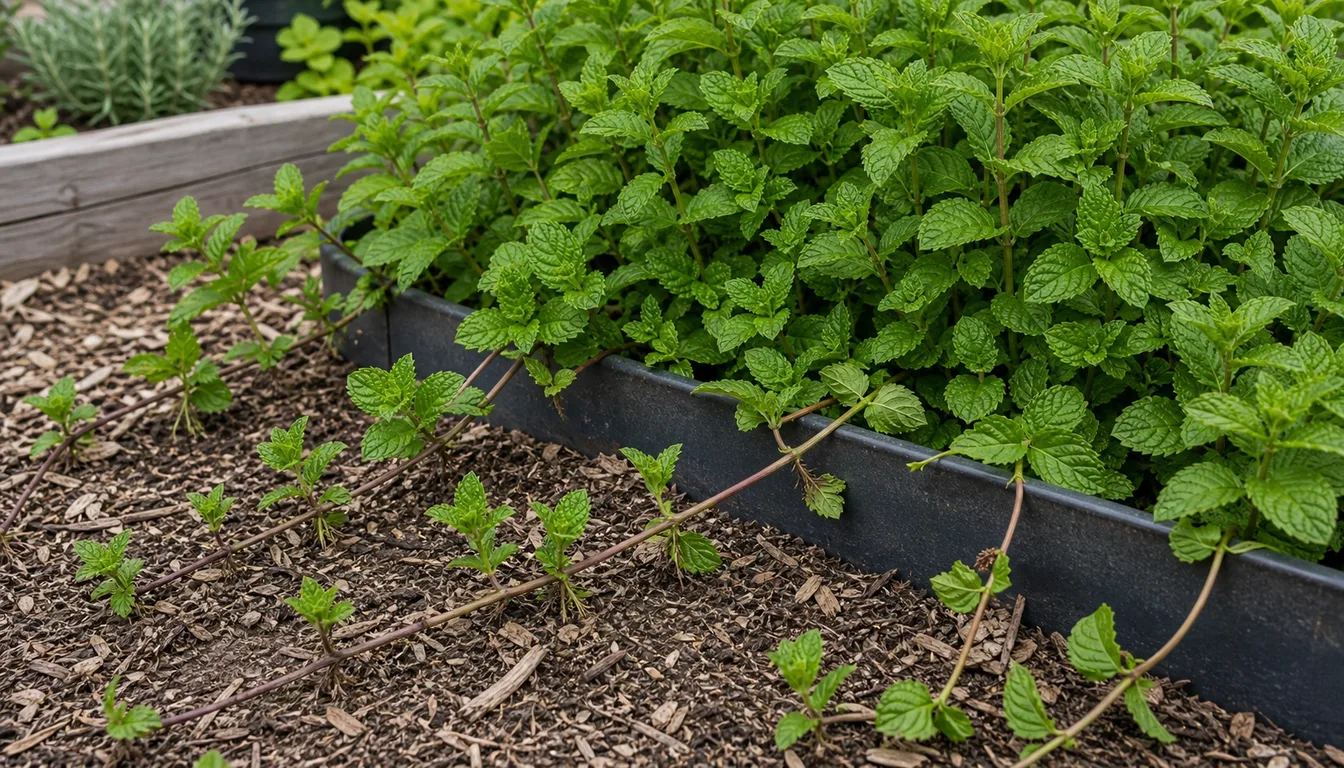
Quick diagnosis
Rhizomes or rooted runners extending beyond the intended patch
Lift the outermost mint shoot gently and follow any surface stem back toward the patch.
If no surface connection appears, loosen the soil between that shoot and the original plant and look for a pale horizontal rhizome carrying buds and fine roots.
Open the full diagnosisWhat You Are Seeing
The visible mint patch is only the upright part of the plant. Peppermint, spearmint, and many related mints run horizontal stems that carry buds out into open soil, where every living node can start another shoot.
Gardeners call this invasive because mint crosses a chosen boundary and crowds its neighbors.
That describes an aggressive garden habit, while official invasive-species status depends on the species and the region and refers to ecological harm outside cultivation.
Containment starts with a decision about what is allowed to stay. Keeping one harvestable plant in a pot is a different job from preserving a wide mint strip, and both differ from clearing mint out of a mixed perennial bed.
Do not start with a rototiller or with repeated mowing.
Both remove the visible top while breaking connected stems into smaller pieces that can root or resprout in more places than before.
Common Causes
01 High likelihood
Underground rhizomes
Mint rhizomes are horizontal stems that travel at or just below the soil surface.
They carry nodes and buds rather than the branching pattern of ordinary absorbing roots, and they push upright shoots well beyond the edge you can see.
How to identify it
- New mint shoots appear in a loose line away from the original patch.
- A pale or reddish horizontal stem connects several shoots below the surface.
- The connecting stem has distinct nodes, buds, and fine roots.
- Top growth returns after mowing because the underground network remains alive.
What to do
- Start at the farthest new shoot and loosen the soil around it with a fork.
- Follow each horizontal stem toward the original patch before lifting it.
- Collect broken nodes instead of leaving them in loosened soil.
- Mark the cleared edge so later shoots reveal where a connection was missed.
02 High likelihood
Surface runners rooting at nodes
Some mint stems travel on or just above the soil as stolons. Damp mulch hides them and gives the nodes the contact they need, so a runner can cross a bed edge and build several new crowns before its leaves attract any attention.
How to identify it
- A flexible stem lies horizontally across soil or mulch.
- Small roots form where the stem touches damp material.
- Several upright shoots remain connected along the same runner.
- Spread is fastest under loose mulch, edging gaps, or neighboring foliage.
What to do
- Lift runners before their nodes establish deep roots.
- Cut the connection only after every rooted section outside the boundary is exposed.
- Keep the rim and surrounding hard surface clear around container-grown mint.
- Inspect hidden edges after rain and during rapid spring growth.
03 Common containment failure
A container touching garden soil
A pot controls mint only while every living stem and root stays separated from open soil.
Runners cross a rim, roots leave a drainage hole, and rhizomes move past a bottomless sunken container.
How to identify it
- A runner hangs over the rim and has rooted beside the pot.
- Roots pass through drainage holes into the bed below.
- New shoots appear just outside a buried container.
- The pot is cracked, buried to the rim, or hidden by mulch.
What to do
- Lift the pot and sever every connection to garden soil.
- Place it on paving, a saucer, or another inspectable hard surface.
- Trim runners before they reach the rim.
- Treat a sunken pot as a slowing device that needs regular inspection, not a permanent seal.
04 High likelihood after disturbance
Rhizome fragments moved by digging or tilling
A chopped rhizome keeps a living bud and its stored energy. Tilling, aggressive hoeing, and moving soil between beds turn one connected patch into scattered points that are much harder to find.
How to identify it
- Many small shoots appear after cultivation instead of one advancing edge.
- New mint grows where excavated soil or compost was moved.
- Short horizontal stem pieces remain attached to young shoots.
- Regrowth follows the width of a tilled strip or equipment path.
What to do
- Stop chopping the occupied soil into smaller pieces.
- Loosen sections with a broad fork and lift connected stems intact.
- Search soil clods and neighboring root balls for mint nodes before moving them.
- Keep removed mint separate from ordinary garden compost unless your local disposal method accepts viable rhizomes.
05 Secondary and type dependent
Seedlings after flowering
Some mints set viable seed, though seedlings are usually a smaller part of a garden takeover than the clonal runners.
They matter when small unconnected plants appear well off the path of the established network after the flowers mature.
How to identify it
- Tiny separate plants appear without a rhizome or runner connection.
- Growth follows a seedbed pattern rather than a line from the parent patch.
- Young plants vary slightly in aroma or leaf form.
- Flower stalks were allowed to mature in the previous season.
What to do
- Pull seedlings while their root systems are small.
- Remove flower heads before seed matures when seedlings are unwanted.
- Keep monitoring separate from rhizome excavation because the search patterns differ.
- Do not assume deadheading stops the underground spread of an established mint.
06 Check before eradication
A different mint-family plant
Creeping Charlie, lemon balm, catnip, and other mint-family plants also carry square stems and aromatic leaves. Their growth routes and their garden value differ, so identify the plant before treating every square-stemmed shoot as escaped culinary mint.
How to identify it
- Leaves differ in shape, hairiness, attachment, or aroma from the planted mint.
- Creeping stems root at every node across lawn or shade without a clear culinary mint patch.
- Flowers, when present, do not match the original plant.
- A traced shoot never connects to the mint container or bed.
What to do
- Compare leaves, stems, aroma, flowers, and runner pattern before digging widely.
- Photograph the whole plant and one flowering stem for local identification help.
- Map the actual species boundary before choosing control.
- Keep desirable mint separate while the unknown plant is being identified.
The patch edge is a moving network
An upright mint stem is an outlet rather than an independent plant.
Several shoots can share one rhizome, and a surface runner roots at several nodes and becomes independent once the connection dies or is cut.
This is why top pruning changes height but rarely changes territory. Harvesting keeps a contained plant compact, while containment work has to follow the horizontal stems and lift the rooted nodes outside the chosen boundary.
Moist fertile soil and damp mulch speed the whole process, because new nodes establish so readily.
Cutting back irrigation or fertilizer slows expansion, but it never replaces a physical boundary or the removal of the live network.
A boundary works only when you can inspect it. Paving around an above-ground pot puts escaping runners in plain sight, while a buried rim under mulch hides both the crossing point and the new roots.
Find the network before you cut it
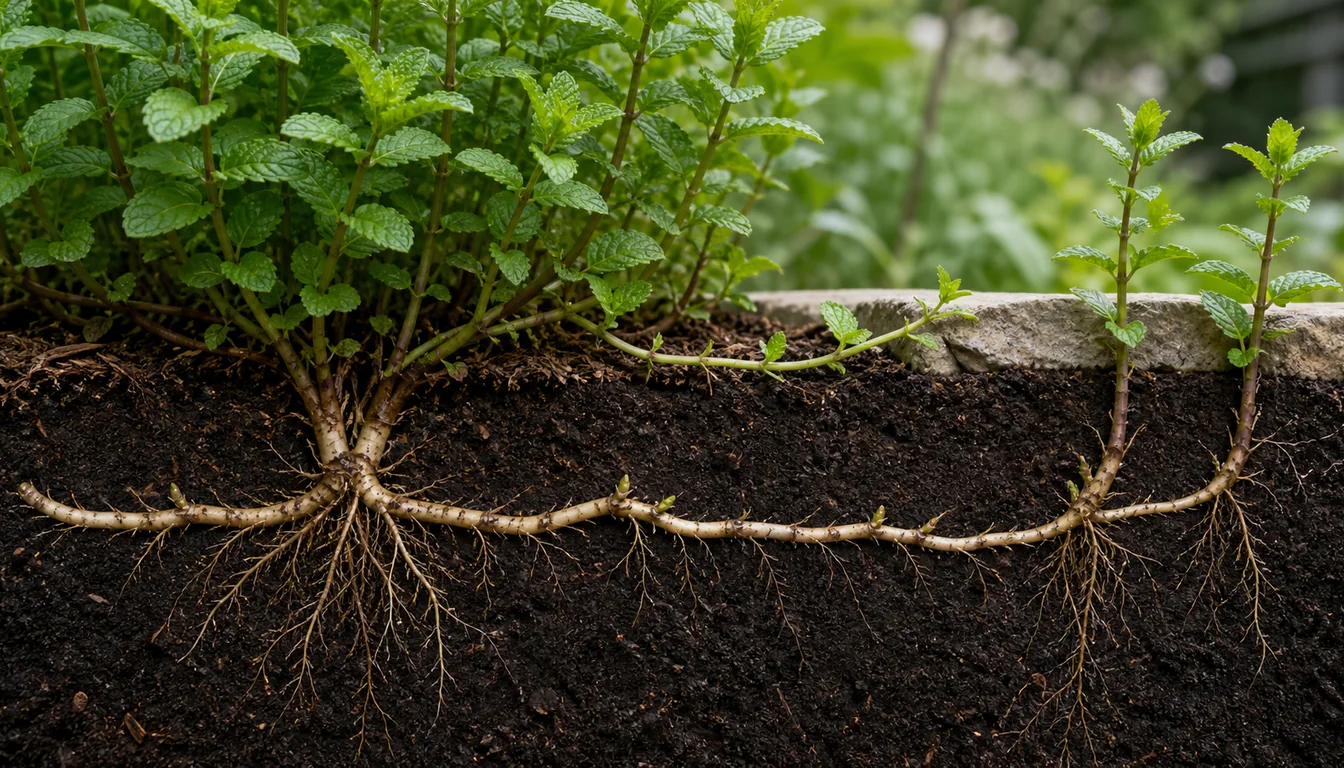
Begin at the farthest shoot you are confident is mint. Brush mulch aside and inspect the soil surface for a runner before inserting a tool, because the first connection tells you which direction to follow.
If no runner is visible, loosen a narrow strip of soil between that shoot and the main patch. A garden fork preserves more of the horizontal stem than a spade, making the network easier to trace.
Mark every rooted node, pot contact point, and place where the rhizome disappears under a neighboring plant. Extend the intended work zone beyond the last visible shoot because the growing tip can be present before it reaches the surface.
Decide which connected section may remain before cutting anything. One clean separation between the keeper patch and the removal zone gives you a clearer edge than many random cuts through the network.
- Confirm that the outer shoot matches the planted mint.
- Trace surface runners and expose rooted nodes without tearing them.
- Probe for underground rhizomes between separated shoots.
- Mark a removal boundary beyond the last known living connection.
Choose a boundary that matches the risk
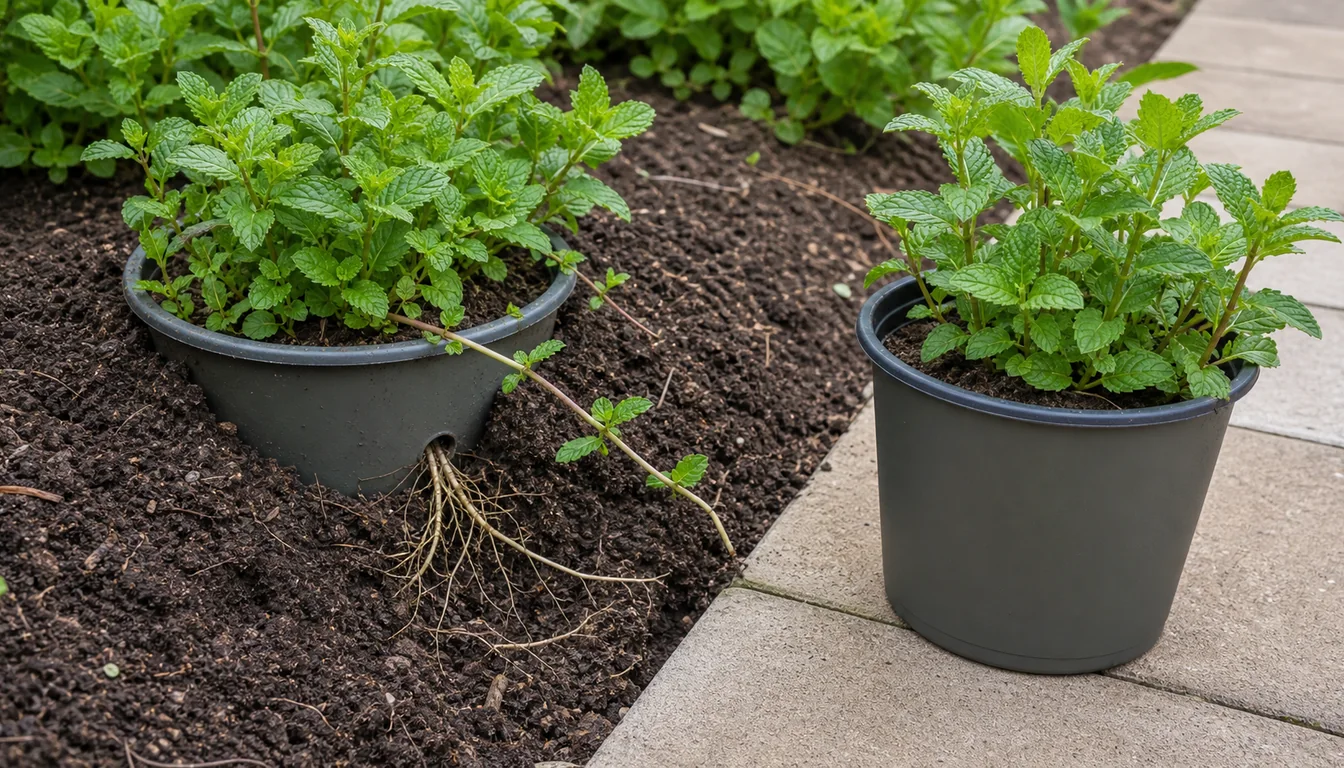
An above-ground container on paving provides the clearest separation because every runner must cross a visible rim and every drainage root meets an inspectable surface. A larger pot also reduces how often vigorous mint becomes crowded and difficult to water.
A sunken pot or root barrier can slow spread when you want mint to look planted in the bed. It requires an exposed rim, regular checks beneath mulch, and acceptance that rhizomes may eventually travel through holes or beneath an open bottom.
A dedicated bed bounded by pavement or a regularly mown strip works when you want a broad supply and can inspect the perimeter. It is a managed expansion zone, not proof that the plant has stopped spreading.
Choose based on the cost of one escape. Mint beside a delicate perennial collection deserves the most reliable separation, while a solitary patch bordered by paving may only need a scheduled edge check.
Pot on paving
- Most visible escape path
- Easy runner trimming
- Best near valued plants
Sunken container
- Natural in-bed appearance
- Rim must stay exposed
- Slows but may not stop spread
Dedicated strip
- Allows a larger harvest
- Needs a hard or mown edge
- Requires perimeter checks
Lift escaped mint without multiplying it
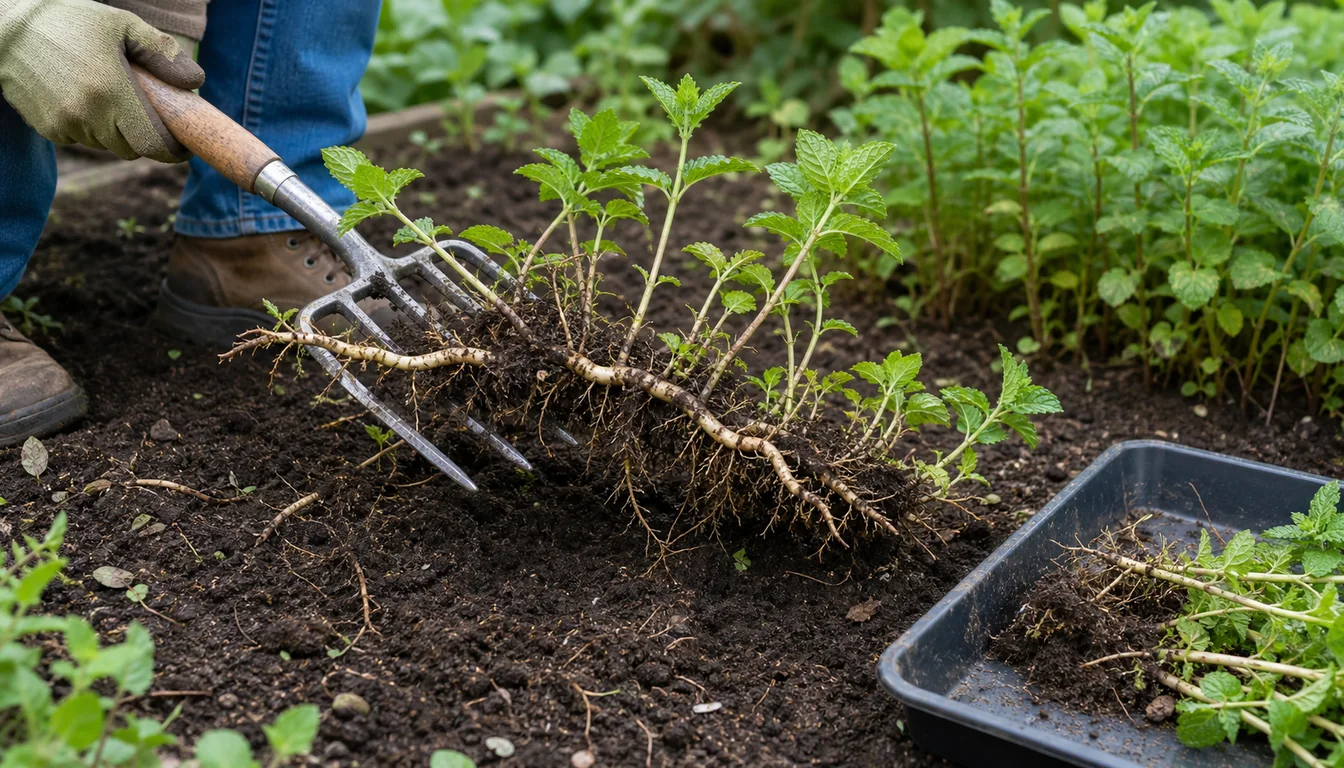
Work when soil is moist enough to loosen but not sticky enough to hide every fragment. Remove surface growth from the work area only if you keep enough stem attached to recognize and follow each crown.
Insert a broad fork outside the mapped edge, lift the soil gently, and pull along the direction of the rhizome rather than straight upward. Place each connected length in a tray so nodes do not fall back into the bed.
Ease mint out of neighboring root balls by hand instead of tearing apart the valued plant. If the networks cannot be separated in place, lift the neighbor, remove every visible mint stem, and replant only after checking the soil clump.
Do not move excavated soil to another bed until it has been searched for buds and nodes. Follow local disposal guidance for viable rhizomes, because a cool home compost pile may preserve the exact structures you are trying to remove.
Expect the first pass to reveal rather than finish a large infestation. The goal is to remove the longest connected pieces now so each later shoot points to a small missed section instead of an intact spreading mat.
Use every new shoot as a location clue
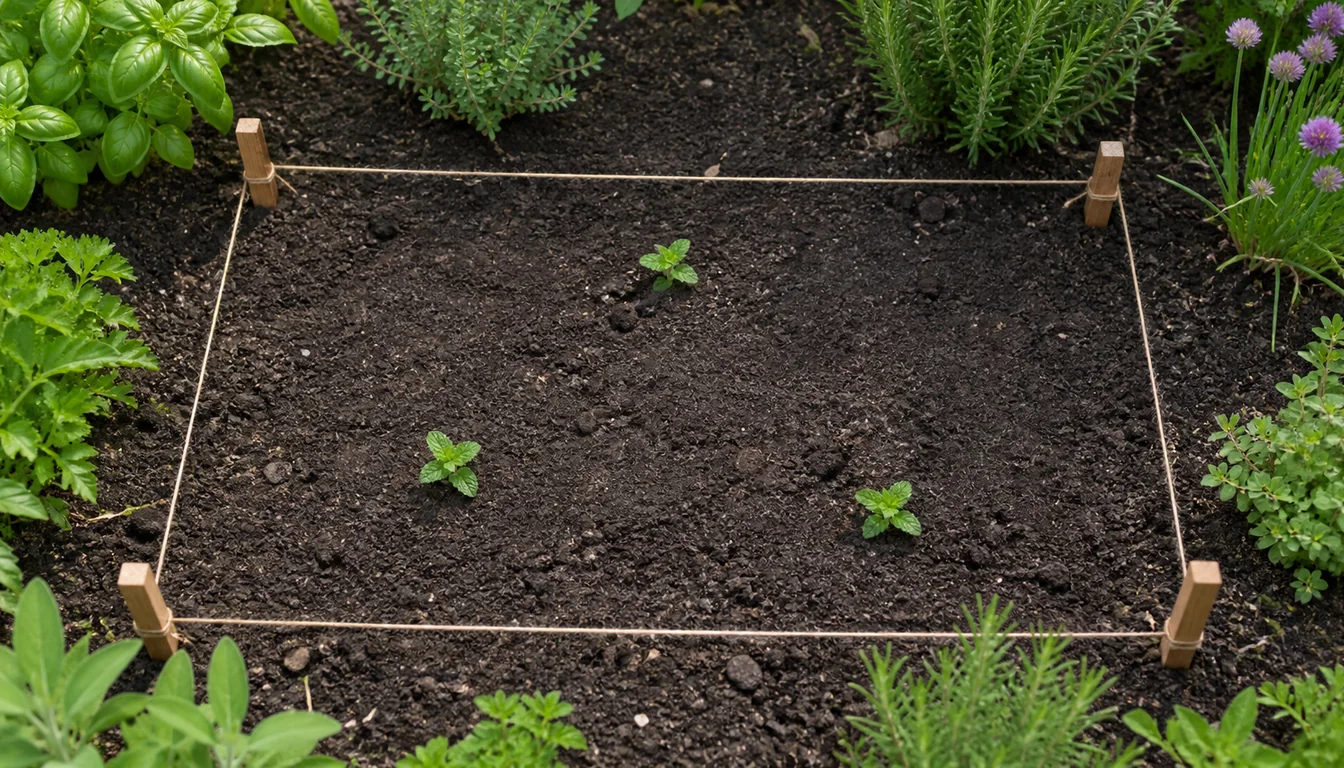
Check the cleared zone every one to two weeks during active growth and after rain. Small shoots are easier to trace than a new leafy mat, and their positions show where the underground search should expand.
Record each shoot before removing it. A line of regrowth suggests a missed rhizome, a cluster near the old pot suggests a drainage-hole escape, and scattered seedlings call for a shallow pull rather than deep excavation.
Continue until the area passes an active growing season without mint regrowth. Winter dormancy does not prove removal because living rhizomes can remain quiet until soil warms.
A site-specific herbicide may be considered when mint occupies lawn, cracks, or an area where digging would destroy valued roots. The product must list the site and target, and treatment should be confined so desirable plants are not contacted.
Recovery Plan
Separate the keeper patch
Trace the live network, make one deliberate boundary cut, and lift the escaped runners and rhizomes out intact.
Move the mint you are keeping into its chosen container or managed zone.
Remove small missed pieces
Inspect after rain and during warm growth. Mark each new shoot, loosen the soil around it, and follow the attached node instead of snapping off the top.
Confirm the boundary holds
Keep pot rims, paving, and bed edges visible.
A contained plant should make no rooted connection to open soil even while its top growth stays vigorous.
Verify long-term control
Recheck the former patch after dormancy ends. A full growing season with no new shoots is far stronger evidence than a quiet winter or one clean month.
Prevent mint takeover by growing it in an above-ground container on an inspectable hard surface, trimming runners before they cross the rim, and checking drainage holes and nearby soil during active growth. If mint grows in a dedicated bed, mark the allowed boundary and remove every rooted node that crosses it.
Sources
- Mint, University of Illinois Extension
- Mints Friend or Foe, University of Illinois Extension
- Growing Herbs in Home Gardens, University of Minnesota Extension
- Growing Herbs in the Garden, Penn State Extension
- Herbs Perennial, Oregon State University Extension
- How to Control Aggressive Garden Plants, University of Illinois Extension
- Peppermint Nutrient Management, Oregon State University Extension